Julia Bobbin Header Image and Menu Past Projects Tutorials Celebrity Copy Cat Awards About Me

Sunday, 9 February 2014

Colour Blocked Laurel + Coming soon: Mad Men Dress Challenge!

Julia Bobbin - Colour blocked Laurel by Colette Patterns

Um ... Happy New Year peeps! Yeah that's right, it's freaking 2014 and I haven't blogged since December 2013. Whaaaaa? Julia, put the egg-nog down!

Don't worry, I haven't just been in my pyjamas this whole time eating christmas chocolate (much). I've also made a few things, and here is one of my latest:
Julia Bobbin - Colour blocked Laurel by Colette Patterns

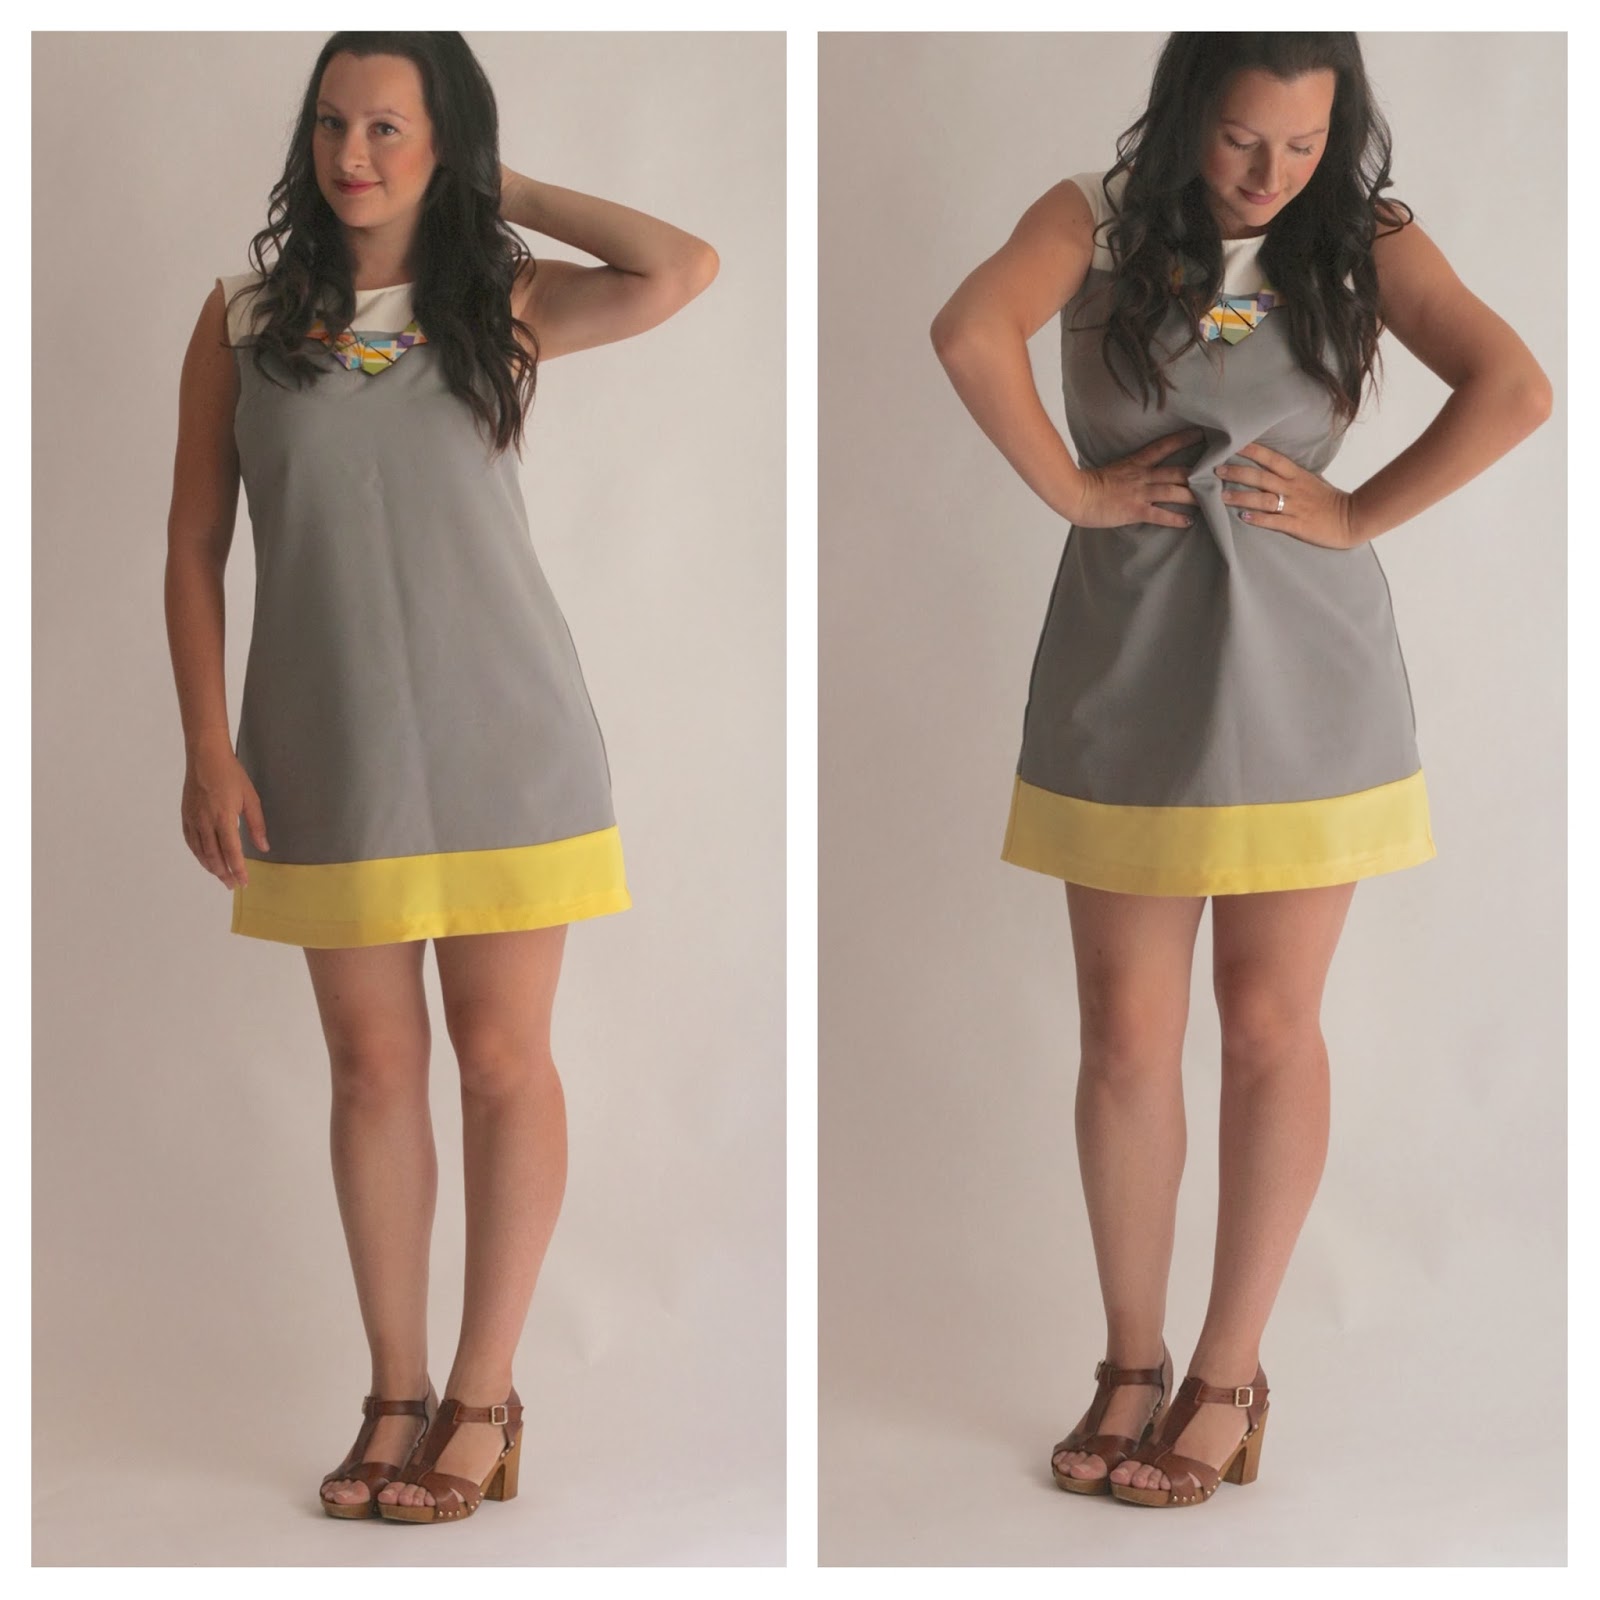
It's another Laurel by Colette Patterns! This is the second time I've made this dress and once again it was an easy-breezy quick sew and a pleasure to make. You can check out my first Laurel here.

Julia Bobbin - Colour blocked Laurel by Colette Patterns
Two Laurel's side by side

Details:
I made the sleeveless version using suiting fabric and bias binding to finish the sleeves and neck edge.

Julia Bobbin - Colour blocked Laurel by Colette PatternsJulia Bobbin - Colour blocked Laurel by Colette Patterns

Changes:
I shorted the dress by about four cm and took the side seams in slightly around the waist. This gave the dress just a little bit more shape but still kept the loose fitted structure of a shift dress.
Julia Bobbin - Colour blocked Laurel by Colette PatternsJulia Bobbin - Colour blocked Laurel by Colette Patterns

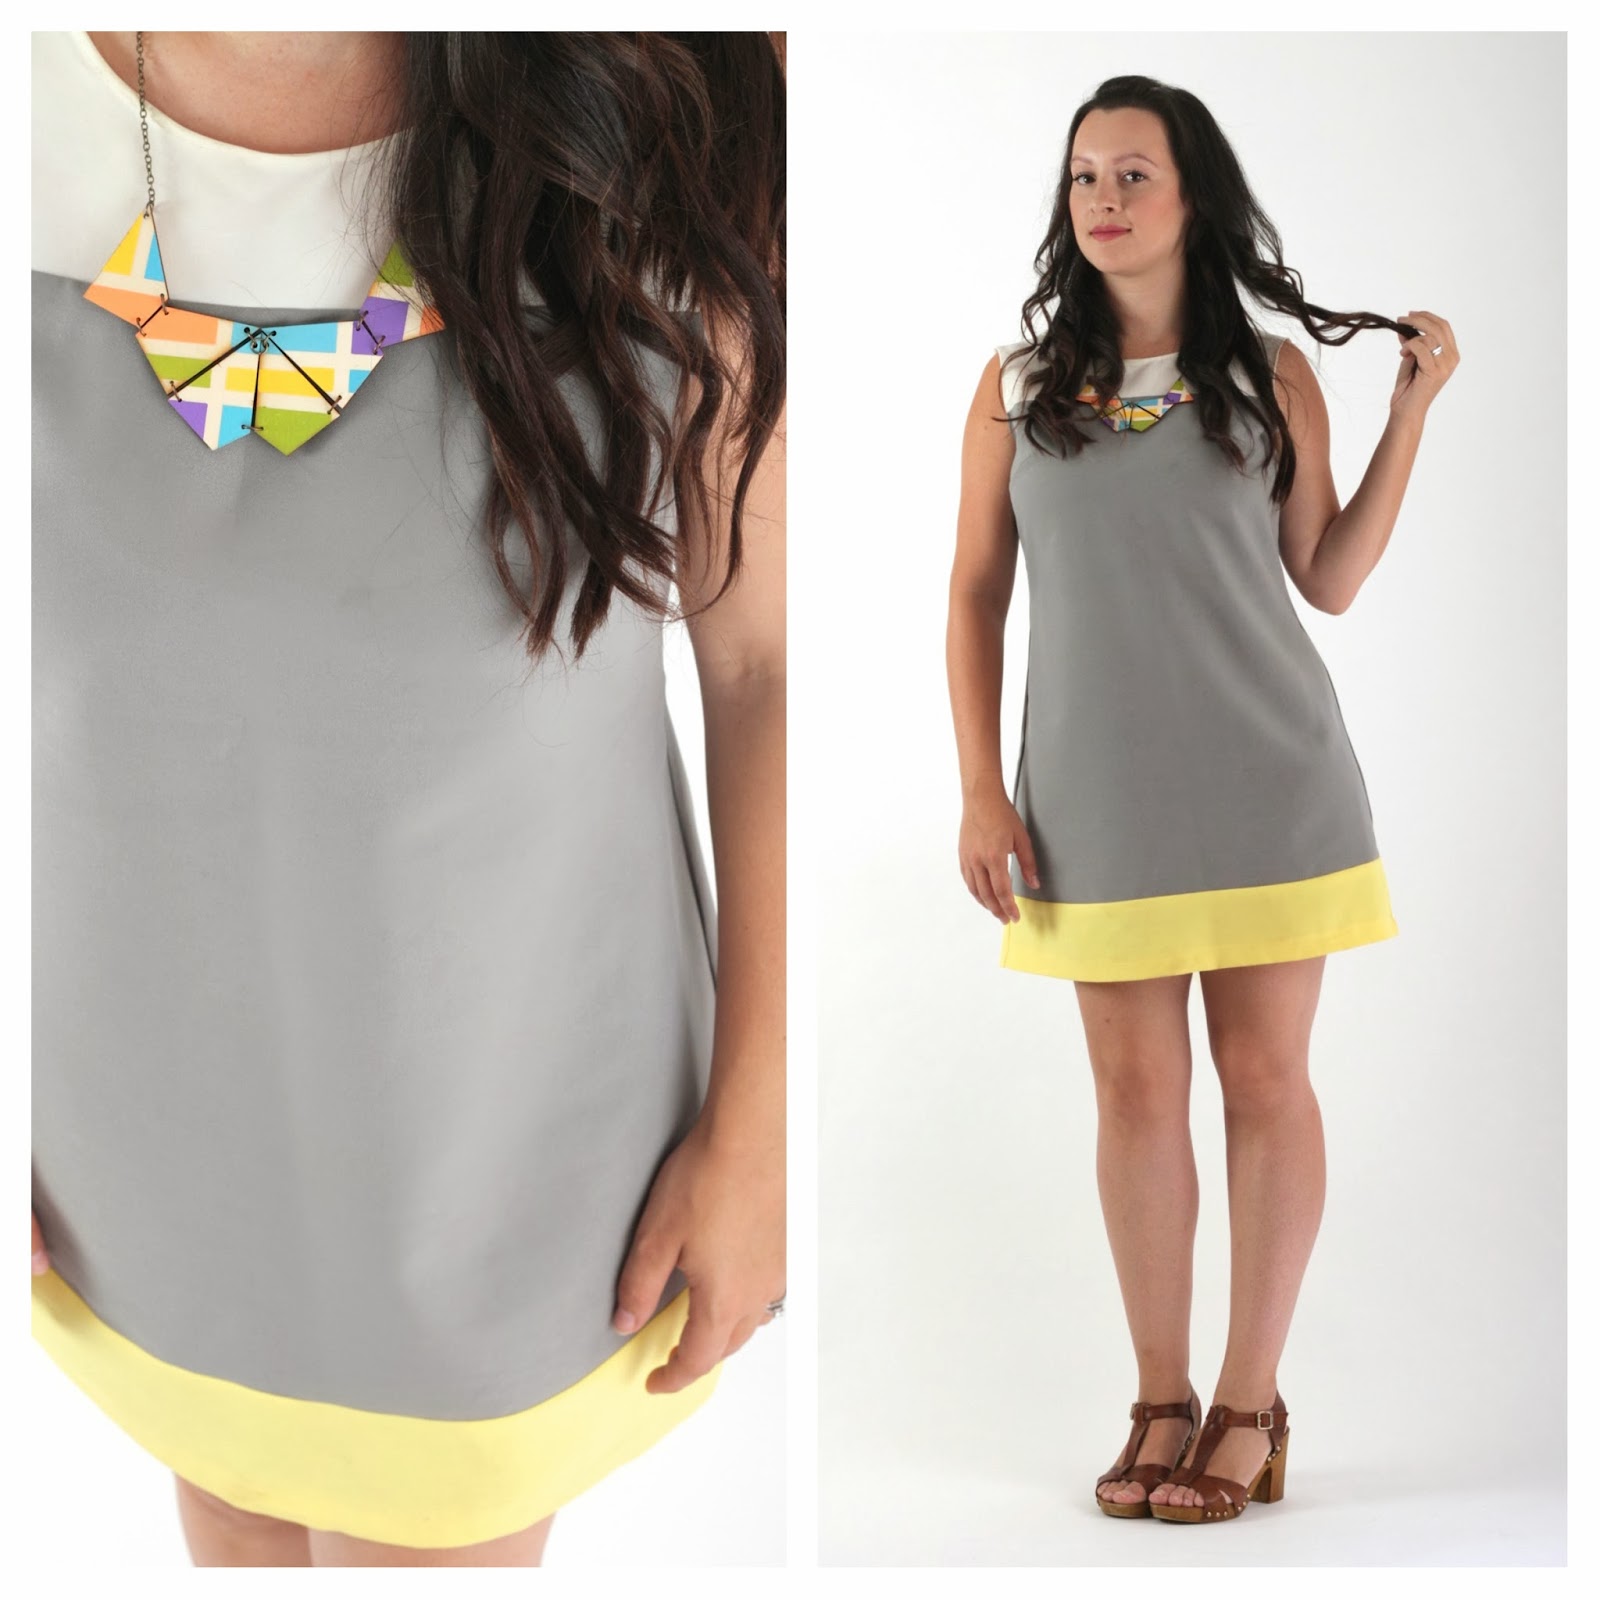
I also cut the pattern into three pieces to make a colour blocked effect, and now I just want to colour block everything! I love the combination of white, grey and yellow.
Julia Bobbin - Colour blocked Laurel by Colette Patterns

Accessories:
Shoes - Piccola Italy by Joanne Mercer in brown
Necklace - Neon Geometric by LiKeGjewelry

Julia Bobbin - Colour blocked Laurel by Colette Patterns

Love:
This dress is super comfortable to wear and is getting a real work out this Australian summer! I love how easy it is to jazz up with a pretty necklace and I especially love how fast and simple it is to sew. Its a winner!

Julia Bobbin - Colour blocked Laurel by Colette Patterns


Recent Indulgent Purchases:
So if you've been following my instagram, you may have seen my latest two babies:  Two amazing necklaces from Strangely Yours. 

A mini sewing machine complete with its own little spool of thread. Oh, and it says 'Julia Bobbin' on it. SHUT-UP!
And a mini polaroid camera, that has a little photo that pops in and out. That's a tiny photo of me and my two faves. It is so freaking cute that it burns my eyes!


Julia Bobbin - Colour blocked Laurel by Colette PatternsJulia Bobbin - Colour blocked Laurel by Colette Patterns

News:
Coming soon ... Mad Men Dress Challenge Number 3!! Yes that's right, it's that time of the year again where we all get together and indulge ourselves with fabulous vintage sewing inspired by the TV show Mad Men! 

It's a ridiculous amount of fun and I absolutely love seeing what everyone comes up with! I'll be posting details about it in the next few weeks. In the meantime, check out the last two years Mad Men Sew-a-longs to get yourselves excited!

Julia Bobbin - Colour blocked Laurel by Colette PatternsJulia Bobbin - Colour blocked Laurel by Colette Patterns

Eek! I am loving 2014 so much already! I can't wait to sew with everyone this year!

Monday, 2 December 2013

Tutorial: Pleated Detailing + Giveaway Winner


It always amazes me how different a dress can be by adding a little design extra. One of my favourite extras to add to an outfit is pleats. I love how it can make it a simple dress look more interesting, or a give a hem more body. This tutorial will show you how to make those pleats.

The good news is they're easy to make!

What you'll need:
  • More fabric! - And you were just looking for an excuse to buy more weren't you. You're welcome.
  • One ruler - the measuring type, not the presiding over a kingdom type
  • Scissors
  • Sewing chalk - two different colours
Julia Bobbin: Tutorial - Pleated Detailing
Let's do this:

With a measuring tape, measure the width of the area that you are wanting to add pleats to. For example the width of your hem or your cap sleeve. Write this figure down.

Julia Bobbin: Tutorial - Pleated Detailing

Cut out long strips of fabric. The total length once joined together will need to be exactly 3.66 times the length of your above measurement. It's good to have a little extra to be safe so I usually times it by 4 to keep it simple.
Julia Bobbin: Tutorial - Pleated Detailing

I cut my strips with a 10cm width, but you can make your pleats as long or narrow as you like.

Note: I cut my fabric on the straight grain which makes the pleats a bit rigid. This gives it the nice kick out that I like. If you want a flatter-to-the-body pleat you can cut the fabric on the bias, so that the pleats are flexible and curve around the body.

Julia Bobbin: Tutorial - Pleated Detailing

Join your strips together so that they make one continuous strip that is 3.66 (or 4!) times the length of your original measurement.

Tip: Join your pieces using a french seam so that there are no raw edges.

Julia Bobbin: Tutorial - Pleated Detailing


Hem the length of your fabric. You might choose do do a narrow hem, or encase the hem in bias binding.

Julia Bobbin: Tutorial - Pleated Detailing

On the right side of your fabric along the long raw edge you are going to make alternating notches in intervals of 4 and 7cms.

The first notches (I've made mine red), are the lines that you will be sewing along. The alternating notches (white) are the lines you will be folding. Place your very first notch on the strip 3 cm in from the short edge of your strip.

Continue marking 4cm (white) then 7cm (red) in alternating colours along the length of your strip until you reach the end.

Julia Bobbin: Tutorial - Pleated Detailing

With WRONG sides together, fold along your first white notch (the second notch on the strip).

Julia Bobbin: Tutorial - Pleated Detailing

Sew in a straight line perpendicular from your hem, at your first notch (red).


Julia Bobbin: Tutorial - Pleated Detailing

Continue to fold along the white notches and sew in a straight line from the red notches until you reach the end of the strip. The width of each pleat should overlap the previous stitching line so that it is not visible.
Julia Bobbin: Tutorial - Pleated Detailing

The back of your pleats will be flat and should look like this.

Julia Bobbin: Tutorial - Pleated Detailing

Press your pleats in one direction

Julia Bobbin: Tutorial - Pleated Detailing

Baste along the raw edge of the strip to hold the pleats down.
Trim your loose threads.

Julia Bobbin: Tutorial - Pleated Detailing

Attach your pleats to a seam, or fold under the raw edge and sew onto your skirt.

Tip: I like to overlock the raw edge of the strip once I have basted it.

Julia Bobbin: Tutorial - Pleated Detailing

And you're done! Isn't it pretty?!!

Here are some projects that I have previously made that have pleated detailing. Click on the pictures to see the blog posts.

Julia Bobbin: Tutorial - Pleated Detailing

GIVE AWAY WINNERS!

Congratulations to the following winners who were both randomly selected and have both won a $50 e-voucher to Mood Fabrics!

Angella *originally listed the wrong web address, sorry! Angella please email me at julia[at]juliabobbin.com
and
Jess from Jessthetics

Hooray! I'll be emailing you in the next few days with your vouchers!


Happy sewing everyone and if you use the tutorial, I'd love to see your pictures! Have a lovely week xxx

Sunday, 24 November 2013

Project Sewn Results + Mood Fabrics Voucher GIVE AWAY!!

Oh my gawd you guys! I came second in Project Sewn! Release the doves!!

Check out the dresses: Top Left - Top Right - Bottom Left - Bottom Right

Thank you SO (sew) much to all of you who followed along and voted!

As a special thank you I am giving away two $50 vouchers to Mood Fabrics. If you don't know already, Mood is the fabric store for Project Runway in the U.S. and they now ship internationally too.


To WIN 1 of 2 e-vouchers for Mood Fabrics

Simply comment on this blog post

Two lucky peeps will be randomly selected and each will win one $50 e-voucher.

Entries are open to everyone from anywhere in the world. 
Entries close on Sunday, December 1st, 2013
The winners will be announced in a blog post on Monday, December 2nd, 2013


Something random for you:

Remember my 'A rose is a rose, is a rose, is a rose' dress? Well there's a movie out at the moment called 'About Time' and the dress in the promo reminds me a lot of my dress! You can learn how to make these rose sleeves with my tutorial here.

Click on the photo to follow me on Instagram

What I've been up to this week:

Saw the amazing how-can-one-person-be-this-talented Jill Scott at the Palais Theatre and almost hyperventilated it was THAT GOOD.


Oh and guess what I did this weekend? Oh ... you know, just had brunch with the talented Leisl from Jorth and the inspiring Kristiann from Victory Patterns and her wonderful partner Simon. Nothing much! Needless to say I had an amazing time and my face is still sore from all the epic smiling and talking!

Thanks again to everyone for your support through Project Sewn. Your words of support made me feel all sorts of warm and fuzzies and I feel very lucky to be part of such an encouraging and positive community.

Tuesday, 22 October 2013

Spring Dress - Project Sewn FINAL Week

Julia Bobbin Spring Lace Dress

It's the final week of Project Sewn! Wah!

I feel so honoured to have made it to the final round. Thank you guys so much for following along and voting for me. Please accept one million dollars* as a token of my appreciation.
*invisible money and not actual money.

Project Sewn has gotten me back into the thick of my sewing passion and for that I am so grateful. It has also taken me away from housework. Lets just say that my son Harry is not the only thing growing in my house at the moment. At least now I can take a breather and restore order to our abode. I'm sure my husband would be happy to hear this, if I hadn't lost him a few weeks ago in one of the laundry piles. I'm going to miss that guy.

So for the last time this season, click here to check out the fabulous creations and VOTE for your favourite!

Julia Bobbin Spring Lace Dress

This week the theme was to create something of our own style.
When it comes to looks that define us, I have a bit of a split personality. The great part about being able to sew is that you get to experiment with all different types of looks, and I love many! I lean towards vintage, the 60's in particular with it's feminine silhouettes, but I'm also drawn to modern fashion with architectural shapes and lines. So which one do I choose?

Julia Bobbin Spring Lace Dress

I decided on this little number which is feminine, soft and vintage but yet wouldn't be out of place at a spring event today . The moment I put this dress on I feel like me.

Julia Bobbin Spring Lace Dress

Details

The dress is made using beautiful ivory lace and underlined with satin. Underlining gives the lace structure and stops it from being see through! I took extra time to make sure that the lace patterns lined up and matched on all the pieces. Check out my tutorial here on underlining lace.

I featured the scalloped edge on the skirt hem of the dress and by making little cap sleeves for the bodice.

Julia Bobbin Spring Lace Dress

I made a scoop neck on the front and back of the bodice,  and added soft pleats on the bodice front neckline. The dress is closed down the centre back with an invisible zipper.

Julia Bobbin Spring Lace Dress

I wanted a big full skirt to go with the fitted bodice. I shaped the skirt waist by making small even knife pleats along the waist. This takes longer than gathering the skirt, but it creates an even shape and makes the skirt sit a bit flatter to the stomach instead of foofing out where you don't need foofing.

Julia Bobbin Spring Lace Dress

This dress would be perfect for an afternoon tea party, a garden wedding or the Melbourne Spring Races which is in a few weeks time!

Julia Bobbin Spring Lace Dress

Styling
Earrings: Swarovski (I wore these on my wedding day!)
Brooch: Myers
Belt: Alannah Hill
Shoes: Burgundy sandals from Zara

Julia Bobbin Spring Lace Dress

Thank you again to everyone for your kind words of encouragement and support throughout this competition! It has kept me going on those days when I never thought I would finish in time!

Don't forget to check out the entries and VOTE for the winner! 

Tuesday, 15 October 2013

The Hay Fever Dress - Project Sewn Week 3

Thanks a gah-zillion to everyone who voted for me last week on Project Sewn. I made it through to the next round!! Wah-to the-hoo!

For Week 3 the theme is 'Graphic Print' and here's my bright florally entry. Makes my nose itchy just looking at it! It's Spring in Australia and that means hay fever time. Goodbye jumpers and cardigans, hello tissues.

Once again, check out the fabulous entries and VOTE for your favourite!


I learnt something about myself with this challenge. I realised that even though I love prints and they are well represented in my gigantic fabric stash(es), I rarely actually sew with a print! Turns out when I go into a fabric store without a project in mind I buy up on prints, but when I go in with a pattern or a design in my head first, I lean towards solid colours. Curious-er and curious-er.


In fact, three quarters of my garments in my past projects are with solid colours. I need an intervention.


I loved this challenge for breaking me out of my design cycle and letting the design be inspired by the fabric first.

So here's the nitty gritty:

Pattern
I used the bodice of Vogue 8280 for this dress with some heavy modifications. You can check my original review of this pattern here to see the changes I made.

I drafted my own skirt and sleeves.


Fabric and Construction
For the shell of the dress I used a beautiful cotton sateen that I bought on sale from Spotlight for $4 a metre. This.never.happens.to.me. Cue high-five-ing strangers.

The dress is fully lined, and closed with an invisible zipper down the centre back.


The feature of this dress is a row of pleats along the hem of the skirt and the sleeves.

This took foooorreeeevvvveeerrrrr! Each pleat was individually sewn down and took a total of 4 metres of fabric and four hours to complete. I love the effect though so it was worth it.

I cut the pleats on the straight grain to make them more rigid and less stretchy. This gives the pleats a nice little kick out at the edges which I love.


I love the heart shape of the bodice and the galaxy dress shape of the shoulders. It just feels so freaking feminine!


Styling
Flower crown from Sportsgirl
Red leather bow belt from JigSaw
Patchuli Floc shoes from Melissa Shoes
Chanel lipstick #98 - This is my new absolute favourite red. Not too dark, not too bright, not too shiny, not too matt. Just perfection!


Special Mentions
Today, the 15th of October is mine and my husbands second wedding anniversary and the first with our baby boy. Don't want to gross you guys out too much but I really love this guy. More than sewing. And fabric. That's a lot.


Don't forget to check out the other entries and VOTE for your favourite! Voting closes Thursday at 8pm MDT.

Thanks again for all your support! :))
