The good news is they're easy to make!
- More fabric! - And you were just looking for an excuse to buy more weren't you. You're welcome.
- One ruler - the measuring type, not the presiding over a kingdom type
- Scissors
- Sewing chalk - two different colours
Let's do this:
Cut out long strips of fabric. The total length once joined together will need to be exactly 3.66 times the length of your above measurement. It's good to have a little extra to be safe so I usually times it by 4 to keep it simple.
Note: I cut my fabric on the straight grain which makes the pleats a bit rigid. This gives it the nice kick out that I like. If you want a flatter-to-the-body pleat you can cut the fabric on the bias, so that the pleats are flexible and curve around the body.
Tip: Join your pieces using a french seam so that there are no raw edges.
Hem the length of your fabric. You might choose do do a narrow hem, or encase the hem in bias binding.
The first notches (I've made mine red), are the lines that you will be sewing along. The alternating notches (white) are the lines you will be folding. Place your very first notch on the strip 3 cm in from the short edge of your strip.
Continue marking 4cm (white) then 7cm (red) in alternating colours along the length of your strip until you reach the end.
With WRONG sides together, fold along your first white notch (the second notch on the strip).
Sew in a straight line perpendicular from your hem, at your first notch (red).
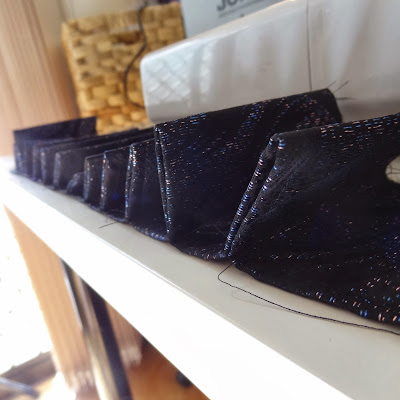
Continue to fold along the white notches and sew in a straight line from the red notches until you reach the end of the strip. The width of each pleat should overlap the previous stitching line so that it is not visible.
Press your pleats in one direction
Baste along the raw edge of the strip to hold the pleats down.
Trim your loose threads.
Tip: I like to overlock the raw edge of the strip once I have basted it.
And you're done! Isn't it pretty?!!
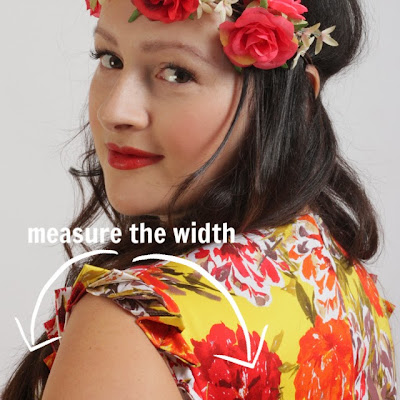
Here are some projects that I have previously made that have pleated detailing. Click on the pictures to see the blog posts.
GIVE AWAY WINNERS!
Congratulations to the following winners who were both randomly selected and have both won a $50 e-voucher to Mood Fabrics!
Angella *originally listed the wrong web address, sorry! Angella please email me at julia[at]juliabobbin.com
and
Jess from Jessthetics
Hooray! I'll be emailing you in the next few days with your vouchers!
Happy sewing everyone and if you use the tutorial, I'd love to see your pictures! Have a lovely week xxx


ok, so yes awesome tutorial, BUT EVEN MORE AWESOME BOX OF WHISKEY ON YOUR SEWING DESK.
ReplyDeleteWell yes, those pleats are going to sew them selves!
DeleteLove, love, love the white dress!
ReplyDeleteThank you!
DeleteI'm in love with your pleated details, so pretty!!!
ReplyDeleteThanks Lelie, it's so nice to have something little you can add to a dress when it's just slightly lacking something.
DeleteThis is fantastic! I think I may need to attempt this on a pencil skirt in the near future!
ReplyDeleteFantastic tutorial! Definitely going to give this a go.
ReplyDeleteYay!! I'd love to see the end result if you do!
DeleteOooo I always wondered how you sewed your ever-incredible pleats!!! Thanks for letting the secret out :)
ReplyDeleteThanks for the tutorial Julia. I have always wondered how you create those beautiful pleats :)
ReplyDeleteGreat tutorial thanks- I really want to add some pleats on the hem of something now!
ReplyDeleteThe textures on the white dress are gorgeous! Thanks for sharing. :)
ReplyDeleteGreat tutorial Julia and I love the image of the babe at the beginning :)
ReplyDeleteThanks for sharing your secrets!! I've always admired your perfect pleats :)
ReplyDeleteReccomendation: Buy more measuring tapes, with a baby, soon a toddler in the house, you'll need them, as they will keep dissapearing :)
ReplyDeleteI absolutely love pleats! Thanks so much for the great tutorial. Your baby looks so adorable and is learning fast! XxxX http:thesecondhandrose.blogspot.co.uk
ReplyDeleteI love this
ReplyDeleteGENIAL!!!
ReplyDeleteThank you so much for this post! I can't wait to try this out!
ReplyDelete