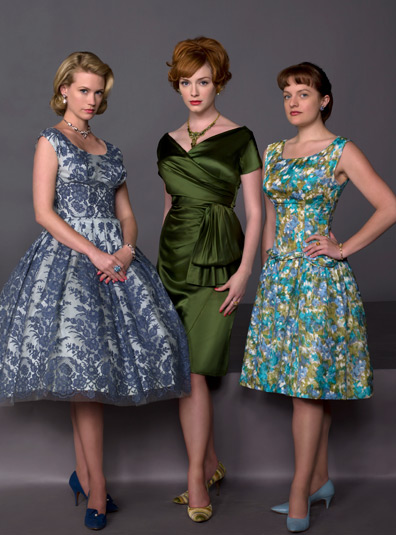
It's no secret; I'm a fan of the American TV series 'Mad Men' and the reasons are predictable. Yes the show is historically authentic, the cast stellar and the story lines depressingly realistic but what really tickles my fancy is ... can you guess? The clothes!
It is becoming more and more apparent that I need to wear a bib when watching this show; the drooling gets out of control. It's getting harder for me to hold on to the plot when these gorgeous clothing creations come swinging their hour glass hips onto the TV screen.
Oh Joanie, you complete me.
My immediate thought when I see these dresses, and I know I'm not alone, is 'I must have this!' And then I sit there scheming and dreaming until I calm myself down with a plan of how I can re-create the look.
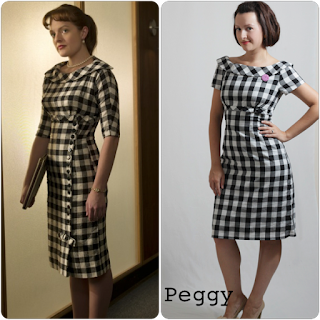
My latest (and not my last) copy-cat fever took over my senses recently with the charming black and white gingham dress that is worn by the lovely character Peggy Olson.
There are so many things that turn me on about this dress. The high empire waist, the curved collar, the cute little bias strip under the bust line and the incredibly satisfying placements of the black and white check. This dress screams vintage.
I busily got to work drafting my own version of this dress. For the bodice I used the wonderfully cut Butterick pattern 5603.
This pattern has three versions. I used version A, the yellow dress in the centre. Can you see the similarities? It has a wide bateau neck and empire waist line that sits right under the bust. It also has the bias strip under the bust line with a bow. The pattern is a great one for butterick. I found the fit very flattering with a really nice neck line. I removed about 1 cm from the length of the bust piece to account for my short torso.
And no I haven't cut my hair off! For these photos I tucked my hair under to make it look like a bob. How vintage of me!
I drafted my own collar front and back.
To do this I used some tracing paper and the original pattern pieces. I lay down the original pattern pieces on a table and and pinned a sheet of tracing paper ontop. I then traced the shape of the neckline and shoulders onto the paper.

Once I decided how wide I wanted my collar to be, I measure that distance down from the centre seam and shoulders, added a seam allowance, and cut it out. And now I had my collar pieces which I cut on the bias.


To create the pencil skirt look I used a skirt pattern that I had previously drafted that I knew worked for me. The midriff section and the skirt of this pattern is joined together in one piece so that there is not a seam at the waist which I love. This was exactly what I was looking for as the Peggy Olson dress also doesn't have a seam at the waist. The problem with this Butterick pattern is that the dart placements on the midriff section did not match the dart placement on my own pencil skirt pattern, and I wasn't willing to move the darts on my skirt as I knew they were in the right spot for my pear shape.
So instead I tried the challenge of changing the midriff section. I carefully traced the midriff section onto tracing paper from the waist point upwards. I then closed all the darts and seams. I also had to add seam allowances to the centre back as I wanted the zipper to be placed down the centre back instead of on the side seam like the Butterick pattern.
Starting at the side seams, I then lined up the midriff pieces onto the waist of my skirt pattern. At the first dart on the skirt I slashed a line right through the midriff piece and then started the rest of the piece on the other side of the dart. Now I had created a new dart in the midriff piece that perfectly lined up with the dart in the skirt piece. I continued this on for the front skirt pieces as well.
Can you see how I've cut the midriff sections as I've come to one of the skirt darts and then started it again at the end of the dart? The picture above is the front skirt which has two darts. The gaps in the midriff piece from where I've cut and stuck on either side of the skirt darts will now become the new midriff darts. Now everything lines up!
Cutting out the fabric pieces when you're using a gingham print is a lot more time consuming than cutting out fabric in a block colour or a randomly placed print. When cutting out this type of print it is very important to get all the squares matching up or things start to look wrong and messy. A bit more effort is required but it's not hard and readers it's totally worth it!
Instead of folding your fabric in half and cutting the pattern piece out in double, you need to lay out the whole sheet of fabric right side up and individually cut each piece out.
Above is an example of a piece that I cut out individually but that I need two of. Once I had cut my first piece I flipped it over and place it on the laid out fabric (right side to right side). It's important to turn the piece over so you get two mirrored pieces instead of two identical pieces.
Here you pin it to the fabric so that the squares are exactly matched. This should mean that it blends in perfectly with the background and is camoflaged. You almost can't see it!
Once you have perfectly lined it up and pinned it in place, using the top fabric piece as your pattern piece, carefully cut the second pattern piece out and then add your notches and markings.
The result is you now have two mirrored pieces that are exactly matching each other.
I also made sure that the centre front and back line of the bodice and skirt started in the same place. You'll see on my dress I've chosen the black/grey squares as my centre and it flows all the way through the dress.
I also cut the collar on this bias to give the nice contrast.
I made the extra effort to make sure that even on the bias the black square was placed on the centre front.
I love the dipped V shape back, especially with the wide collar. My husband says it looks classy. Bless.
I drafted my own sleeves but made them shorter than Peggy's version.
The butterick pattern also included pattern pieces for a bow (bonus!) so I cut one out on the bias, but instead of placing it in the centre of the band under the bust, I placed it to the side just like Peggy's version.
How cute are bows! Seriously! It adds such a sweetness to a dress, and I love the band under the bust which I've also cut on the bias. Look at those squares all lined up!
I used an invisible zipper down the centre back instead of a button closure at the front like the inspiration piece.
Don't get me wrong, I do love the buttons, but I felt a bit nervous using a different type of closure in an area that can so easily become unflattering on my pear shaped lower half. Maybe next time. I think this dress has enough going on with it however that the look is not compromised with the loss of the buttons.
Yes, I like my photos served with cheese.
Speaking of buttons, the button I'm wearing on my dress is made by the ridiculously talented Gracious Mae, my BFF! (totally name dropping!) For people who live in Australia, you can buy these hand made gems (if there's any left!) at her online store
GraciousMae
I love the vintage of this dress and how prim and proper I feel when I wear it!
I wore it out to dinner the other night and I had lots of older ladies give me warm smiles when they saw what I was wearing. I always take it as the highest compliment when an older woman exclaims 'Oh that's what I used to wear when I was young like you!' Big warm fuzzies!