
I'm currently working on my hand tailored, double breasted blazer and I'm documenting the work as I go!
If you missed the first two posts you can catch up here:
- Tailoring Resources for a hand sewn bespoke blazer - how I learnt what I know so far through books and blogs.
- Part 1 - Muslin fit, collar and canvas prep
The Sleeves
This sleeve has mitred corners and functional sleeve vents because if you're going to take the time to sew a tailored garment you may as well level all the way up.
I extended the sleeve vents to 11.5cm from the hem, to allow room for four buttons and buttonholes.
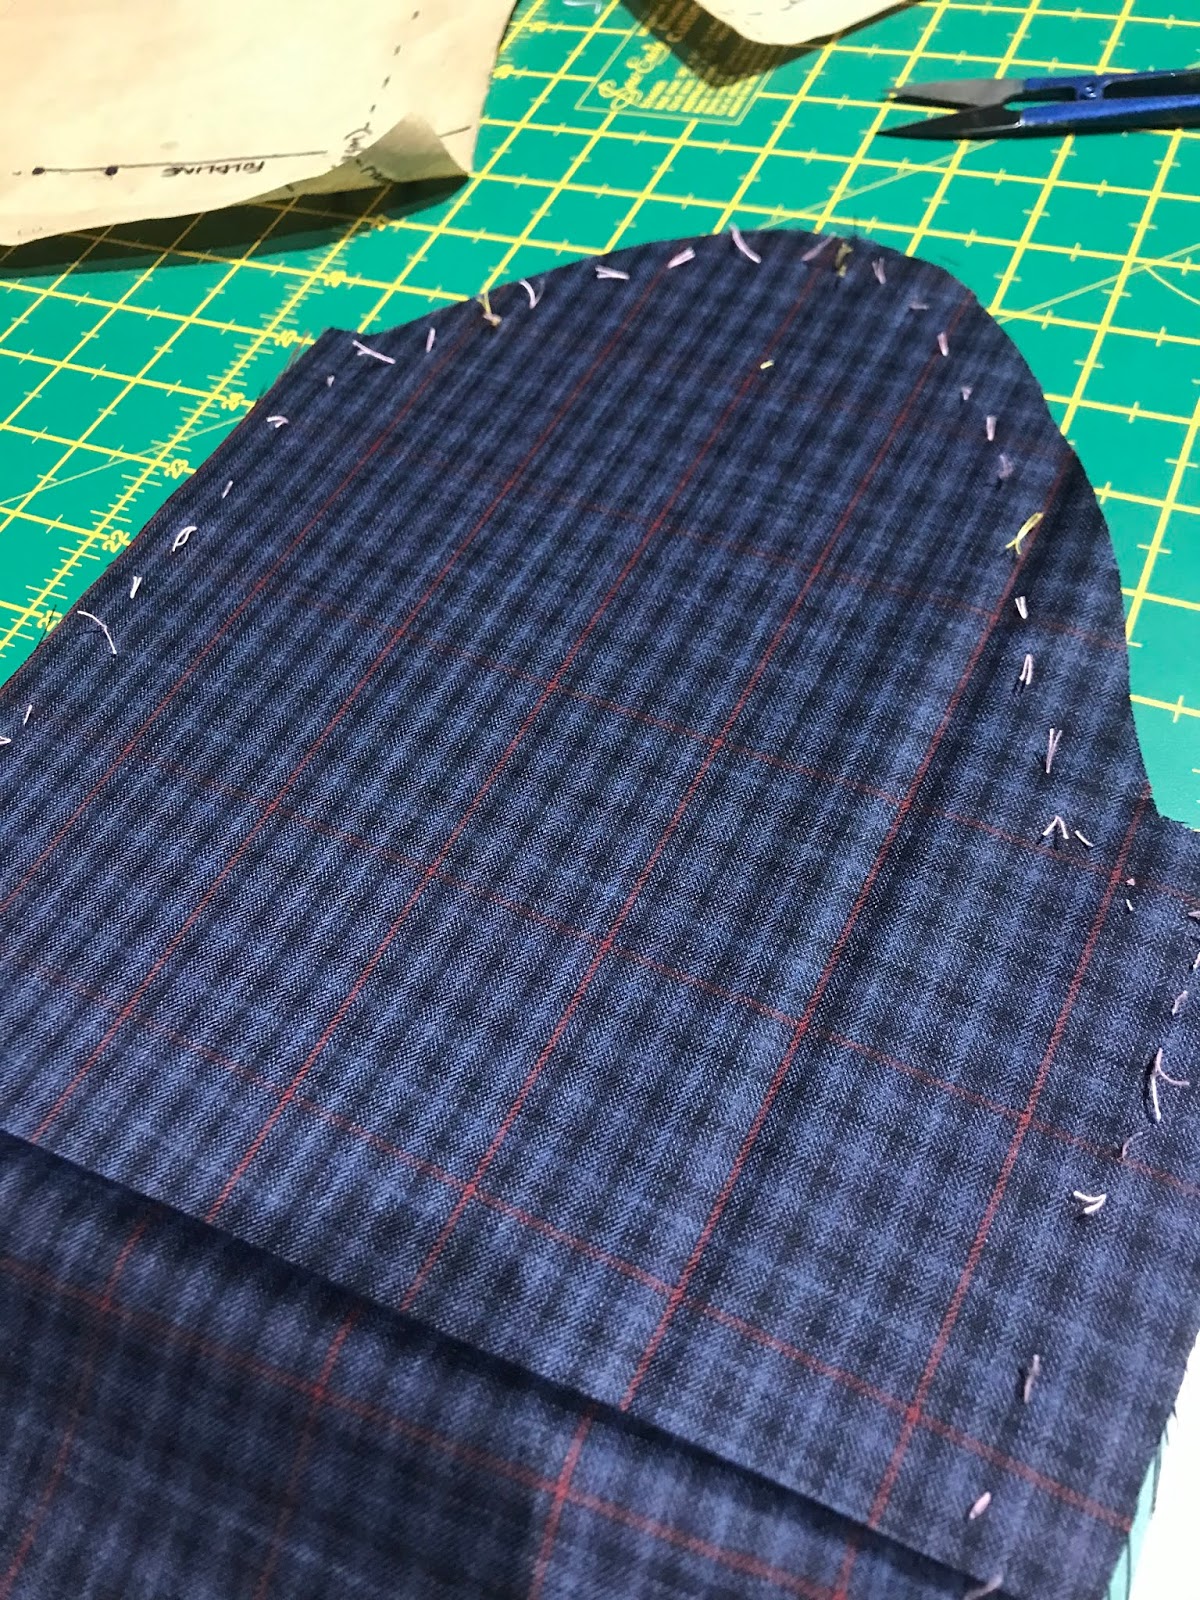
I interfaced the sleeve hem and vents with cotton pocketing fabric. Previously I've used hair canvas, but the softness of the cotton appealed to me for a strong but less rigid finish. I permanently basted the interfacing along the top and bottom edges using silk thread and being careful that the stitches didn't show through to the right side.
I extended the sleeve vents to 11.5cm from the hem, to allow room for four buttons and buttonholes.
I interfaced the sleeve hem and vents with cotton pocketing fabric. Previously I've used hair canvas, but the softness of the cotton appealed to me for a strong but less rigid finish. I permanently basted the interfacing along the top and bottom edges using silk thread and being careful that the stitches didn't show through to the right side.
 |
| Cotton pocketing fabric hand sewn along the sleeve vent and cuff, falling 1cm below the hem fold. |
 |
| Silk thread is used to permanently, and invisibly attach the interfacing to the sleeve. |
Mitred Sleeves BY HAND
I've mitred some corners in my time. That neat cornered finish, is visually pleasing, and also helps to distribute bulk evenly.
Sewing a mitred corner is not complicated, but demands precision. All of my hems with mitred corners have been done by machine, with a considerable amount of time taken to ensure everything lined up. UNTIL NOW.
For the first time, I tried my hand (ha!) at mitring the corners of the vents by hand and let me tell you, it's a game changer! Instead of spending considerable time calculating the folds, the stitch line and where to cut, you just iron along the sleeve hem and the seam allowance and then fold the corner under. So simple!
It's an easy slip stitch or ladder stitch in place, and visually you can see that it's exactly in the right place. No sitting in front of the machine, with fingers crossed hoping that you've got it right, folding it out and realising the hem line is now off.
When you sew it by hand, especially in fine fabrics like suiting fabrics, you don't trim the corner. This means you can shorten or lengthen the hem in future if needed, and the additional fabric actually helps reinforce the area. Unless you have really thick fabric like a heavy wool coating, you should not need to cut the excess.
It's also a really short seam, so hand stitching it takes about one minute! Le simple!
It's also a really short seam, so hand stitching it takes about one minute! Le simple!
 |
| Ta-DAH! Mitred corner sewn by hand! |
 |
| So clean, so precise. |
 |
| The vent in it's closed position. |
Lining the Sleeves
There are a lot of firsts for sleeves in this jacket and this time I lined the sleeves BEFORE attaching them to the jacket, another game changer.
When you add lining by hand, the order that you attach your garment pieces together has many more options.
I sewed the vertical seams of the sleeve lining together first, and then attached them to the garment at the sleeve hem. It's so much easier working on the hem of sleeves when they are not already attached to the jacket body!
I then hand basted the lining to the sleeves about 3/4 up from the hem, in preparation for attaching to the garment.
 |
| Hand mitred hem, with silk lining hand sewn to the sleeve hem. |
 |
| Is there anything prettier. I ask you. |
Pockets
My jacket consists of three pockets, one single welt breast pocket, and two double welt flap pockets.
All of the pockets are functional, with the welts and flaps individually cut out to pattern match the surrounding fabric.
I drafted the flap pockets AFTER I'd created the welts, to ensure that they fit accurately. They are slightly longer in length for a snug fit, and each flap has been decorated with a pick stitch by hand.
The backs of the pockets were reinforced with cotton fabric, instead of iron on interfacing. This gives strong support, without warping the garment fabric with the adhesive.
 |
| Basted close. Pockets are basted close so that they don't get pulled or distorted while you are constructing the rest of the garment. Everything is held in place exactly where it needs to be. |
 |
| The back of the lined welt pocket. The sides of the welt are cross stitched to the jacket from the back, so that you can't see any stitches from the front. |
Double Welt and Flap Pocket
I decided to make double welt flap pockets for the jacket body and drafted my own flaps.
Even if you are using a sewing pattern that provides a pattern piece for the flap, I find it's much easier to sew the welts on your jacket FIRST, and then remeasure the opening.
Often the size changes a little and we want to make pocket flaps that fit perfectly, rather than forcing a pocket flap in that doesn't match the finished welt pocket.
Before making the welts, I reinforced the back of it with light cotton fabric, which I basted into place.
When tailoring a garment, I avoid glue on interfacing as much as possible, which can warp the fabric over time.
 |
| cotton pocketing basted to the back of wrong side of the garment where we will make the welts. |
 |
| From the right side. You can see some rough chalk guide lines and the basting stitches that hold the cotton and garment together. |
Once I was satisfied with their position, I machine stitched each piece down 6mm from the raw edge/placement line.
When machine stitching turn your speed right down and reduce the length of your stitches. You want to make each line exactly the same length so there is no puckering at the corners of your welt pocket.
From the wrong side, slash along the placement line (the centre between the two stitching lines) to about 1cm before each end of the stitching lines and snip right up to the end of your stitching line to make a 'Y' shape.
 |
| hand basted into position, close to the placement line with raw edges touching. |
 |
| From the back of the garment! Take it slow and make sure each row is exactly the same length. Go back and add a few extra stitches if you need to! |
The flaps are then pushed through to the wrong side, wrapping around the seam allowance. The seam allowance stays inside the welt as extra reinforcement, and dictates the shape of the welt.
 |
| The seam allowance becomes both the guide for your welts, and a nice stable filler, which is why the welt pieces DON'T need to be reinforced with glue on interfacing. |
 |
| Both welts pushed through to wrong side, wrapping around welt seam allowance. |
From the right side, stitch along the seam line with small back stitches, going all the way through to catch the back of the welt to the garment.
Sewing the welt in place by hand is quick (it's just a little seam!) and allows you to be exact and precise. I find it much easier to do this by hand as there is so much more control, and it's so much less visible than 'stitching in the ditch' on a machine.
 |
| Both welts hand stitched in place along the length of the seam, not yet ironed. |
Once the welts are in place, it's time to measure the opening and draft a flap!
These are super easy. If you can draw a rectangle and own a ruler, you can draft a pocket flap.
As with everything in fashion, lengths of pocket flaps vary depending on style and personal preference, but I made my pocket flaps 5cm long.
- Measure the opening of your welt and then add 3mm to that measurement. You want the flap just slightly longer than the opening, so that there are no gaps and it curves nicely around the body.
- Draw a rectangle with your measurements (including the extra 3mm), mine was 14.5 x 5cm.
- In the bottom right corner of the flap, extend the horizontal line out by 6mm.
- Join the top right corner to this new point. This will be the back corner of your flap.
- Add a 6mm seam allowance at the bottom and sides of flap, and a larger seam allowance at the top.
 |
| Drafted pocket flap that fits your welt perfectly! |
Sewing the flaps
You now have a pocket flap perfectly made for your garment! Cut two mirrored pieces in your garment fabric, and two mirrored lining pieces.
For the lining I cut the pieces about 3mm shorter along the bottom and sides, so that when they were sewn to the garment pieces, the outer fabric rolls in slightly to the under side, hiding the seam line.
Our pattern piece has sharp corners at the bottom of the pocket, so make sure you curve those corners when sewing them at your machine. If you prefer, you can curve the pattern piece before cutting them out.
Once you have attached your flap fabric and lining together, machine stitch or baste along the upper stitching line to hold them together and to act as a placement line. I then hand pick stitched along the edge of the flap which is both decorative and helps keep the edges crisp.
Watch my mini tutorial below (includes right handed and left handed views) to see how to make a pick stitch.
 |
| One completed welt, with a hand pick stitch along edge. |
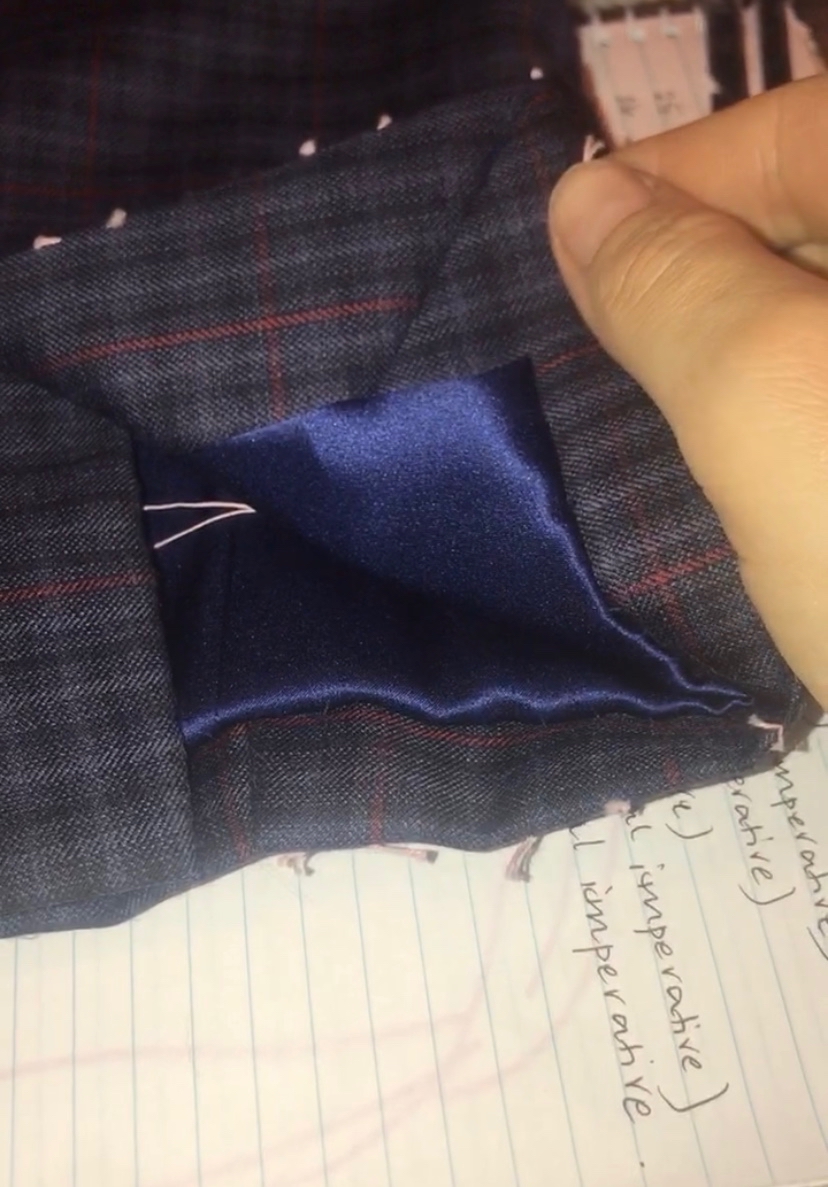
The flap is then positioned in the welt opening and basted to the top welt to hold into place. The welt pocket is then lined with pocketing fabric and basted shut until the whole jacket is completed.

 |
| I love a pretty pocket fabric. I attach a 5cm long strip of garment fabric to the piece of pocketing that is visible when you lift up the flap, that way the contrasting fabric doesn't peak out and is only visible when you look inside the pocket. |
Next up: Part 3 - Attaching the Canvas + Padstitching the Lapels
All the posts in this tailoring series:
- Tailoring Resources for a hand sewn bespoke blazer - how I learnt what I know so far through books and blogs
- Part 1 - Muslin fit, collar and canvas prep
- Part 2 - Welt and Flap Pockets + Sleeves with mitred corners


Thanks for sharing all these details! Exciting to see your process.
ReplyDelete