
So much work goes into the making of these tailored blazers, and with most of my projects you only ever see the finished product! As stunning as a hand tailored blazer is, what I find the most beautiful is all the engineering and creating of the jacket itself. It's the process that makes the finished product so successful. This time I thought I would share the details on my blog as I walk through this big project.
All the posts so far in this tailoring series:
- Tailoring Resources for a hand sewn bespoke blazer - how I learnt what I know so far through books and blogs.
- Part 1 - Muslin fit, collar and canvas prep
- Part 2 - Welt and Flap Pockets + Sleeves with Mitred Vents
THE PATTERN
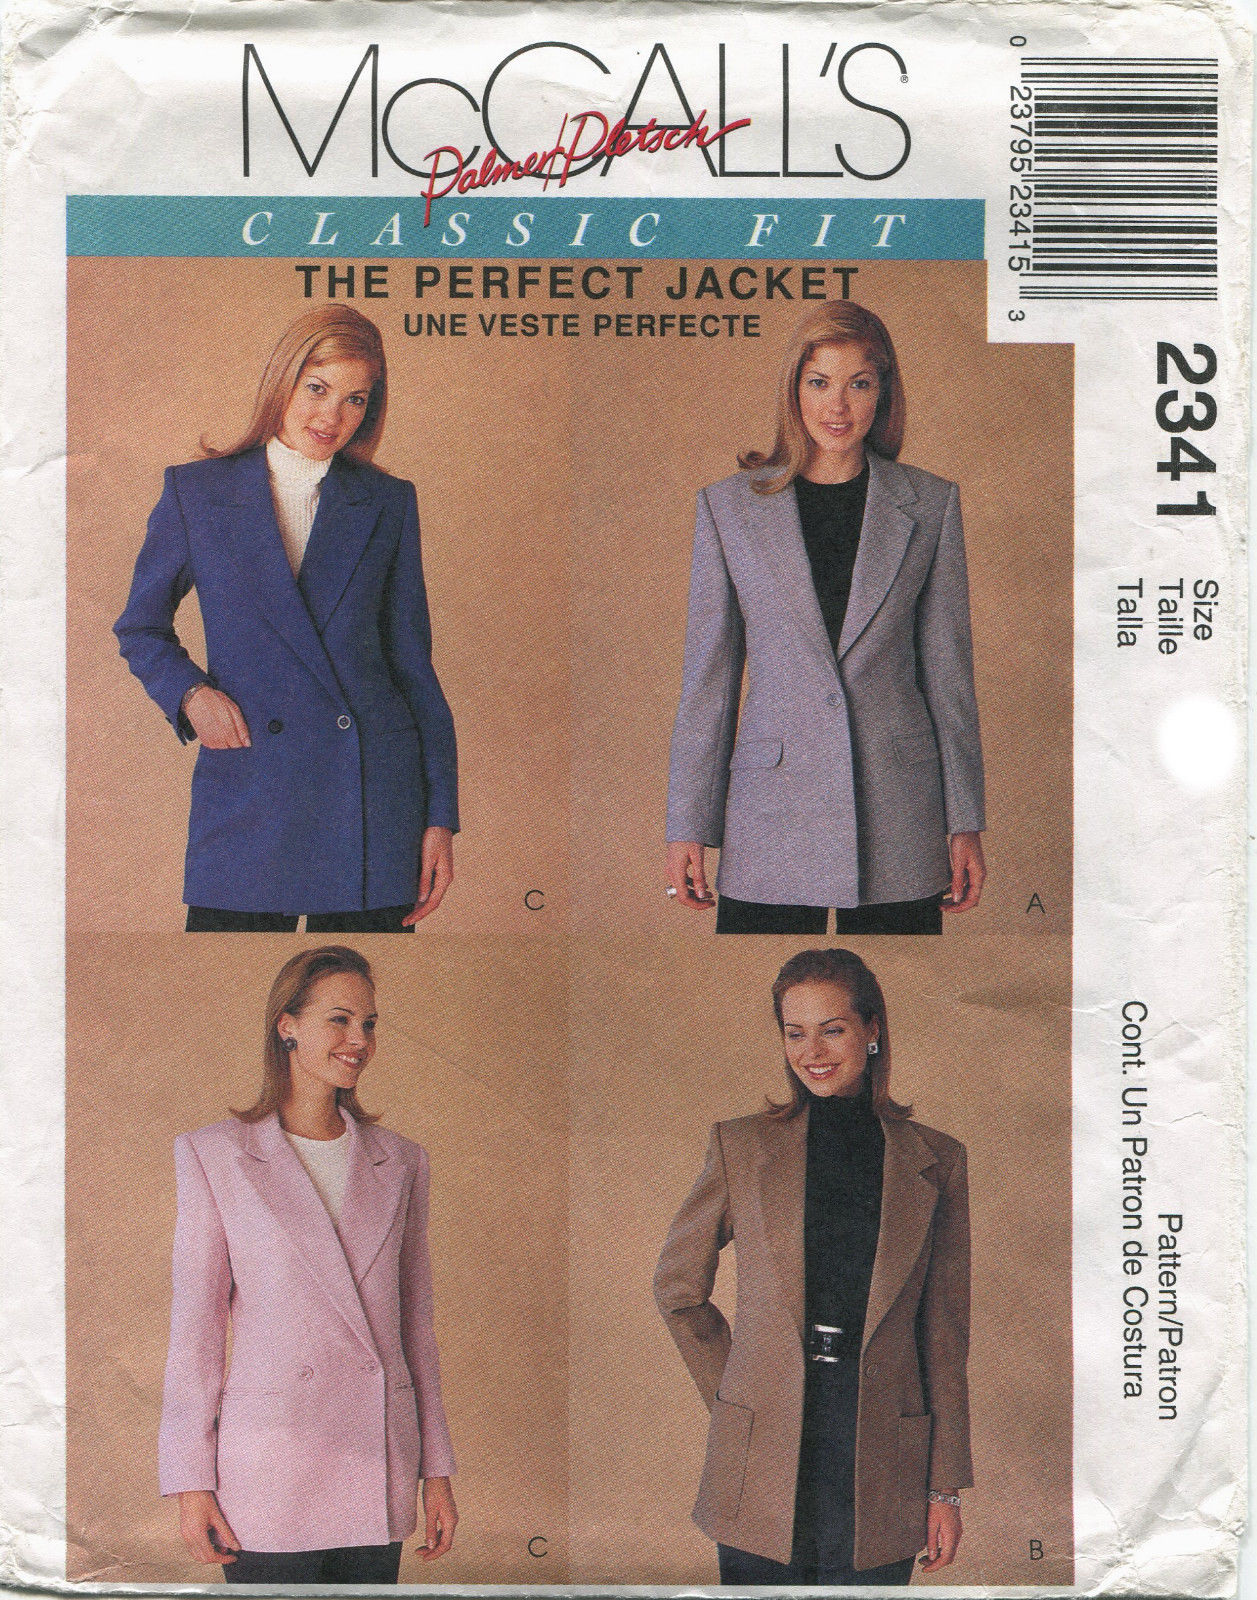
I'm using McCall's Patterns #2341 Version C with the double welted flap pockets in a size 12, and with quite a few changes.
 |
| It doesn't get any sexier than this ¯\_(ツ)_/¯ |
You'll see in the above pic that the arm on the right has been altered, with the seam lines on the outside. This jacket was made in the 90's for big feature shoulders with stacked shoulder pads. I decided to calm it down a little. I also made the following fit changes:
Sleeves:
- Removed 2cm width out of the centre of the sleeve, starting from the centre of the shoulder cap all the way down to the hem.
- Extended the sleeve vent to 11.5cm from the hem
- Raised the height of the armscye by 2.5cm. Having an arsmcye that is too big or low, actually restricts your movement. Most patterns are drafted with large armscyes as a 'one size fits all' measure, and it means when you raise your arms, your whole jacket rises with it. The closer the armscye to your underarm, the more comfortable. When you think about it, it makes sense. Look at athletes, who need a full range of movement. Their clothing is fitted to their bodies, not hanging. You do however want to make sure that the armscye doesn't get closer than 2.5cm to the centre of the armpit.
 |
| I added a strip of fabric to the muslin at the armscye, rather than recutting a new toile. |
 |
| When raising the armscye, you also need to raise the height of the sleeve pattern too. You can see the adjusments here in blue that grade out to nothing at the notches. |
 |
| My altered sleeve patterns, which I redrew on brown paper. |
I didn't like how there was a gap between the peak lapels and the collar (see original toile photo), so I redrafted the top of the peaked lapel, to line up with the collar, which you can see in the picture below.
 |
| Much better! The lapel and collar now butt up against each other |
In addition to the sleeve alterations, I also:
- Narrowed the shoulder by 2.5cm grading down to the armscye notch on both the front and back pieces.
- I narrowed the waist by 1cm on the front, back and side seams, taking the waist in by a total of 8cm. I wanted a more shaped fit, rather than the boxier style that the pattern was drafted for.
- I graded out to a size 14 on the hips
- Did a sway back adjustment of 2cm, positioned 1cm below my waistline.
Tip: When making multiple changes, I like to redraw the pattern onto card or brown paper so it's easier to work with. I also write the changes I've made on each pattern piece, which makes it much easier for future me to immediately understand the alterations!

Preparing the Under Collar
I cut the under collar in a wool felt, and used french collar canvas for interfacing. Both pieces were cut on the bias.
French collar canvas is a little stiffer than regular body canvas and is often made out of a treated heavy weight linen.
I then stitched along the roll line, and using the roll line shape as a guide, I started pad stitching over the whole under collar.
Note: Traditionally tailors use melton wool for the under collar, but I enjoy wool felt for it's thickness and shape, which I feel makes a crisp and upright collar. Just make sure it's 100% wool!
 |
| roll line basted with silk thread, and then pad stitched. |
 |
| Ta-Da! Smaller pad-stitches were made at the corners to encourage the collar to roll slightly towards the body. |
I then folded the collar along the roll line, pinned it to a pressing ham, steamed it and let it dry over night. The photo above shows what it looks like once it has been set and dried.
The seam allowance of the under collar has been removed, as is typical with a bespoke jacket where the collar is attached to the neckline seam allowance by hand.
 |
| This is the underside of the under collar. Can you see any of the pad-sttiches? When you pad stitch correctly, you are just picking up a tiny 'bite' of the fabric from the right side. In a thick wool felt it is not even detectable. |
Preparing the Canvas Interfacing
For my double breasted blazer, I am using the full front canvas interfacing for the first time. I used canvas I already had in my stash that I purchased from Spotlight a while ago.
With my previous two tailored blazers, (here! and here!) they were partially interfaced to start under the arm, travel above the bust, and down through the centre front length of the jacket (check out my previous post here to see a comparison picture of a full canvas and partial canvas front). I wanted the jacket front to have uniform draping, and so with the book 'Classic Tailoring Techniques for Menswear' as a guide, I drafted a canvas front.
I cut out the darts, and closed them with pocketing fabric and a zig zag stitch.
I then created a PLASTRON using canvas and french collar canvas, and then covered with wool fabric. I then loosely pad-stitched the plastron's to the canvas interfacing.
This part will be covered by both the fabric and lining, so the pad stitching can be visible on both sides.
The plastron's purpose is to keep the form of the jacket across the chest, where it may naturally cave in. The wool fabric covering is the side that is closest to the body, and covers the additional canvas so that it is not uncomfortable to the wearer.
You can see below the 'right' side of the canvas, with the pad stitching showing on top and the plastrons underneath.
 |
| The jacket front interfacing with darts zig zagged closed, and the plastron pad stitched to the underside. |

 |
| Finished under collar and readied canvas interfacing pinned to the dress form.
And that's it for now folks! Thanks for reading :)
|
All the posts in this tailoring series:
- Tailoring Resources for a hand sewn bespoke blazer - how I learnt what I know so far through books and blogs.
- Part 1 - Muslin fit, collar and canvas prep
- Part 2 - Welt and Flap Pockets + Sleeves with Mitred Vents


No comments:
Post a Comment