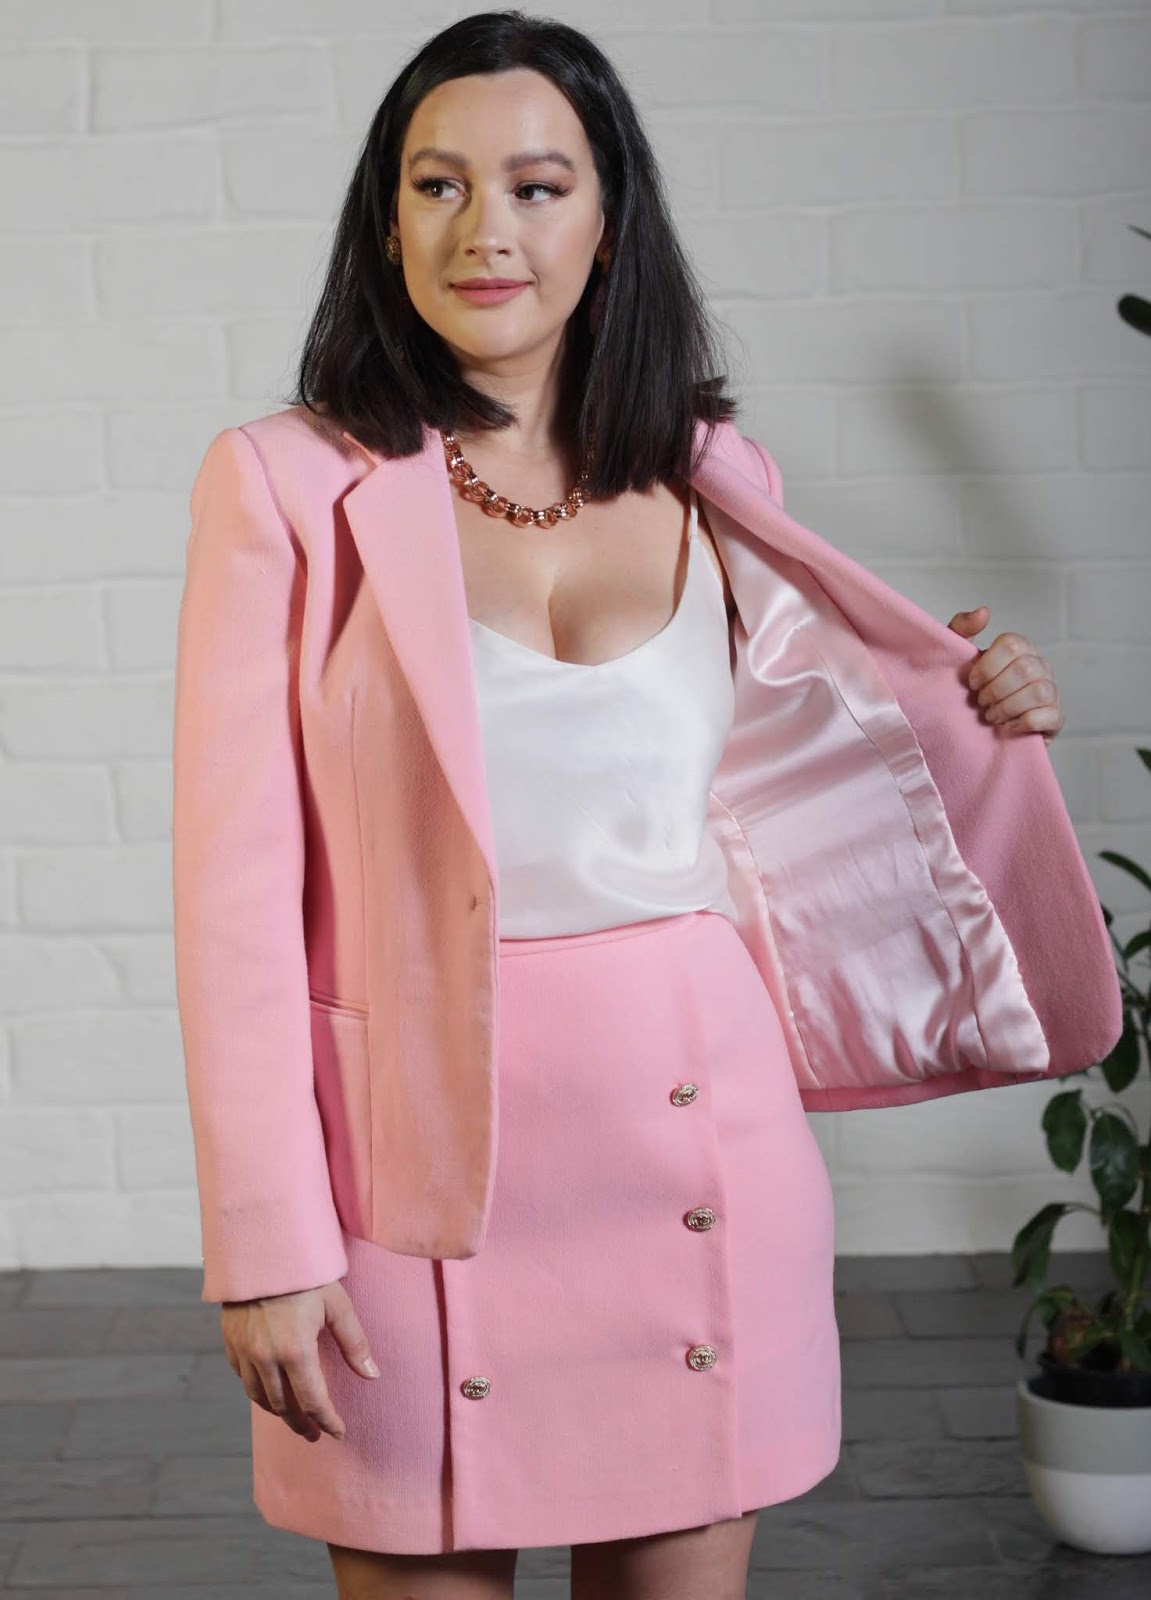
If you just want to see the FINISHED LOOK, feel free to click on the image below to go to the original post! :)

Now's the time to go to the bathroom and grab those snacks because this post is a LONG one...
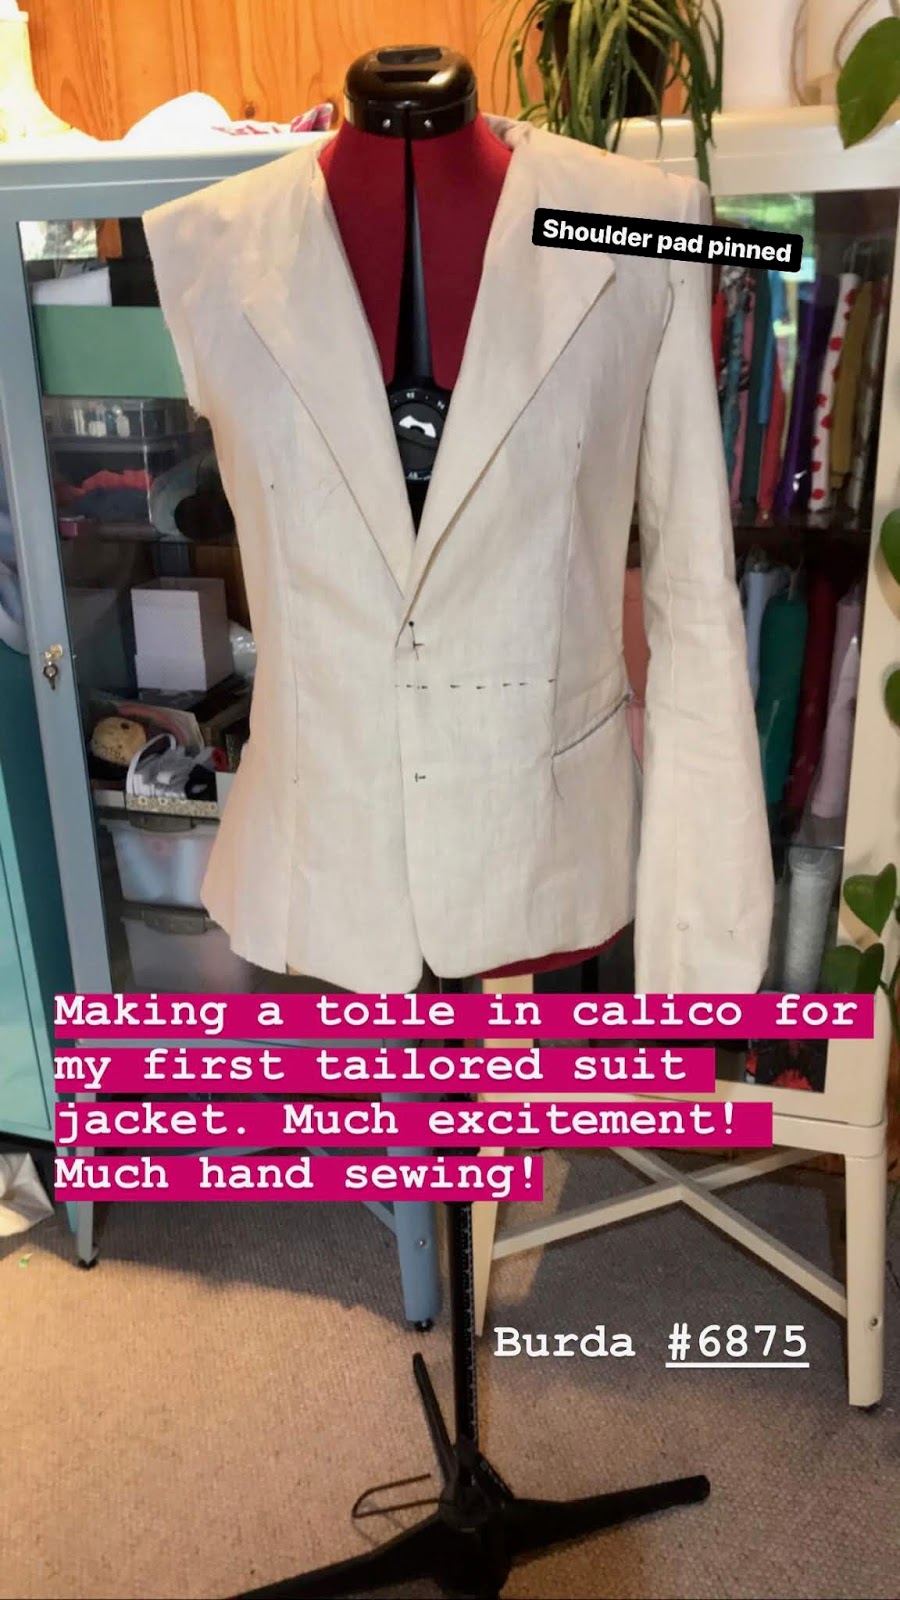
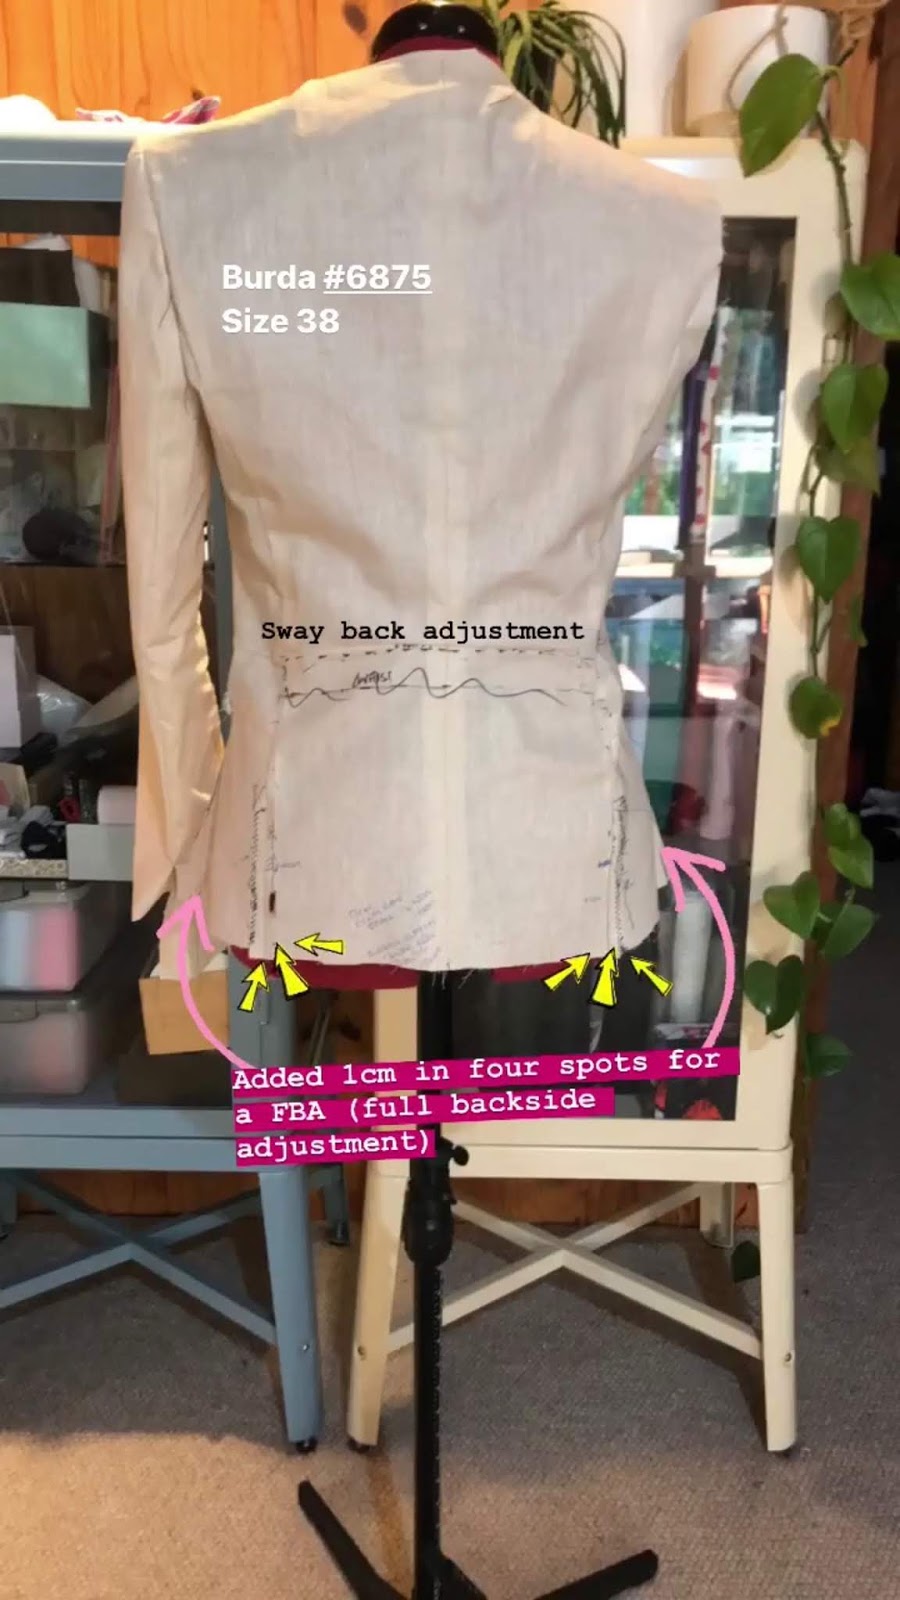
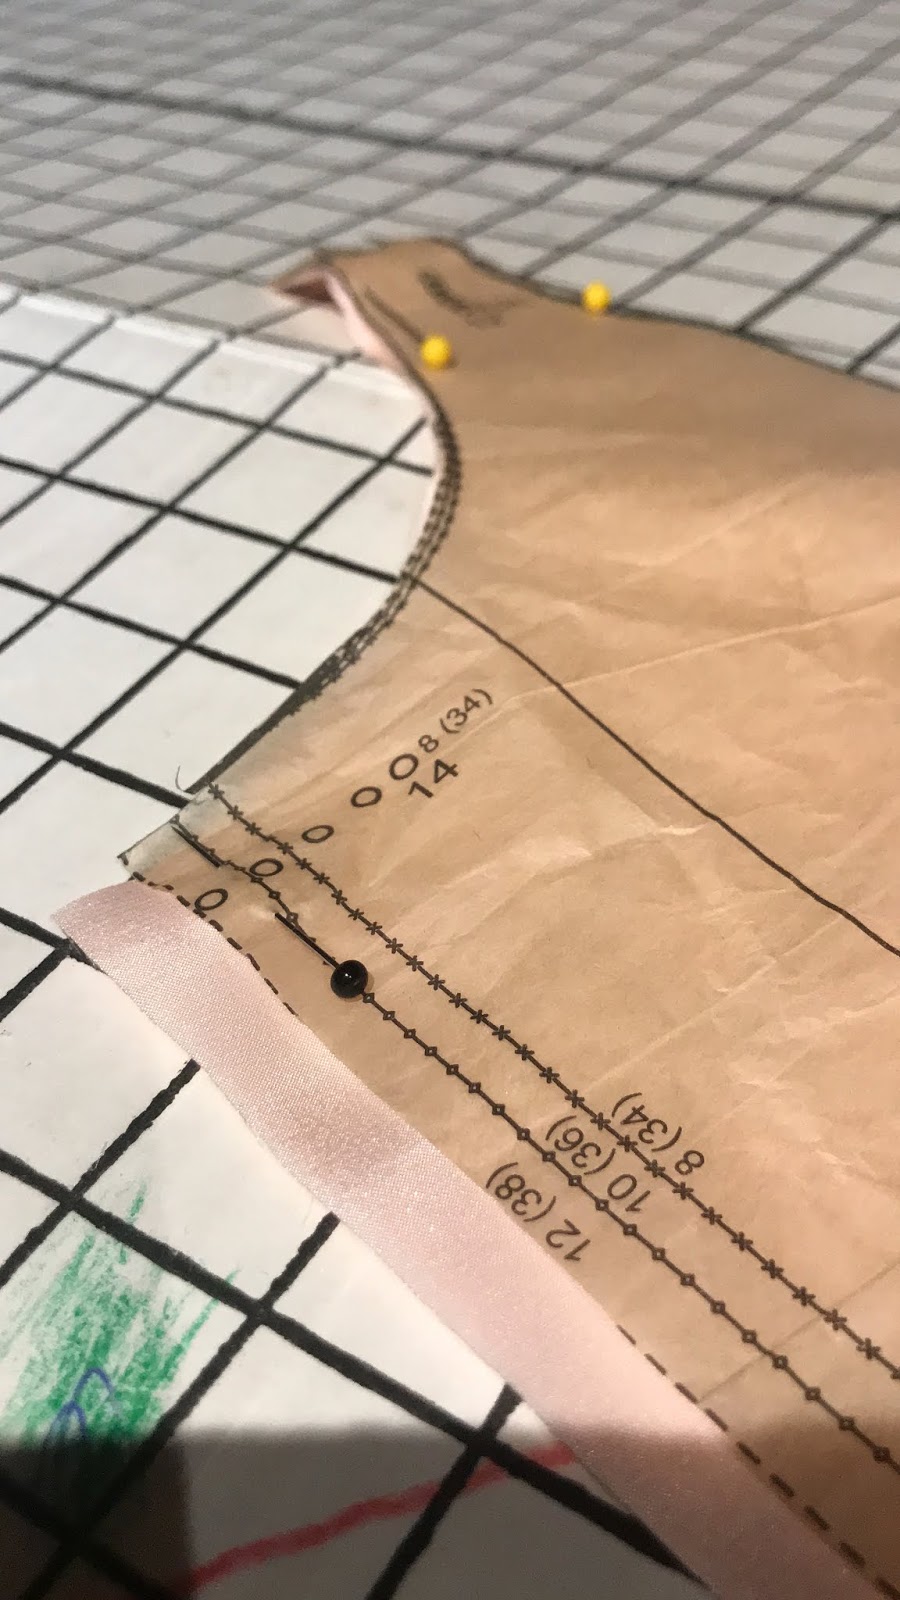
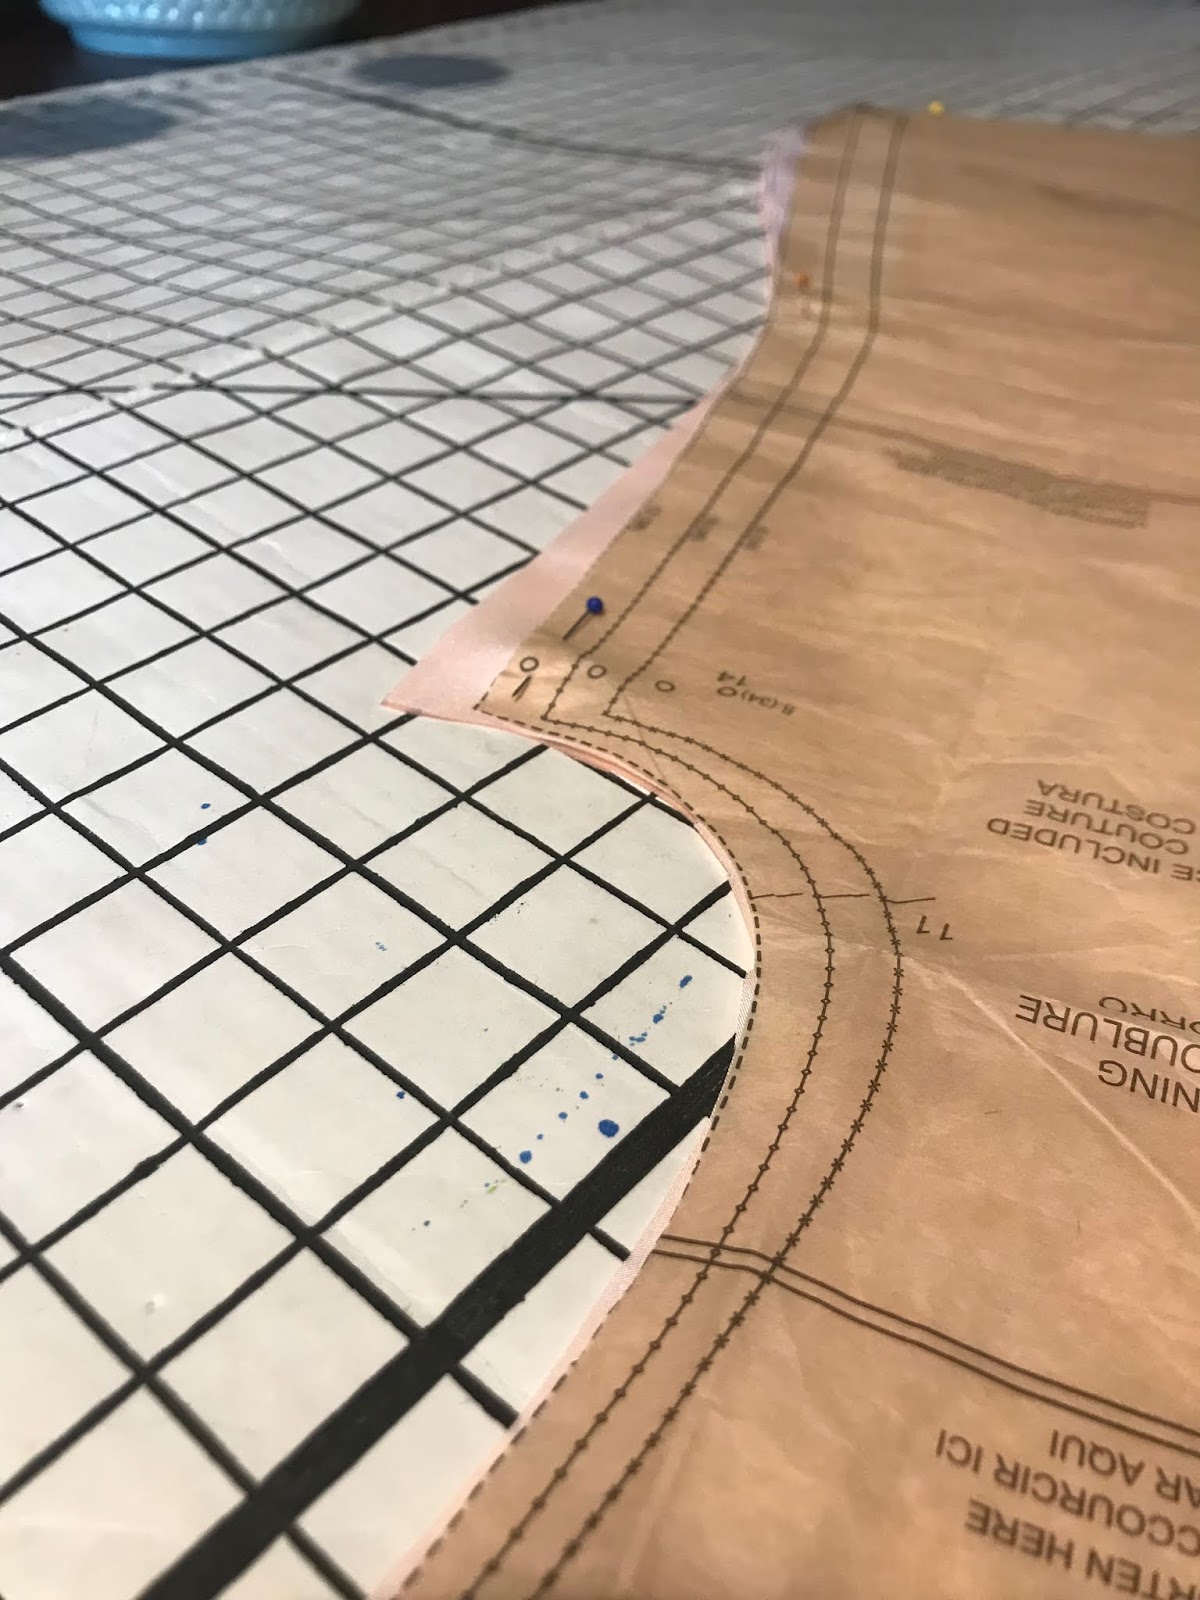
The Pattern: This is Burda 6875
Pattern Sizing: Euro 34-44.
I cut a size 38 (with modifications) in View A (shorter length).
The instructions are detailed in some areas and lacking in others, but mostly I disregarded them and constructed the jacket in my own order.
As always when sewing something that is detail heavy like a jacket, a TOILE IS A MUST Not just for the fit but to practise the techniques and to fill in the missing gaps in the instructions.
TIP: When trying on your toile, pin in your shoulder pads. This pattern has been drafted to include them, so you don't want to mistake a caving above the chest as a fit issue, when it actually just needs to be lifted with a shoulder pad.
What did you particularly like or dislike about the pattern?
I love the NARROW LAPEL of this blazer which is flattering and modern.
Burda patterns always include the little extras like ease at the shoulders, pleats in the centre back lining for extra movement, and sleeve vents.
Double welt pockets and two piece sleeves that are beautifully shaped are some other features of this great jacket.
Fabric Used: A double wool crepe (Mood Fabrics)
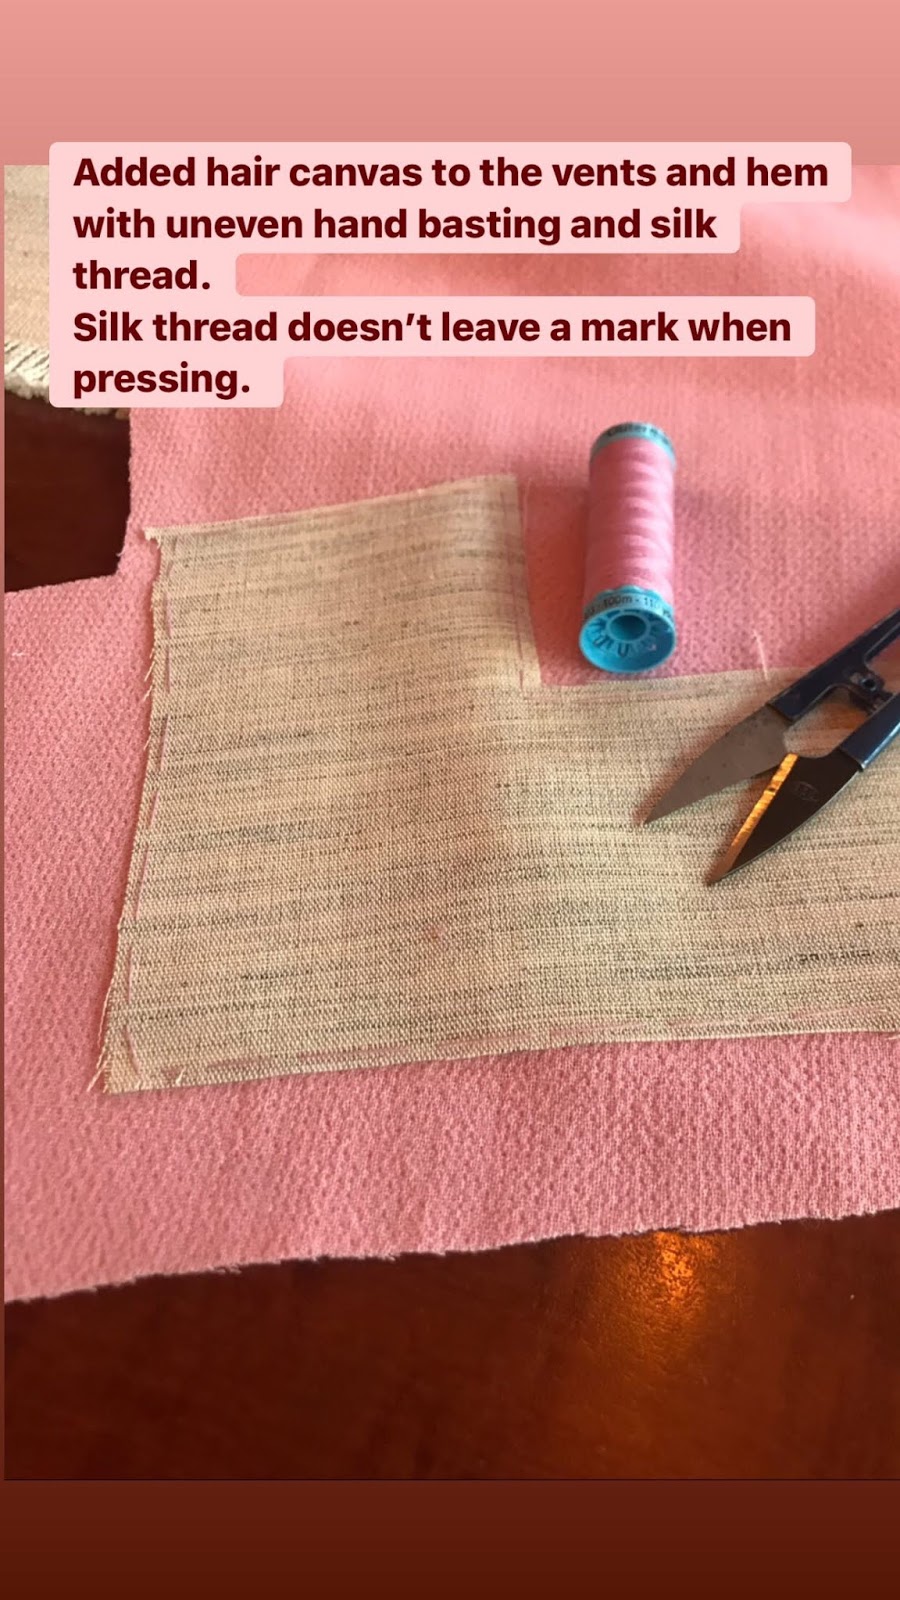
Soft hair canvas for interfacing (Spotlight)
Silk organza for back stay (My stash)
Liberty of London cotton lawn for pocket lining (GJ's Fabrics)
Wool felt for under collar (GJ's Fabrics)
Silk Satin (19momme) for lining (HomeCraft Textiles)
Organic cotton wadding for the sleeve heads (Spotlight)
Construction Changes and Tailoring:
I have been wanting for a long time to make a tailored jacket using traditional bespoke methods, and I finally worked up the courage to try it for the first time!
I chose this pattern and made a toile, and with the aid of the book 'Tailoring:The Classic Guide To Sewing The Perfect Jacket', and bits and pieces that I found on the internet I decided to give it a go. Below are the details of how I've constructed my jacket.
Note: I deviate from the book in quite a few areas where I've found other techniques work better for me personally.

FIT CHANGES:
I cut a size 38 and tapered out one extra cm from the waist to the hem at the side seams, and side back princess seams, effectively doing a full butt adjustment.
I also did a sway back adjustment with the widest reduction being 2cm at the centre back.
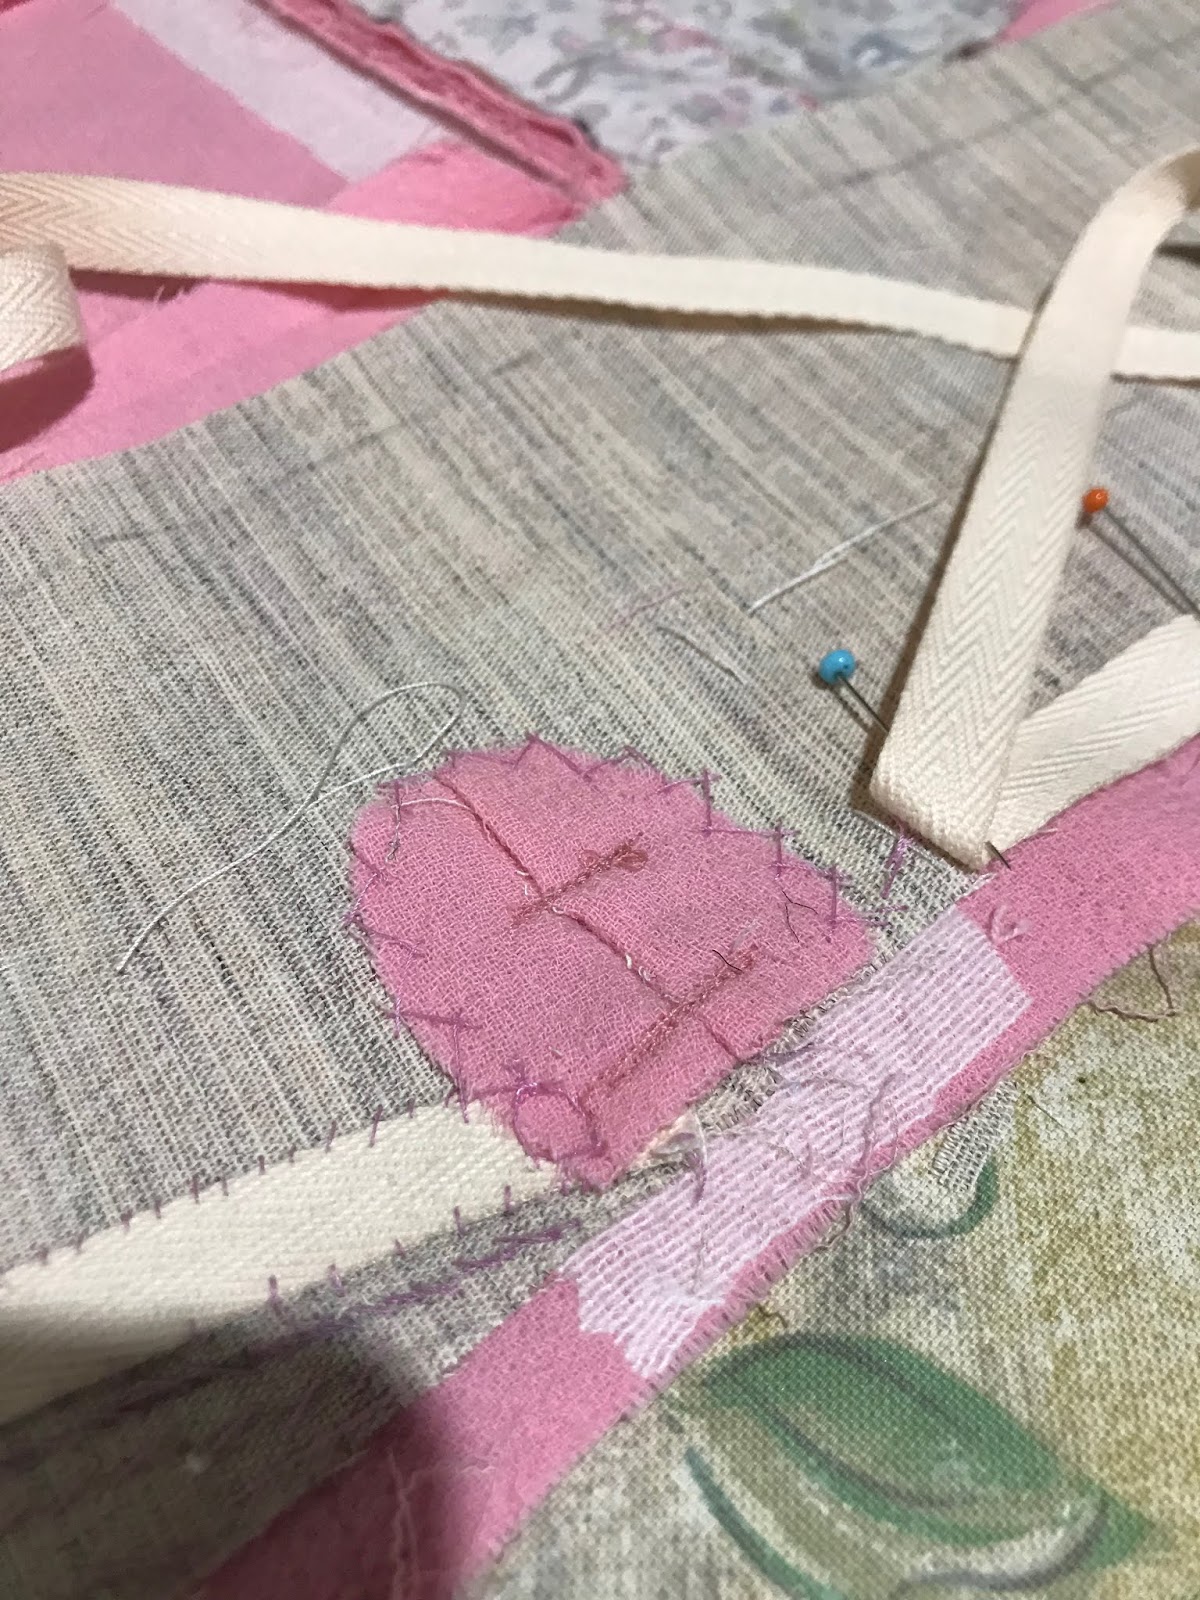
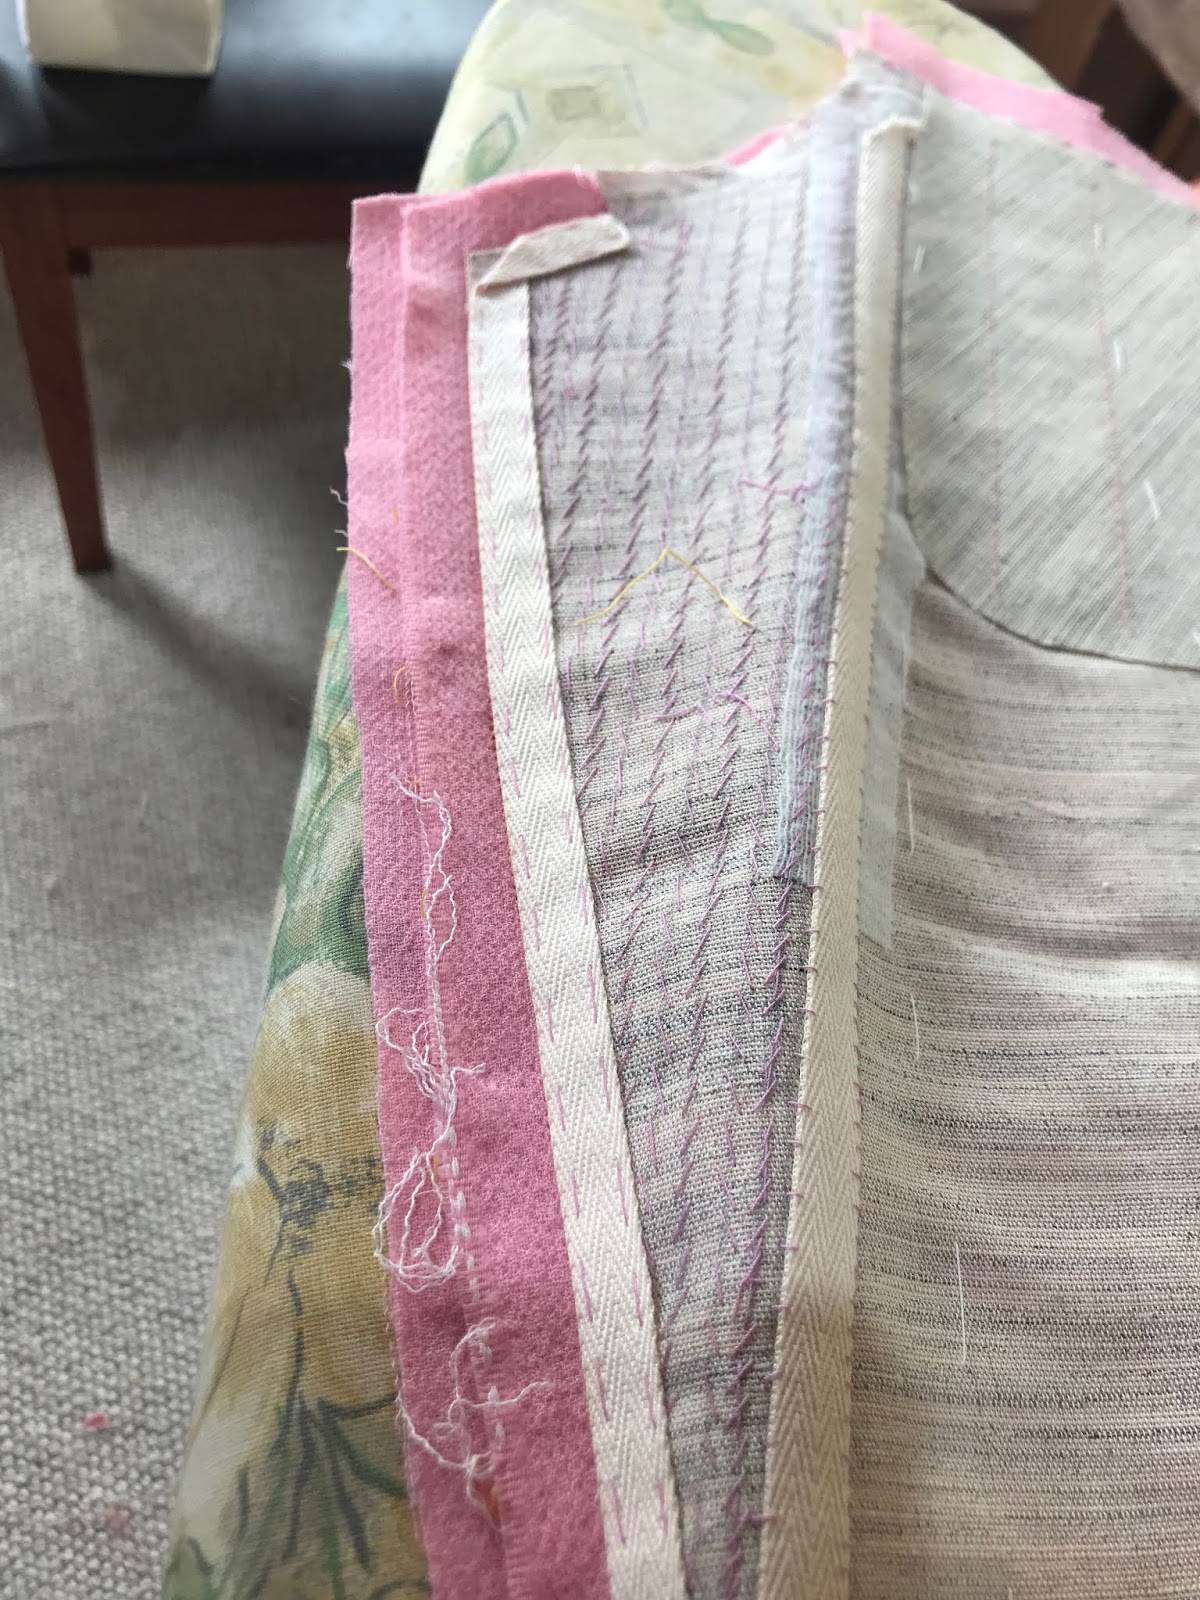
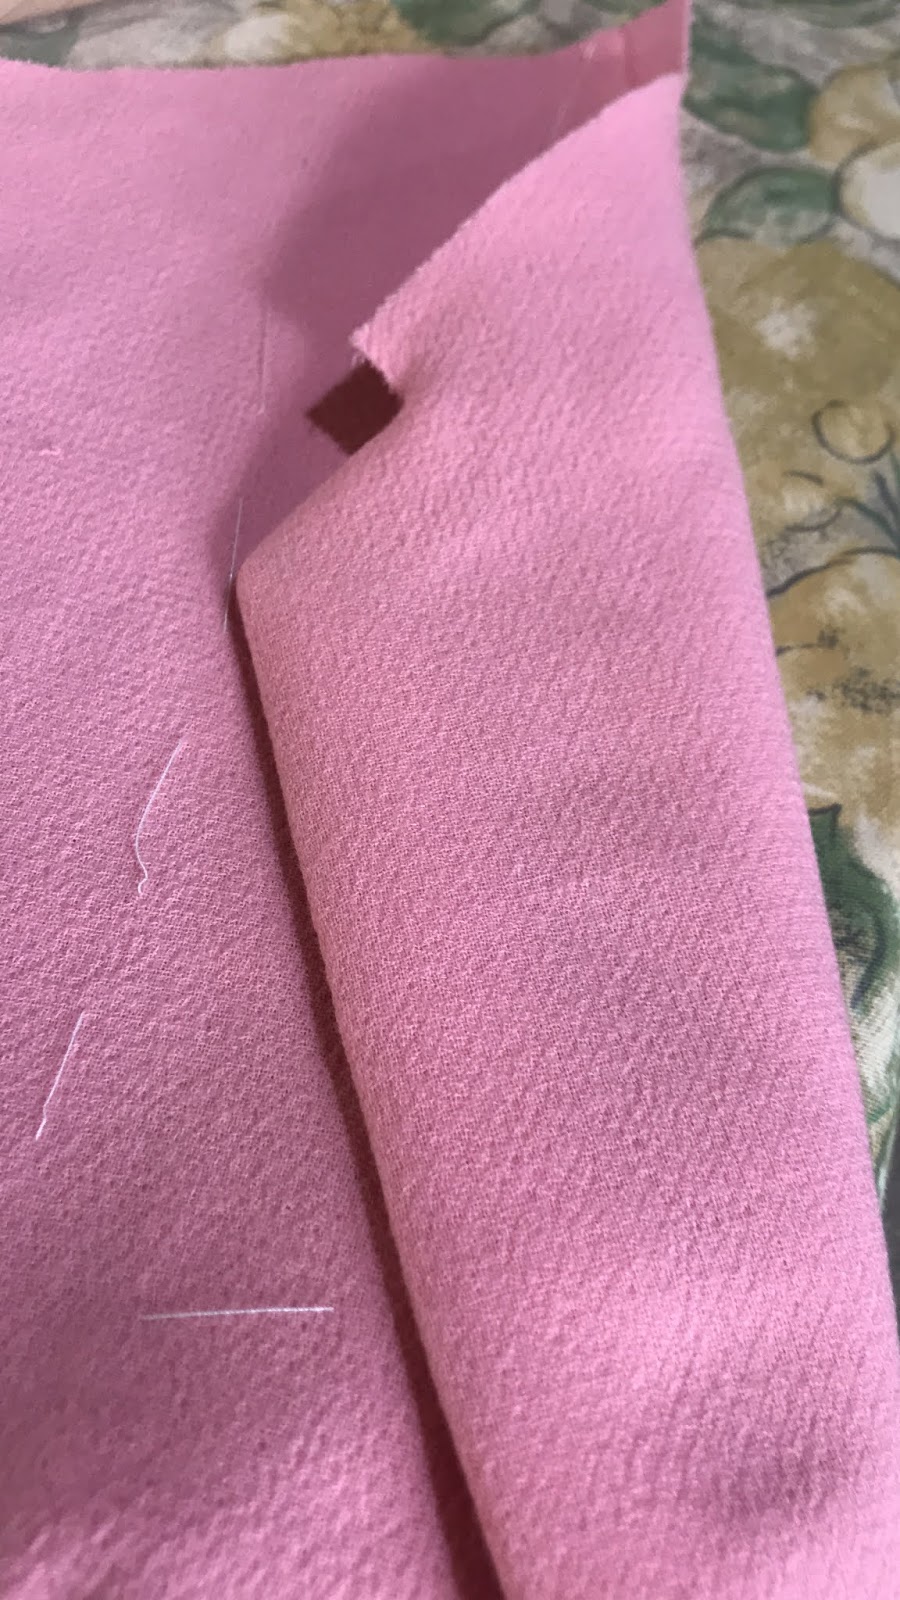
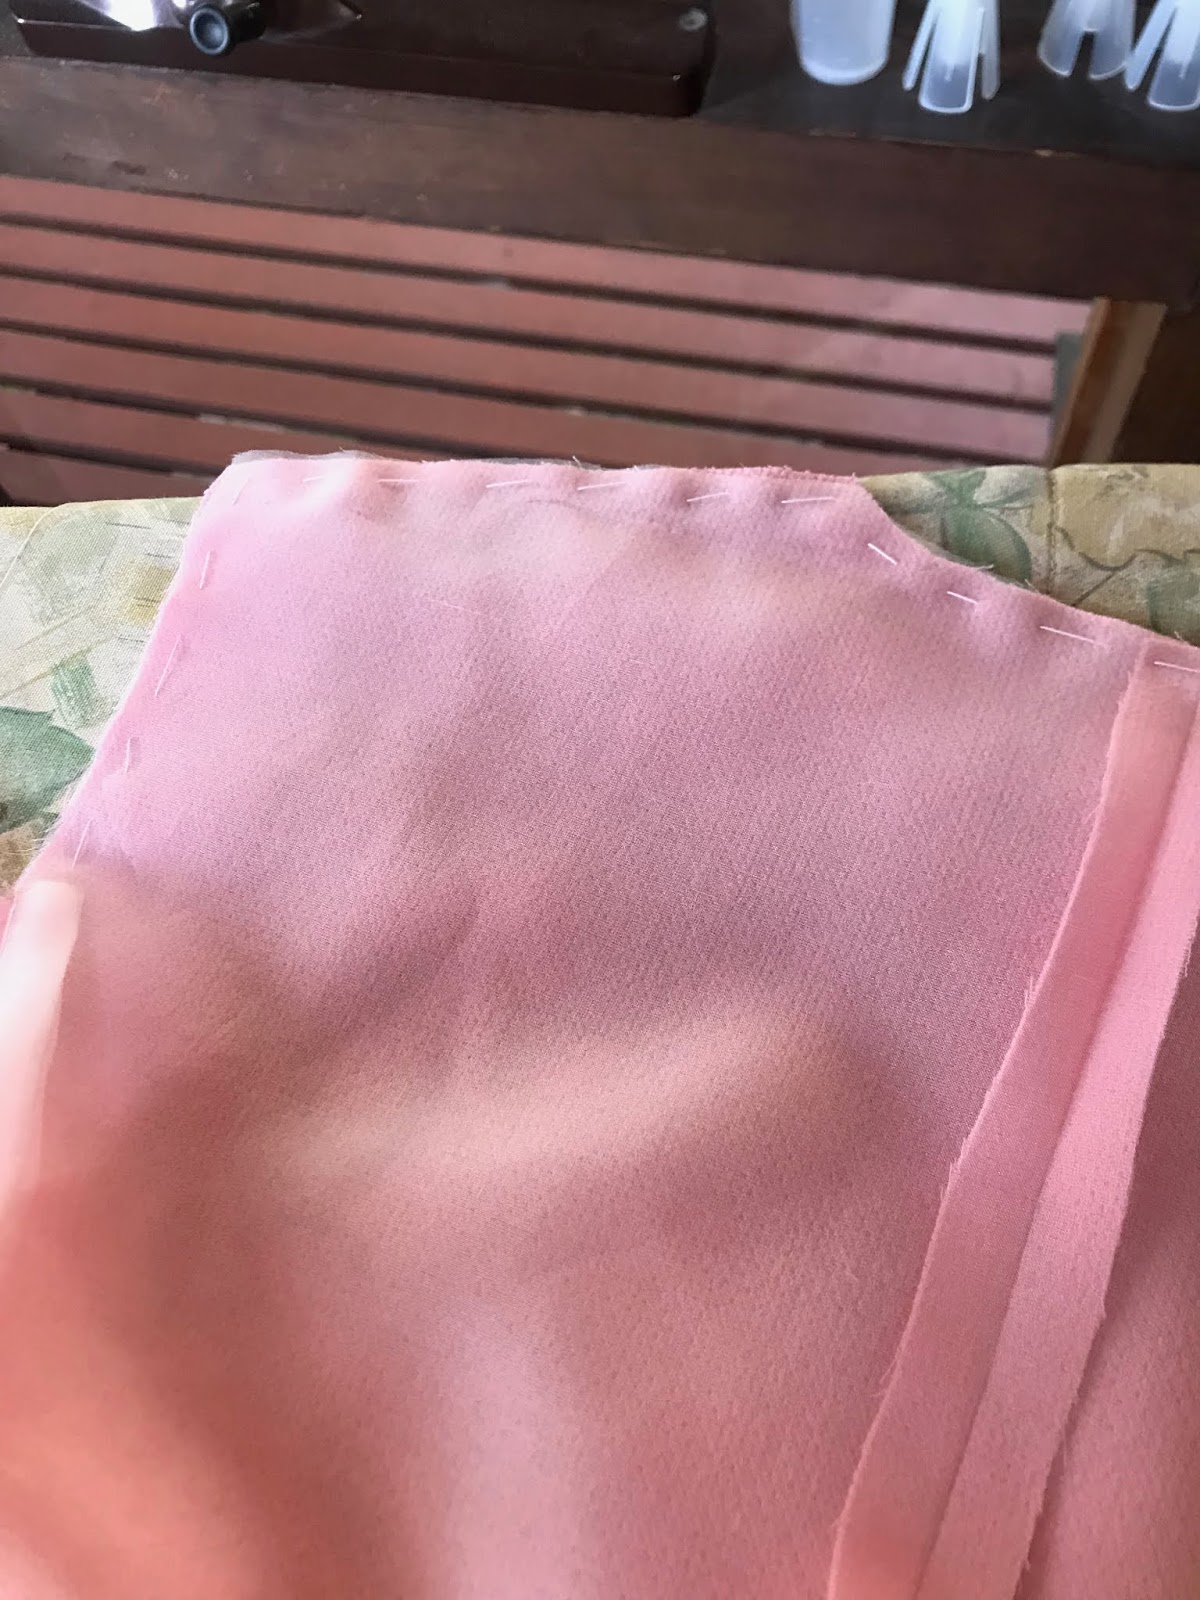
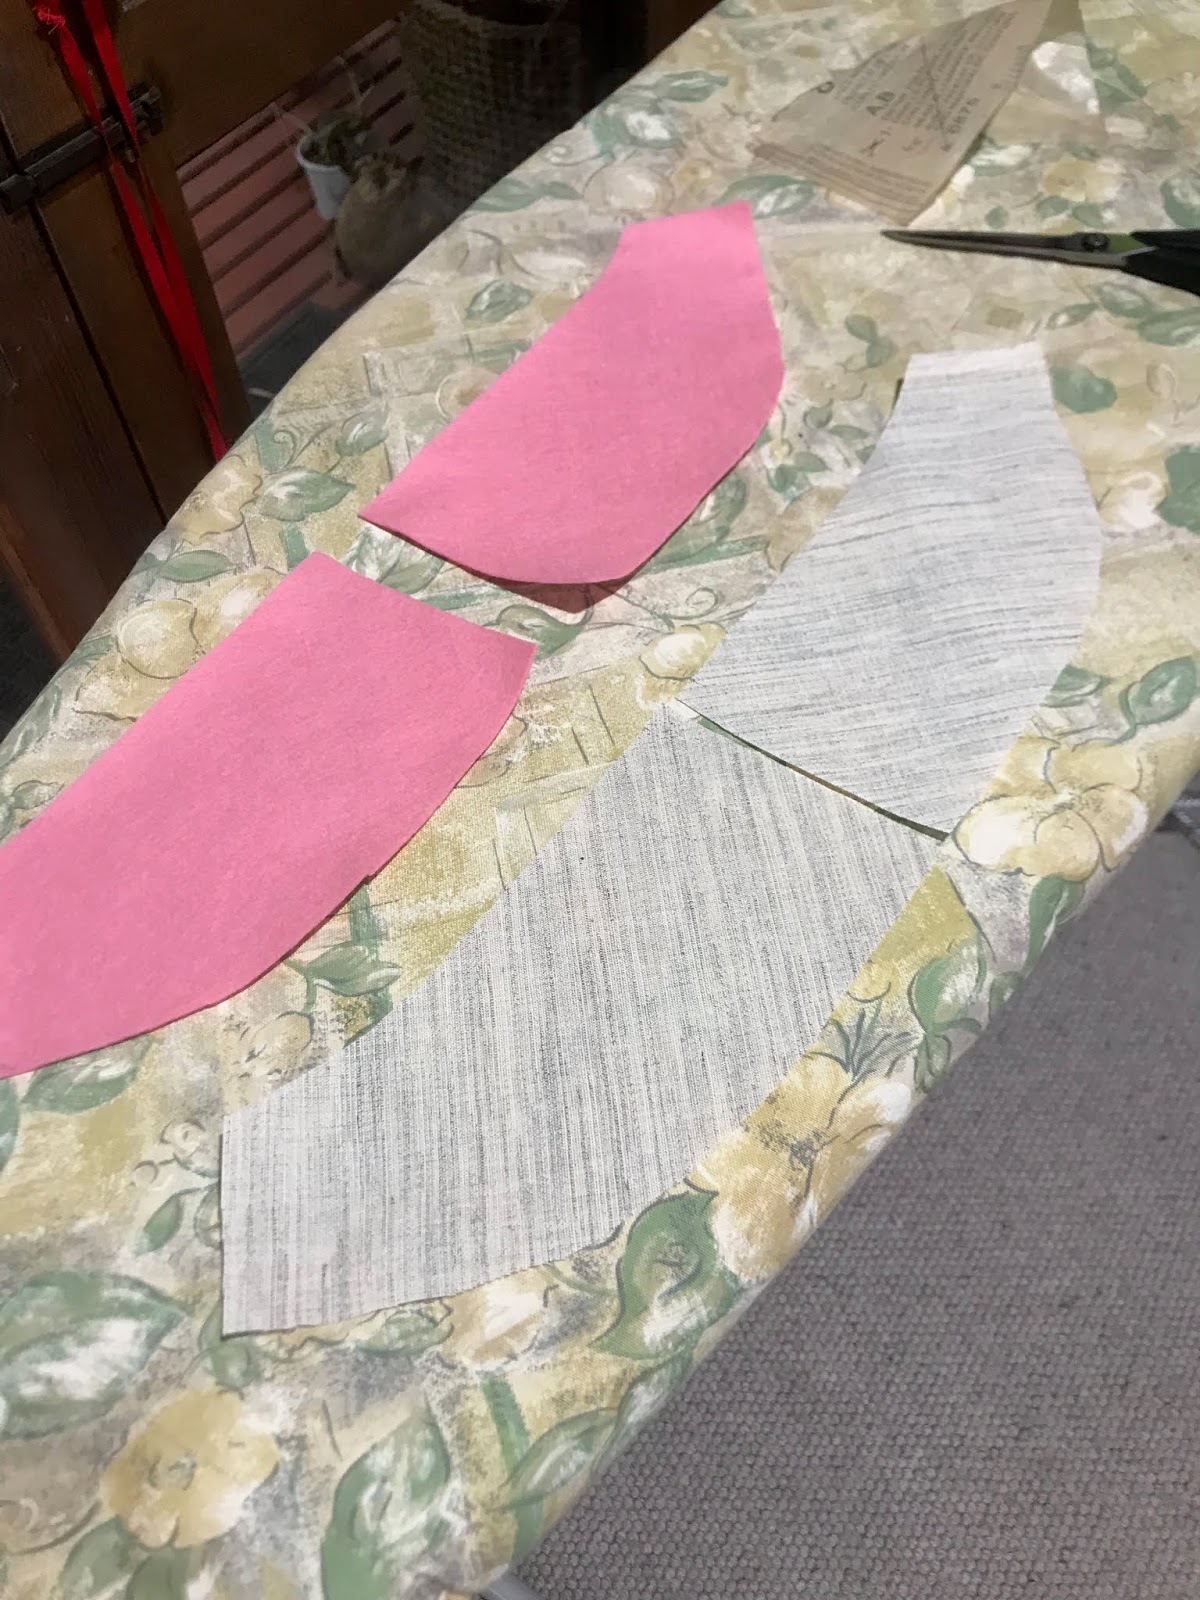
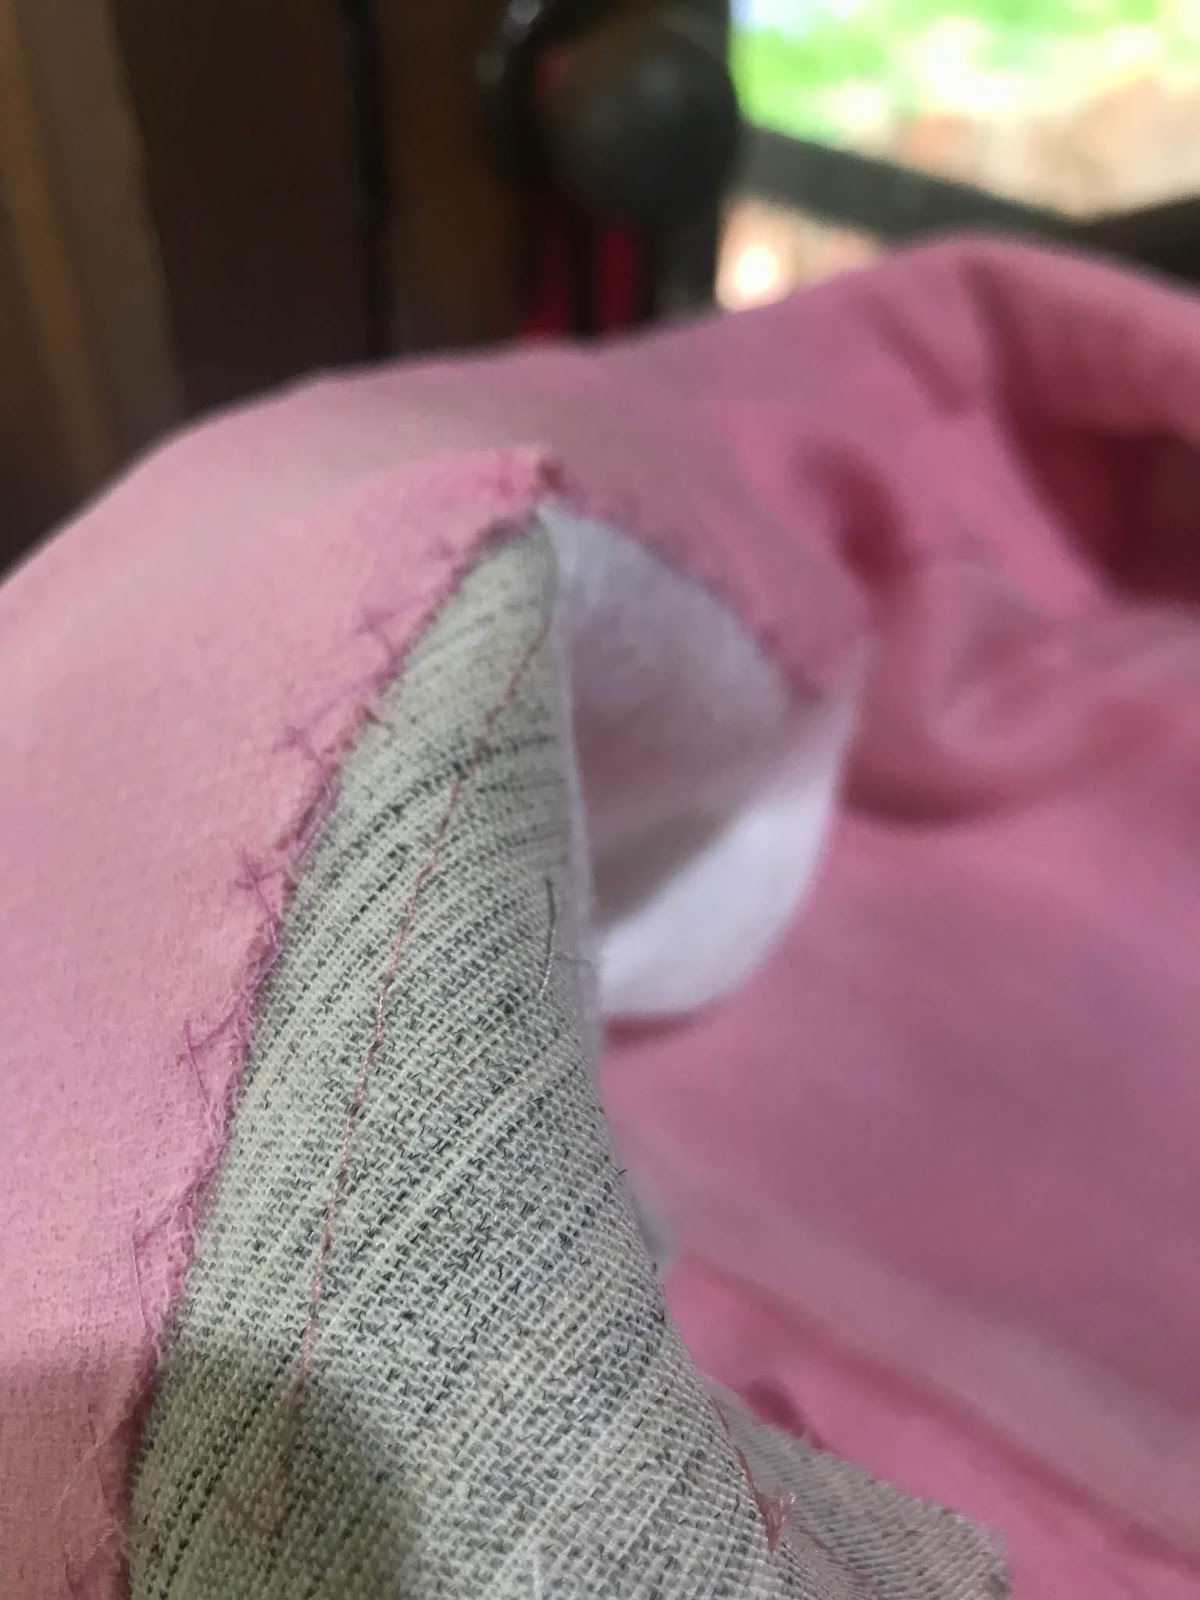
DOUBLE WELT POCKETS
I've always loved how double welts look and I was excited to play with these. I made a practise one before I cut into my fabric and I'm so glad I did.
The placement of these pockets is on an open seam, so it's not constructed the typical way.
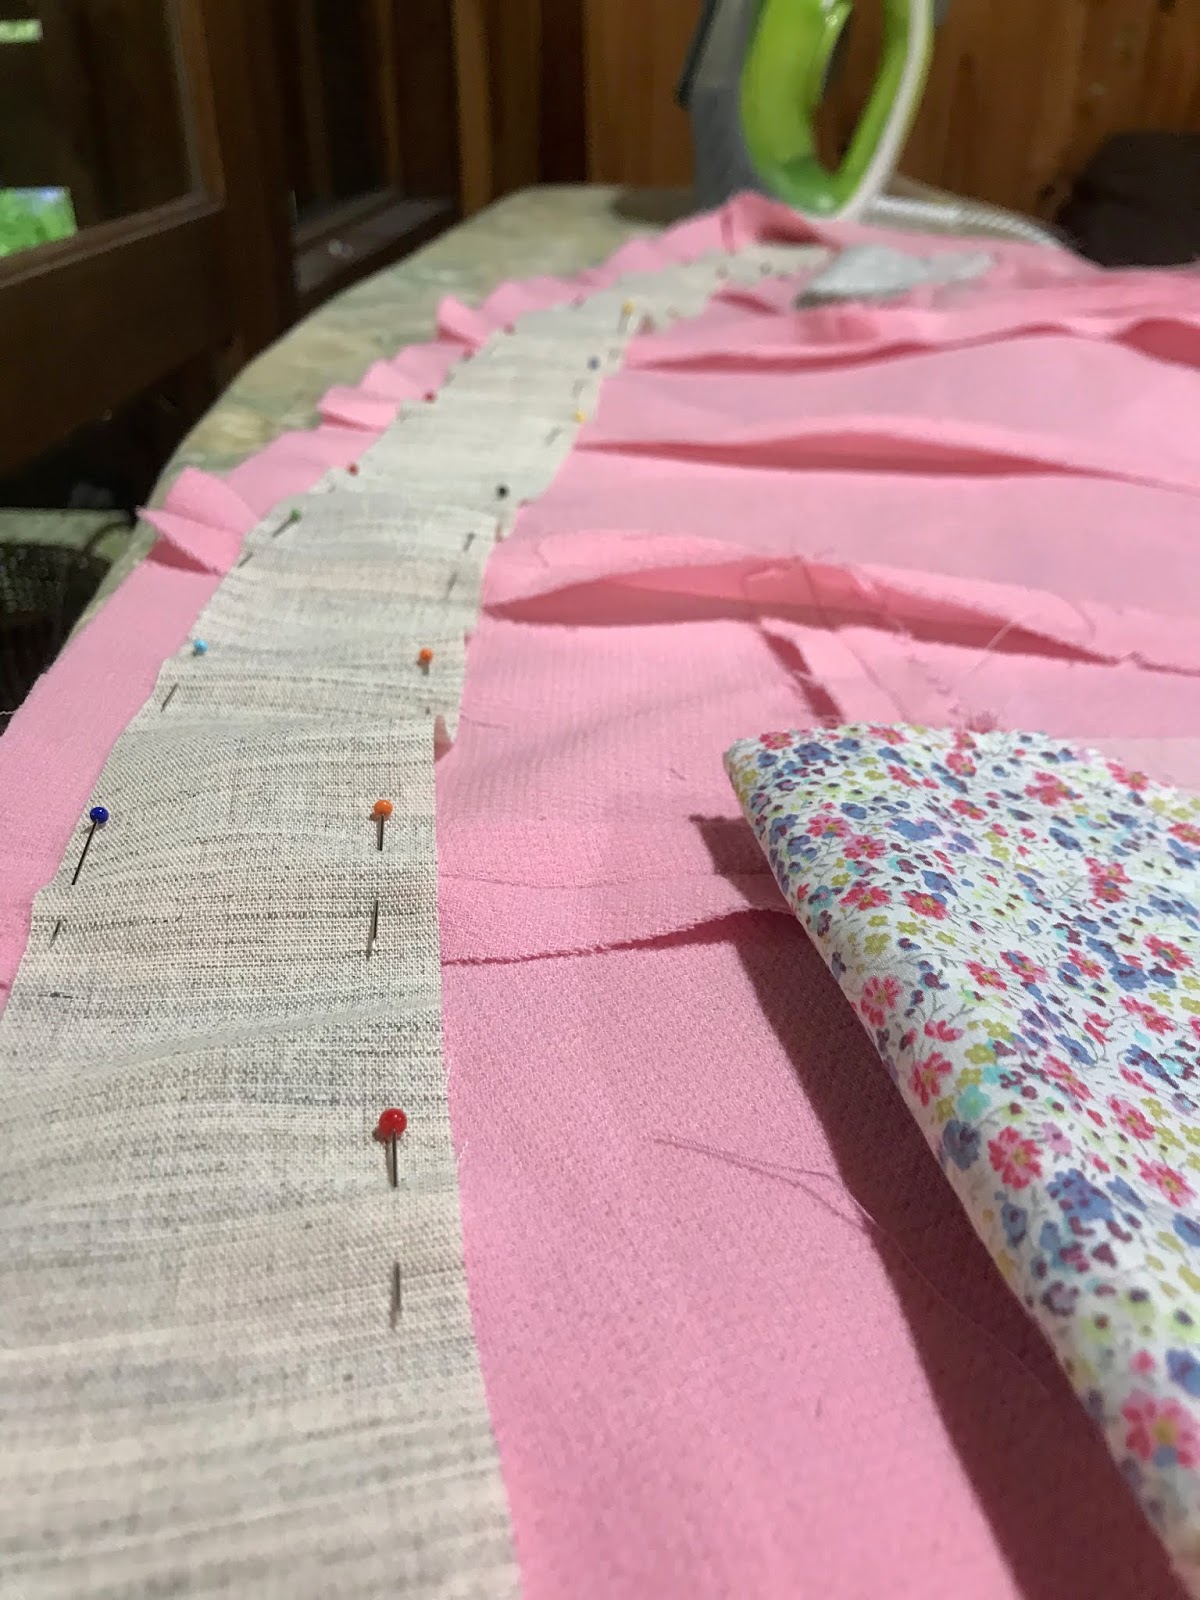
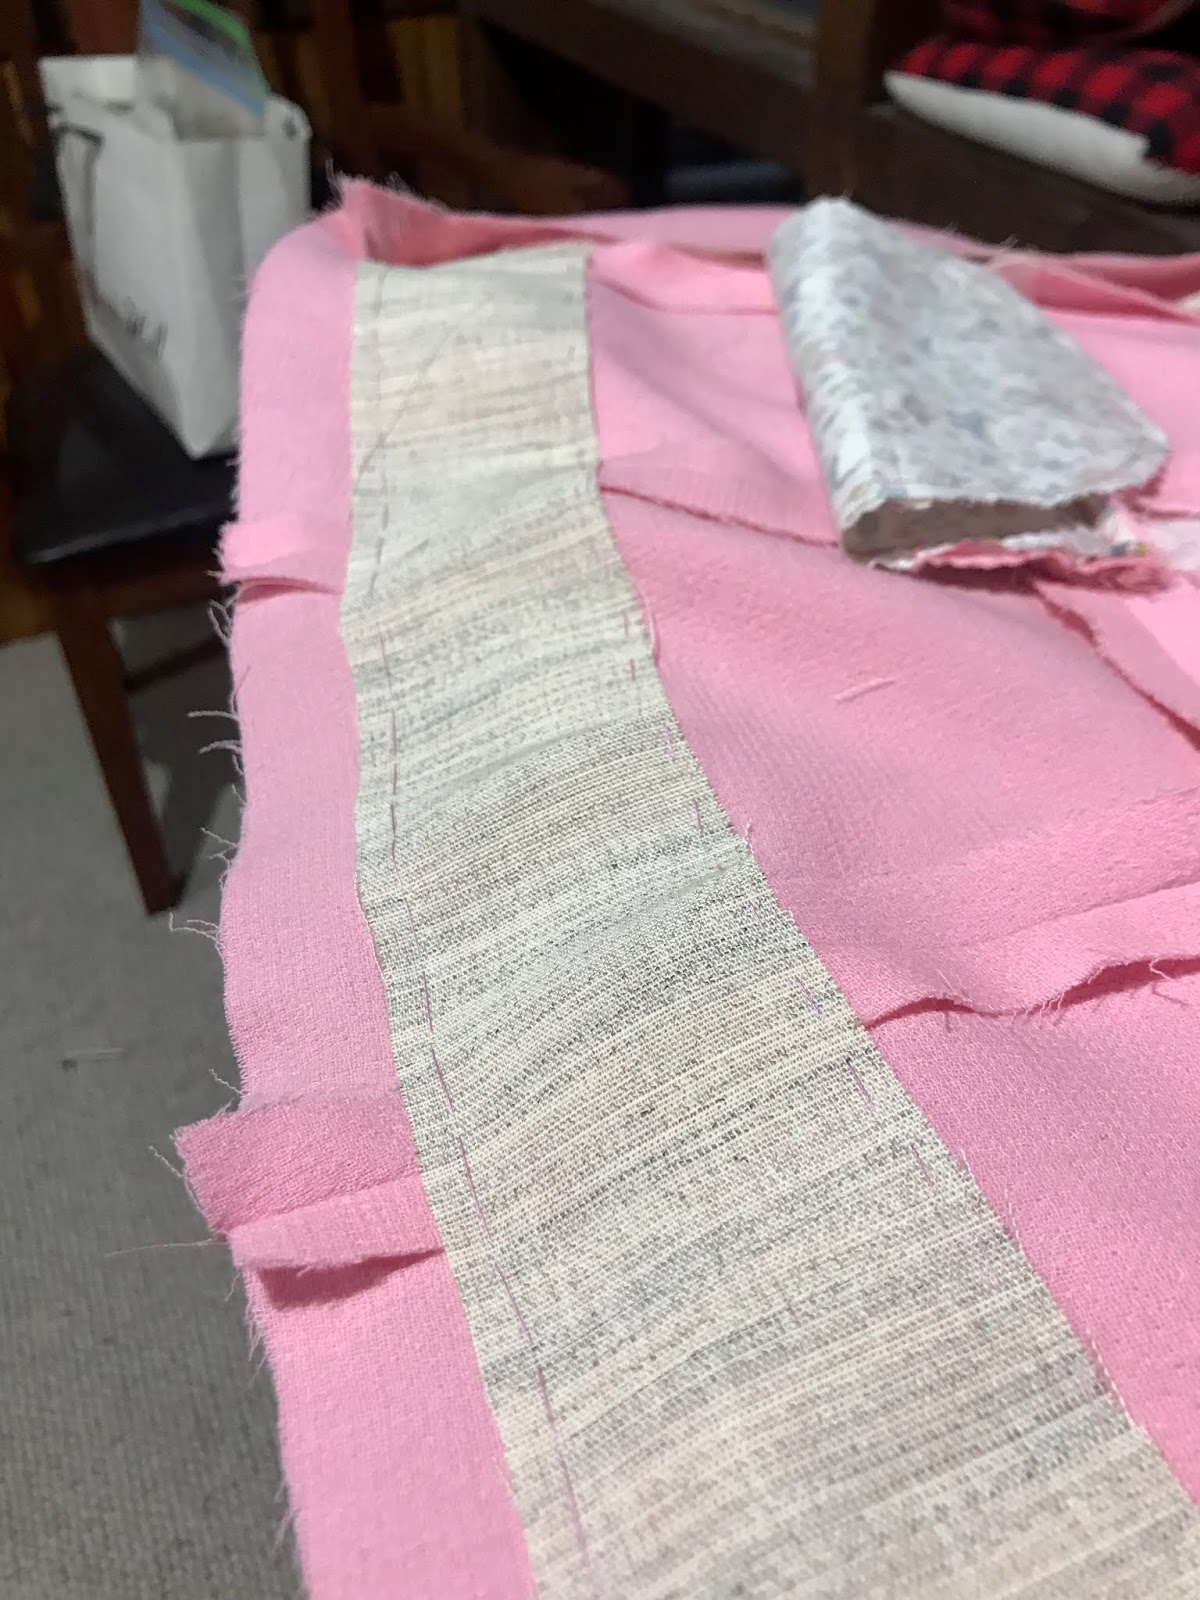
I added a 1" strip of silk organza, centring it over one end of the pocket (the side back end) going straight up to the underarm. This reinforces the pocket and stops the bodice from sagging because of the opening.
I steamed and stretched out the strips of fabric that would become the lips of the welts before attaching them to the pocket.

WATCH OUT for the side of the welt pocket that begins on the 'side back' piece.
According to the pattern the pocket starts at the notch, which is where you cut away the seam allowance to place the welt lips. DON'T cut all the way from the notch, give yourself an extra cm after the notch before you start cutting. Otherwise there is no seam allowance for the side of the welt lips, so you'll see the raw edge.
You want to cut a 'Y' shape (clip into the corners) before turning the lips through, and then sew the little 'V' to the lips.
This sounds very confusing, so just trust me and do a toile and practise the pockets so you can see what you're working with.
I ignored the pattern's pocket lining and made my own so they'd be big enough.
I cut a 2" strip of garment fabric and top stitched onto the upper edge of the pocket underlay, so that you saw the fabric poking through the welts and not the pocket lining.
The pattern has you cut a whole pocket piece in the garment fabric for the back of the pocket and that adds unnecessary bulk and is also not as strong as what a pocket lining should be.
I used gorgeous liberty of london fabric for the pocket lining as a nice little surprise for my hands.


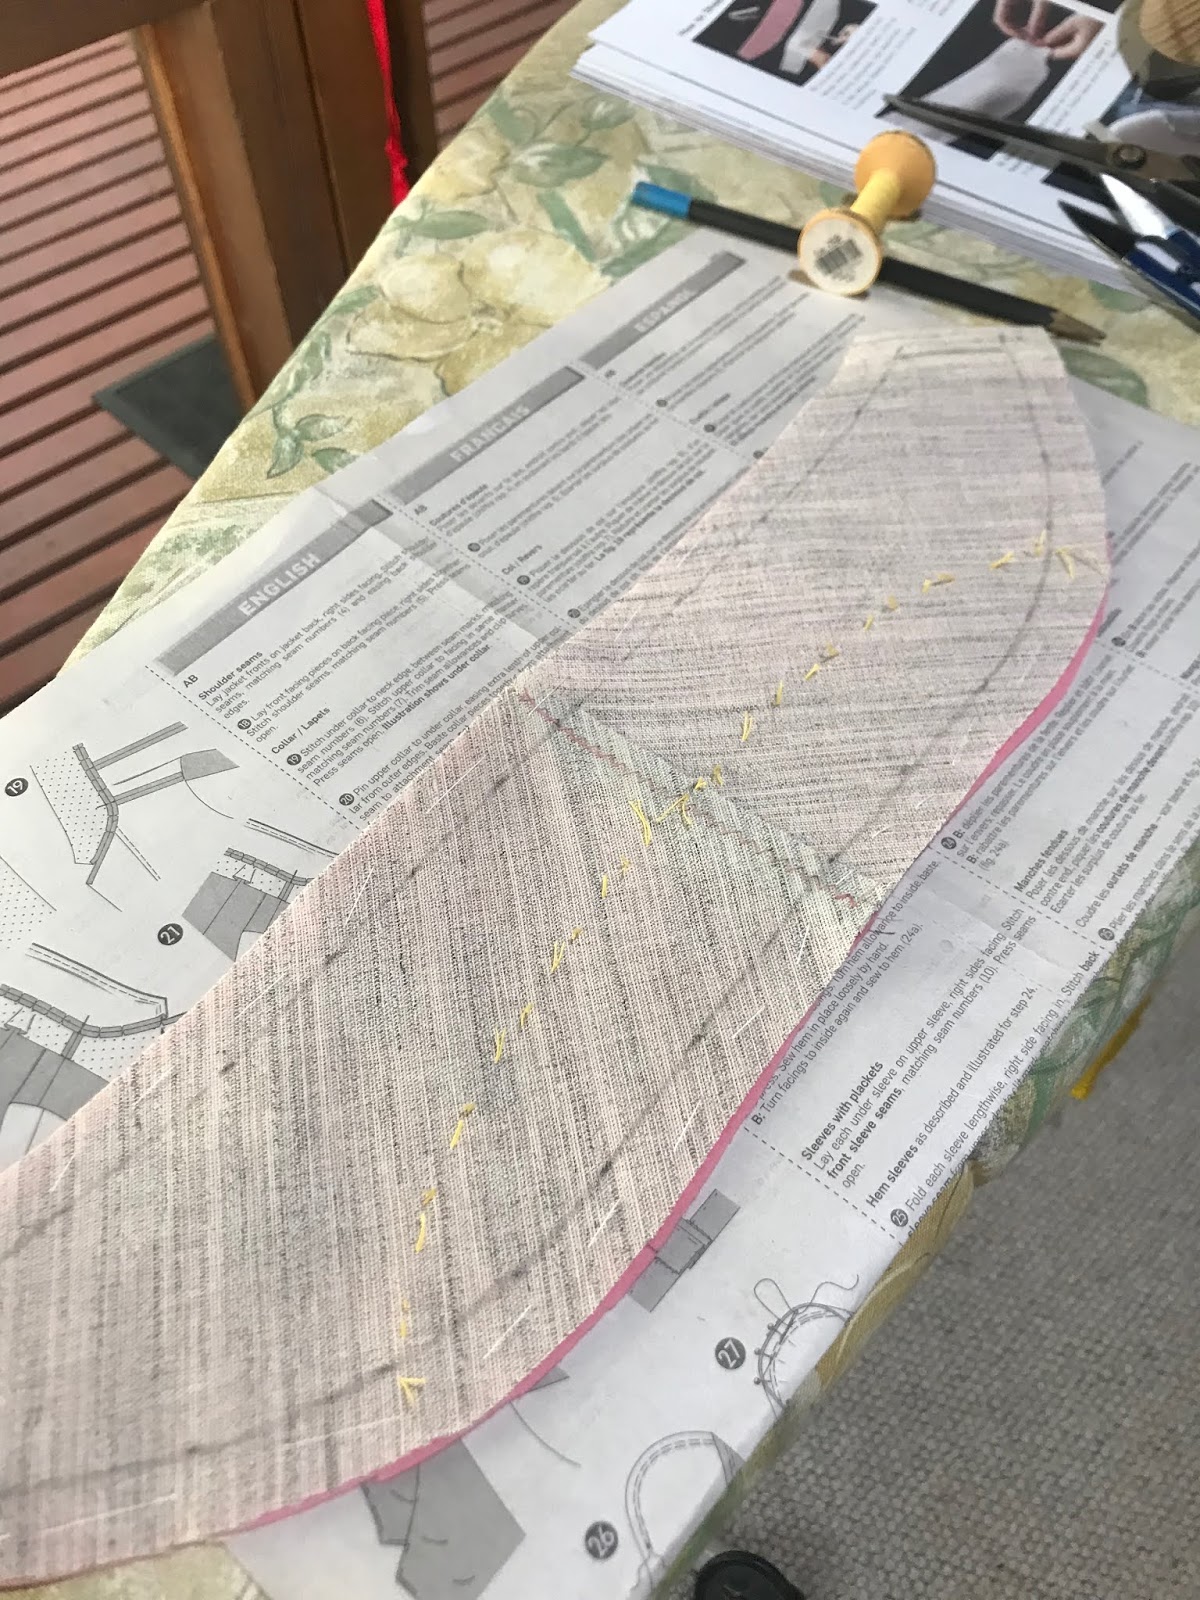
THE LAPELS
Using the facing pieces as a guide, I cut out hair canvas. I made them 1 inch wider than the facing pieces, scooping above the bust point and out to the side seam, a few inches below underarm.

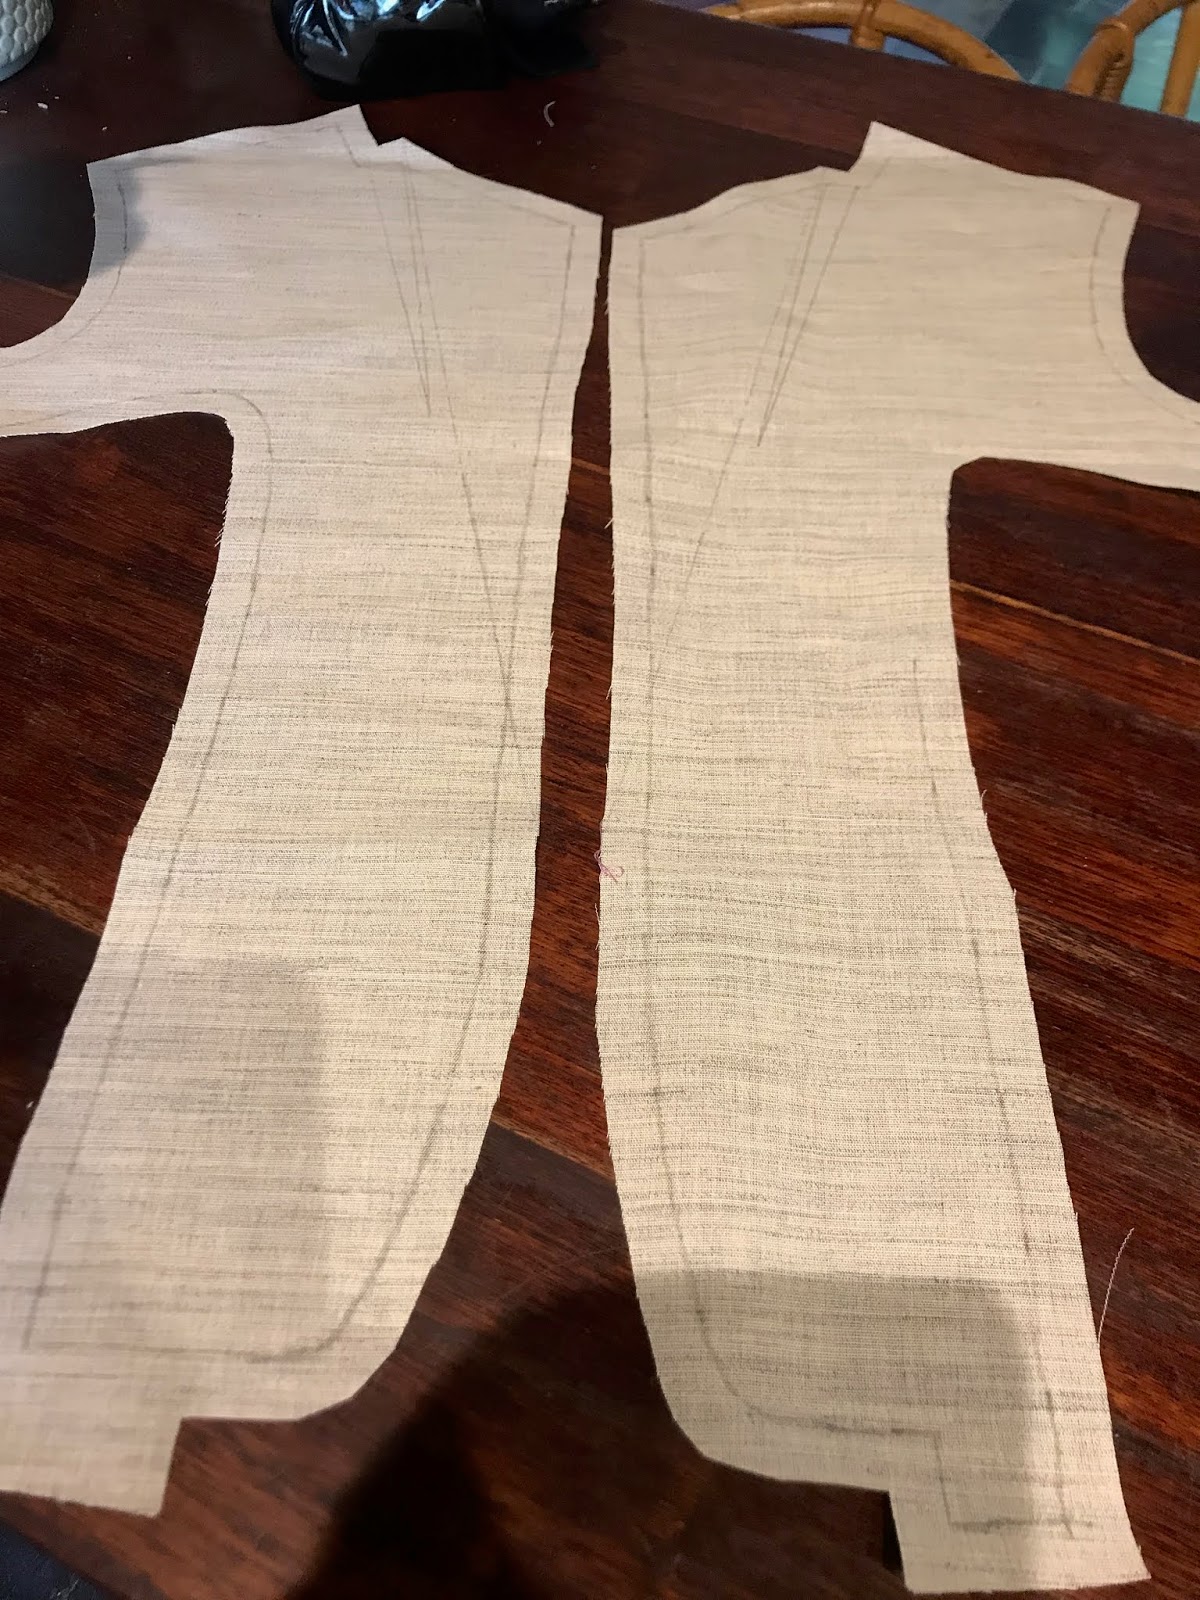
I cut out extra canvas to reinforce the shoulder, upper chest where it naturally wants to cave in. This I secured to the canvas with rows of machine basting stitches, spaced about 2cm apart from each other.
I then cut out the dart in the canvas and used iron on interfacing to close it. Once closed I secured the edges with a zig zag stitch.
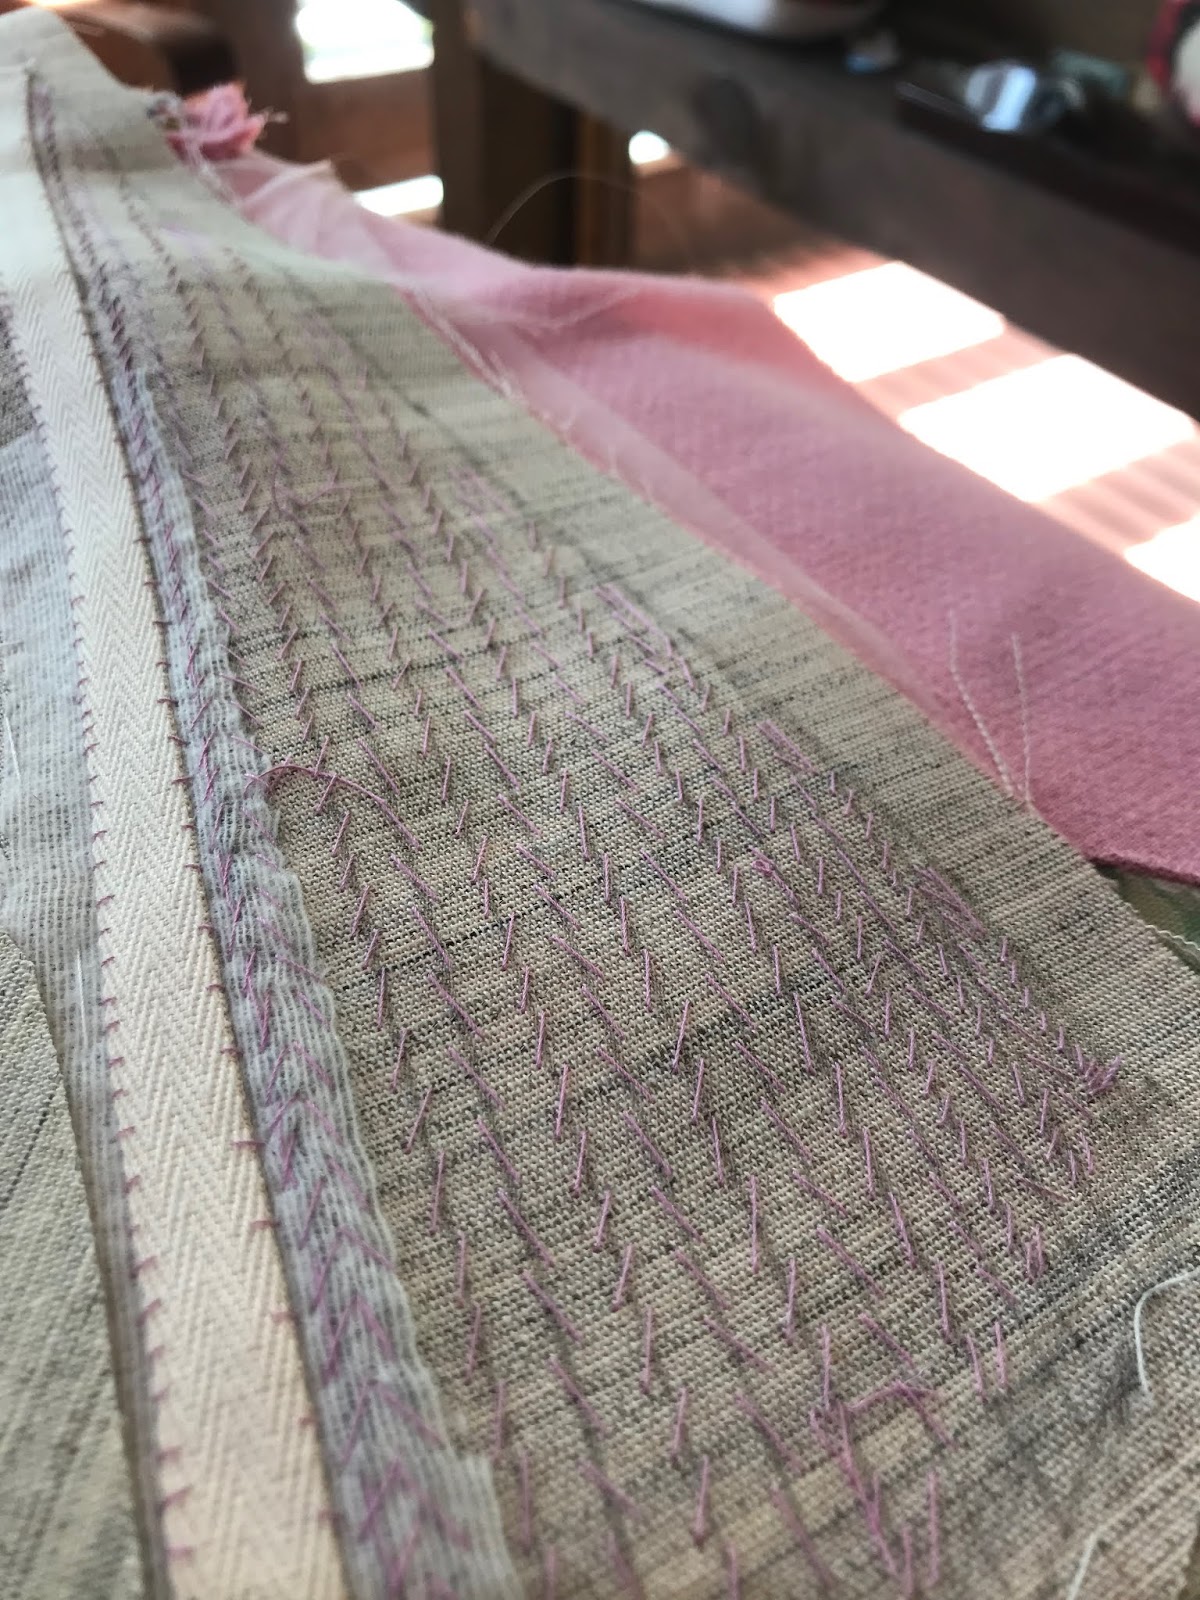
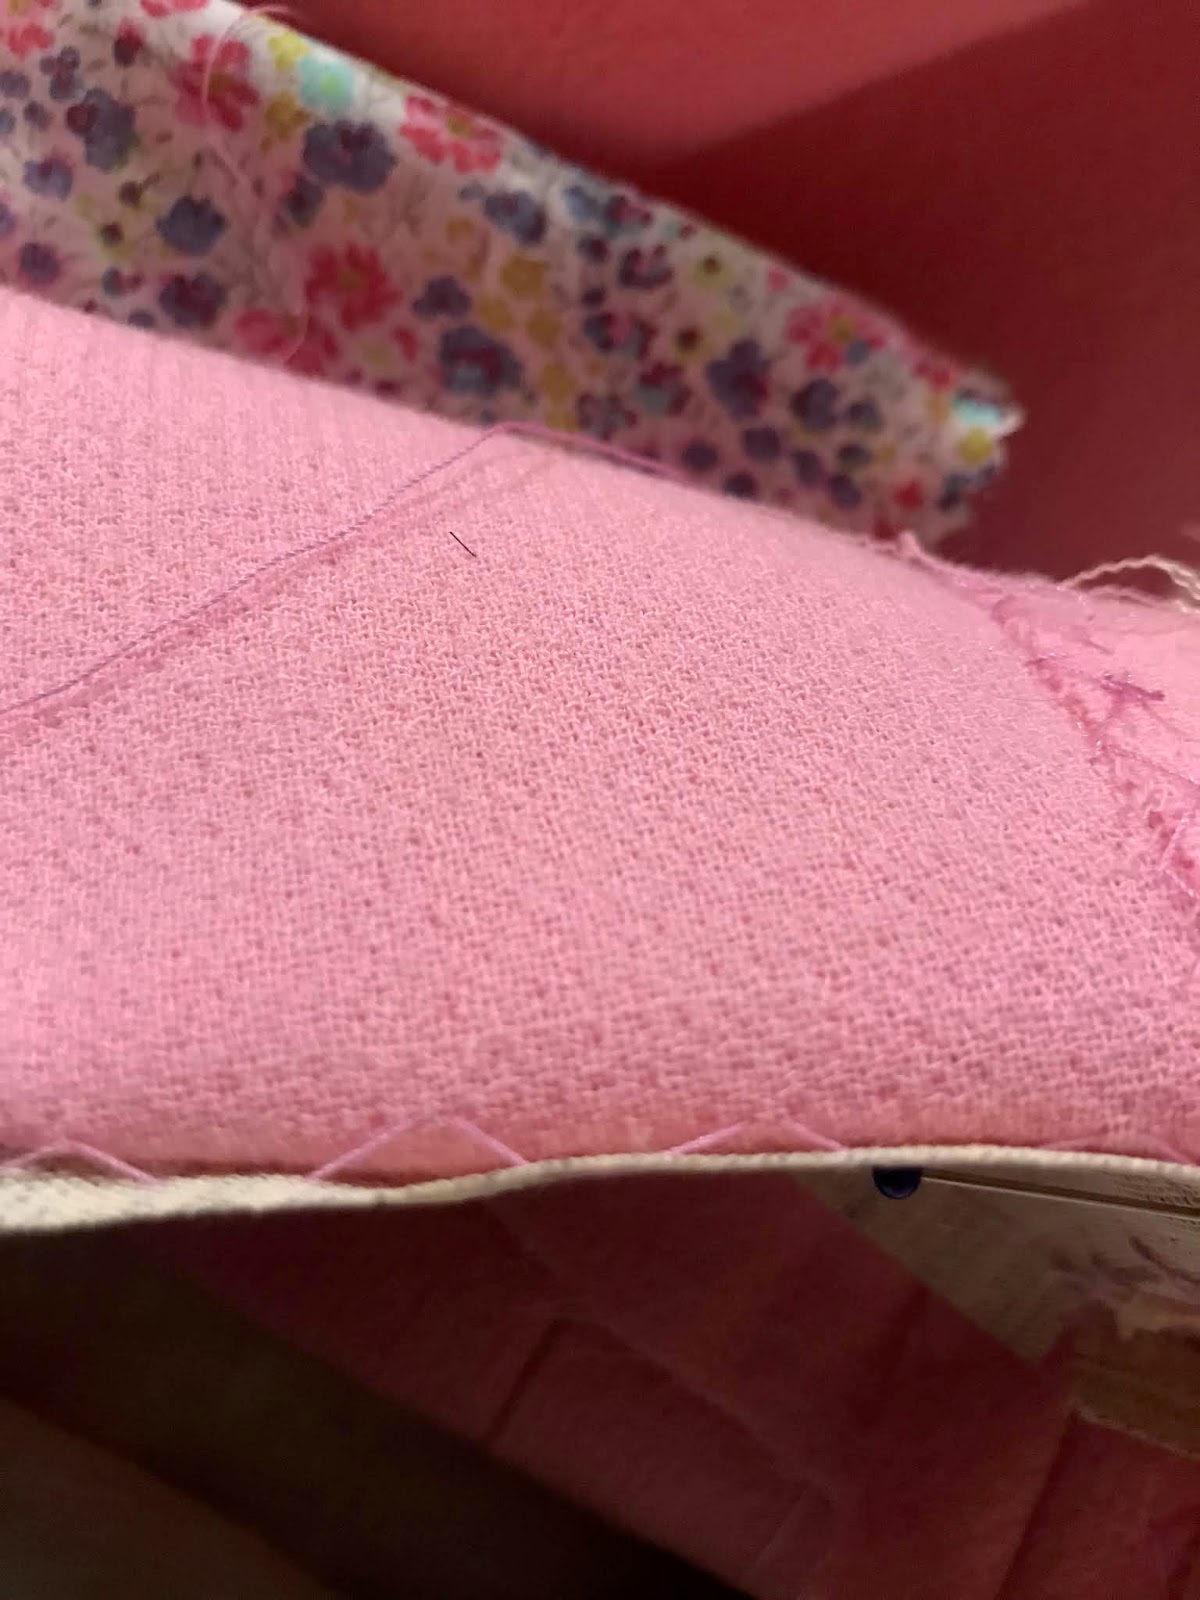
Next I marked the roll line and pat stitching lines for the lapel, which all run parallel to the roll line.
The line next to the roll line and in the corners of the lapel were spaced 3mm apart, and 6mm for the rest of the lines. (narrow on and next to the roll line and in the corner of the lapel).
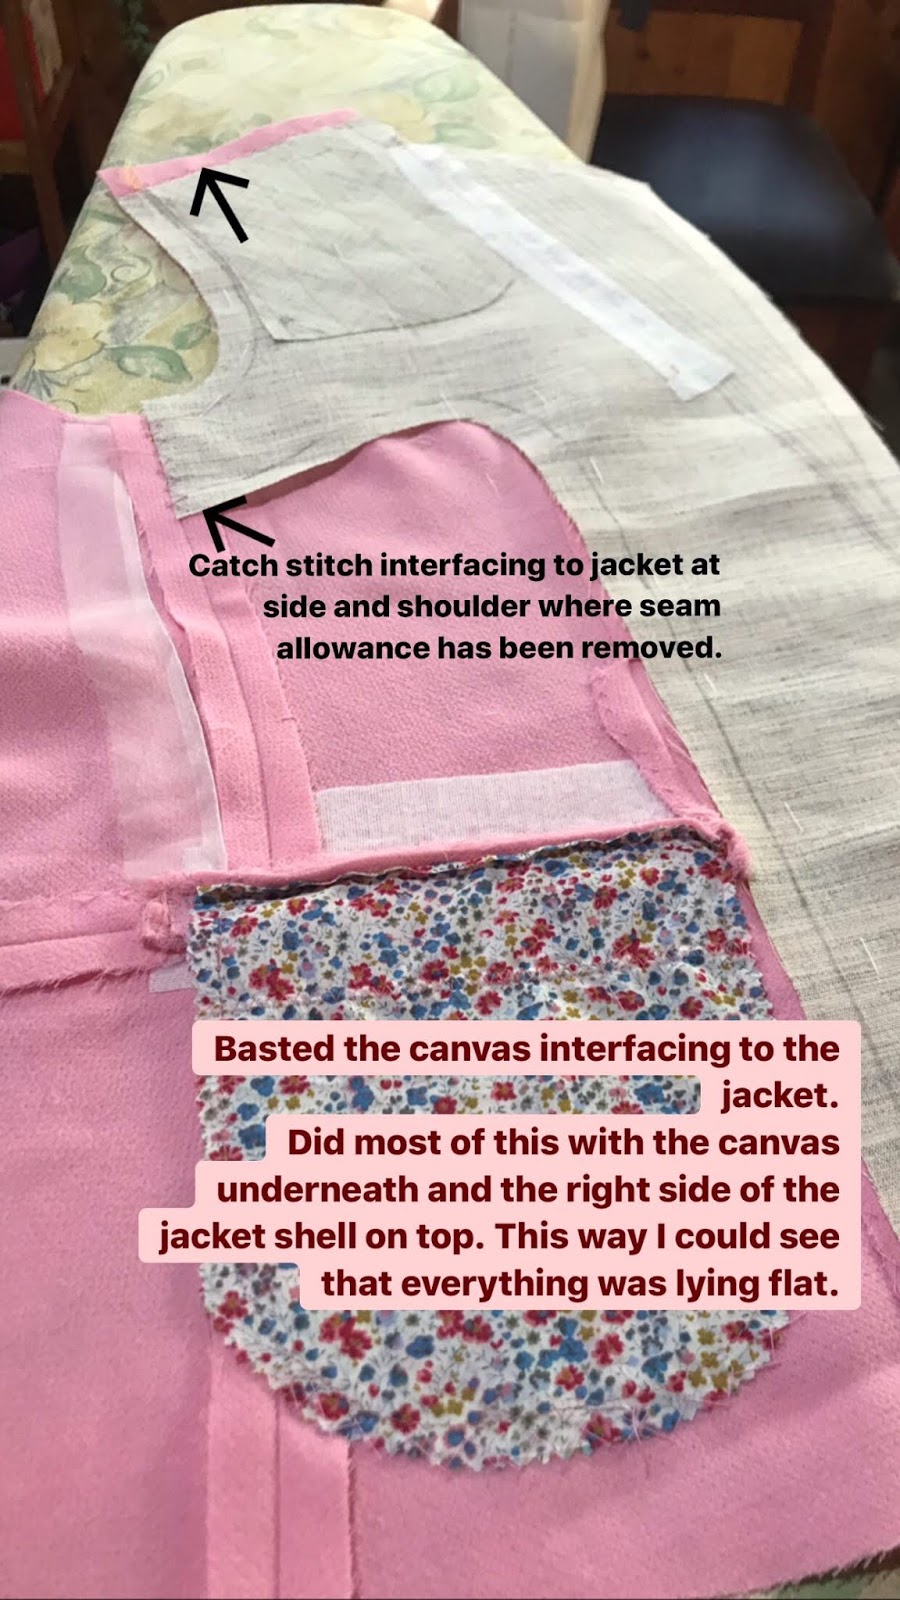
The canvas was then basted to the garment with long tailors tacks in silk thread. I positioned the garment right side up when basting to make sure it was smooth and there were no puckers.
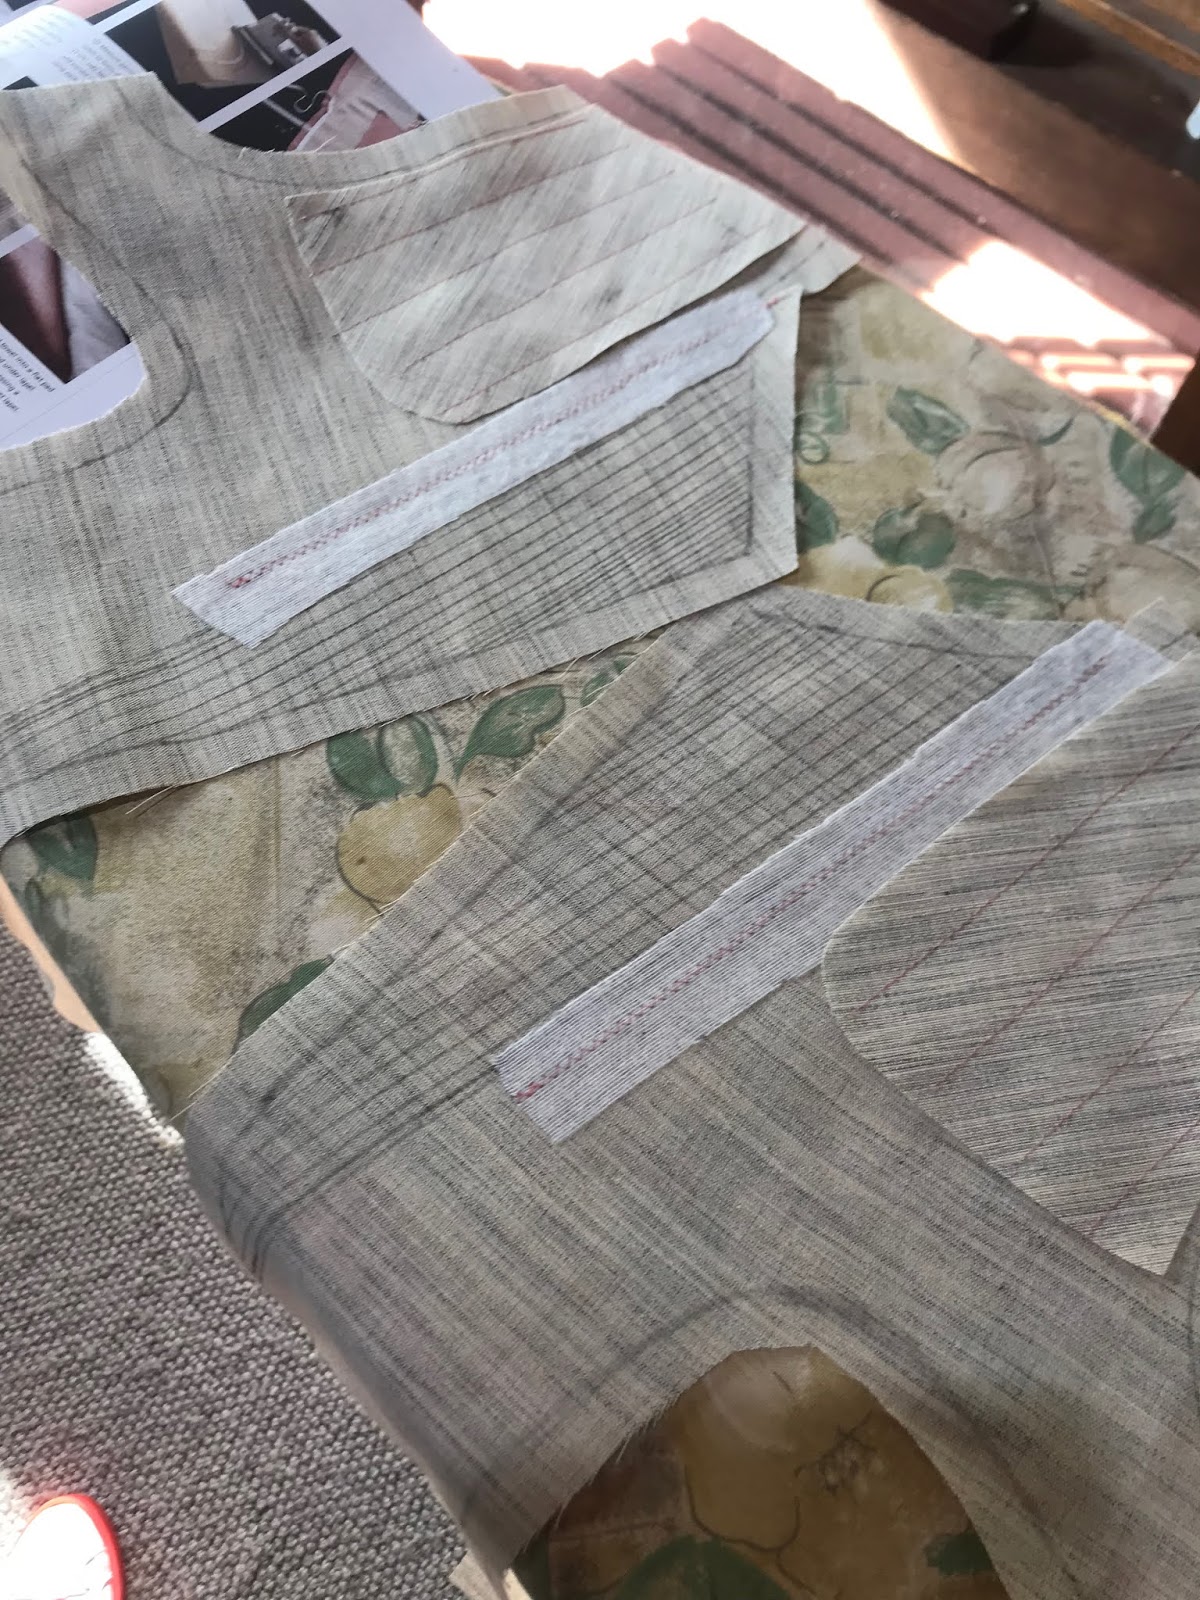
I then removed the canvas seam allowance of the shoulder and side seams and catch stitched them to the garment.
The seam allowance of the arm hole is kept on to give the underarm area, a high stress area, extra support.


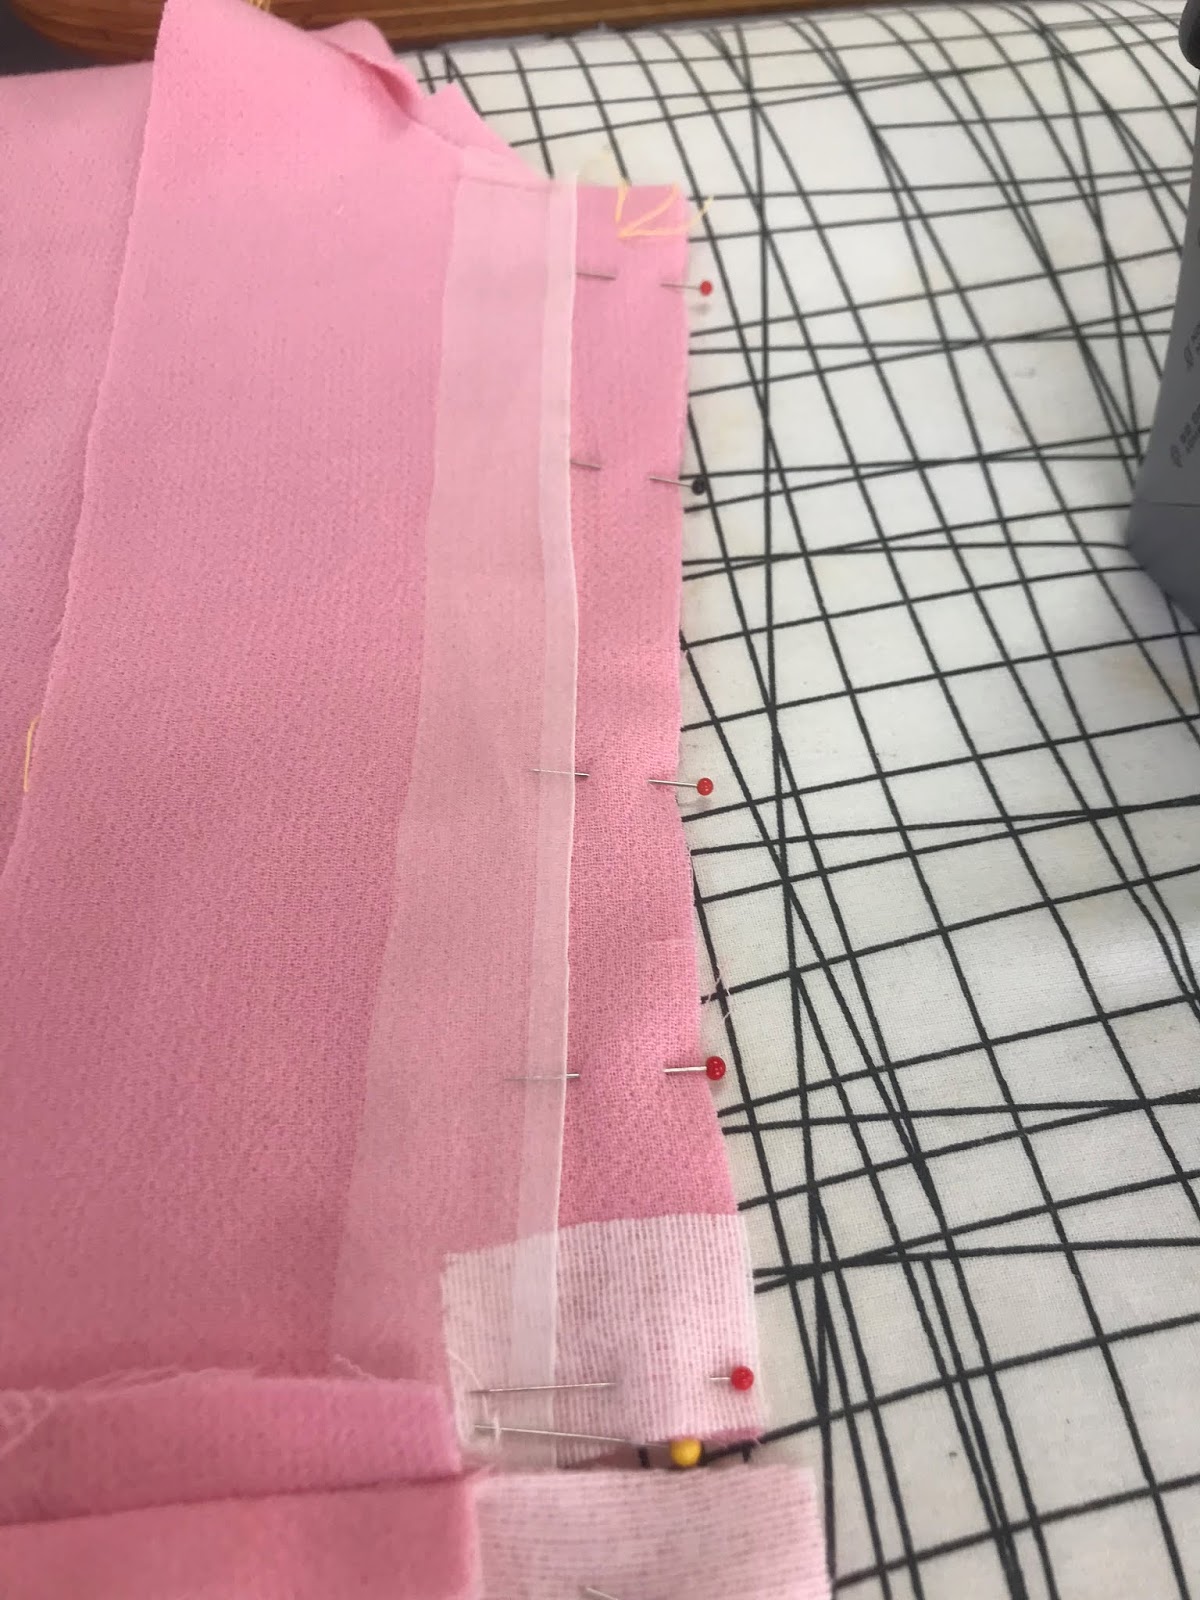
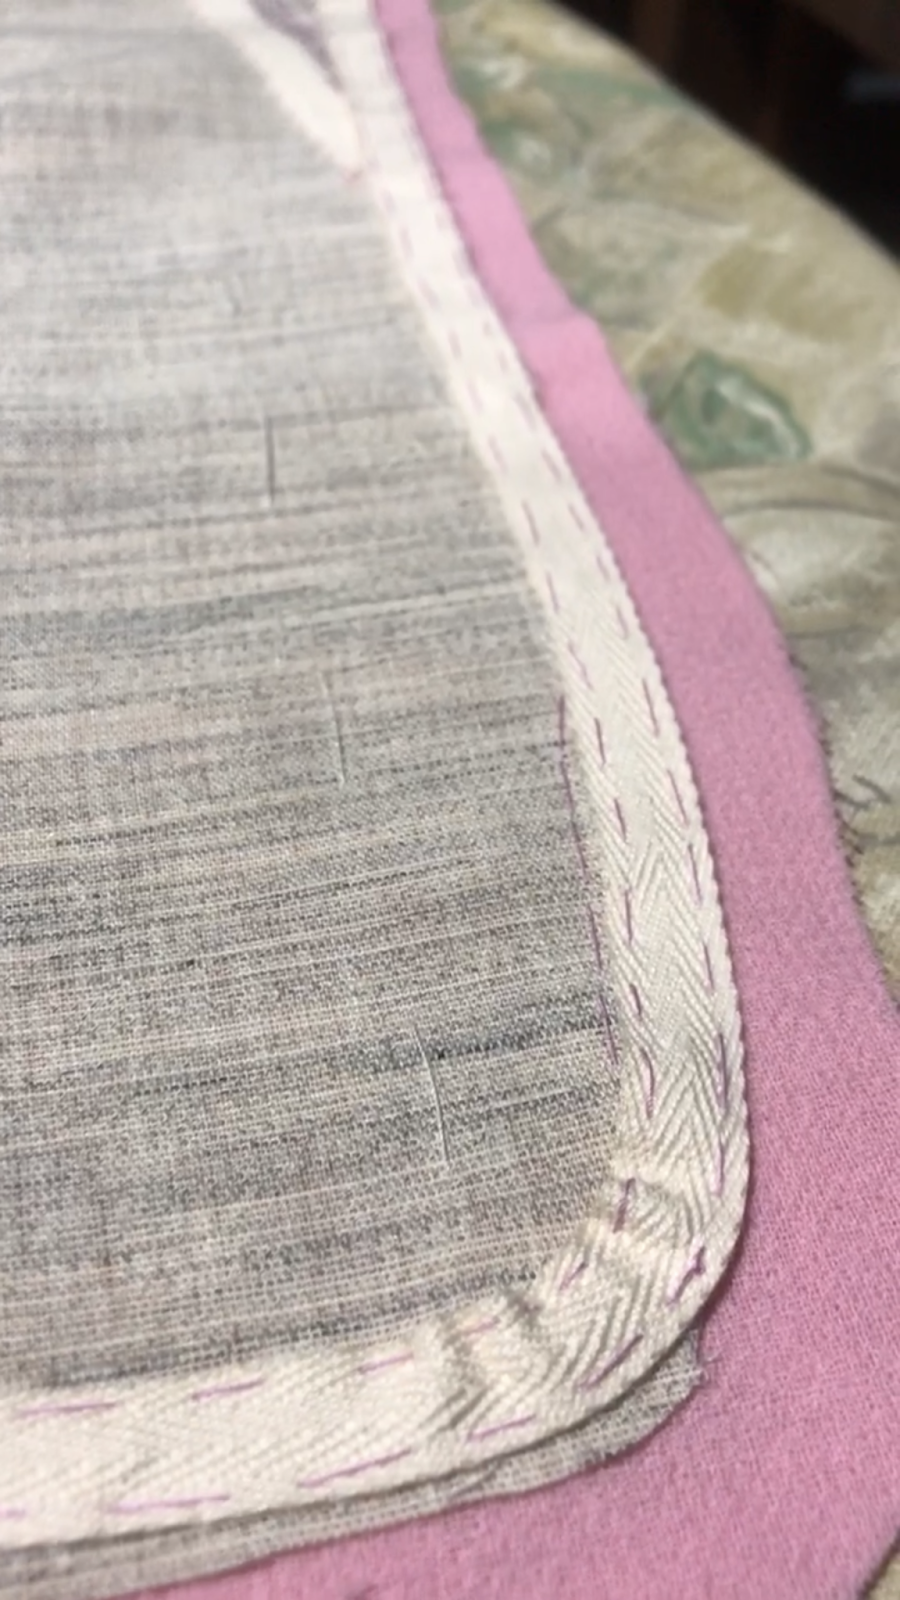
Next I hand fell stitched cotton twill tape just shy of the roll line. I cut the tape 1cm shorter and eased it over the length of the roll line. This helps curve the lapel slightly, to accommodate the natural curved shape of the chest.
Pad stitching is the art of sewing together the two layers of fabric, the garment and the canvas interfacing, to act as one.
It is done using small hand stitches that run along and parallel to the roll lines of the collar and lapel. When done correctly these stitches are almost invisible on the right side of the garment.
When stitching, the fabric and canvas is rolled over the index finger to encourage a curve in the fabric. Smaller stitches are made at lapel corners and at the roll line to set the roll line and to make corners of lapels and collars turn slightly to the body, rather than sticking out.
I pad stitched the canvas to the garment, with shorter narrower stitches on and next to the roll line, and at the lapel corners.
Generally, if your lines are 3mm apart, then the stitches on those lines are 3mm long. If it's 6mm apart the stitches will be 6mm long etc.

I then removed the seam allowance of the canvas only (not the garment fabric) from the collar notch down to the hem.
Once the seam allowance of the canvas was removed I hand stitched the tape along the seam allowance of the lapel, starting from the collar notch down to the hem with permanent uneven basting stitches. These stitches are not visible from the right side, and are made uneven to prevent a pattern showing on the garment front.

Setting the Roll line
Once all the pad stitching was complete, it was time to set the roll line in place.
I placed a damp folded towel (about 1cm thick) between the jacket front and the lapel along the roll line. I then steamed it thoroughly without letting the iron actually touch the lapel and left to dry over night.
Once it had dried the pad stitches were set and there was no way that lapel was going to fold anywhere but the roll line. Success!
Adding the Facings to the Lapel
Now it was time to attach the facings to the lapel and see all the magic come together!
I cut the lapels 1cm wider than the pattern along the roll front edge all the way down to the them.
This creates a graded seam to help minimise bulk and the extra width gets folded over the twill tape and catch stitched down.
The longer seam allowance meant a flatter edge, and makes stitching the seam allowance down easier. Stitching the lapel seam allowance down, keeps the joined seam edge rolled slightly under and flat to the body.
The corner of the lapel is also cut on the diagonal to remove bulk.


Once the seam allowance has been folded over and stitched down, the lapel facing gets turned to the right side and that's where all your hard work starts to pay off. Look at that lapel!!
THE BACK and SHOULDERS
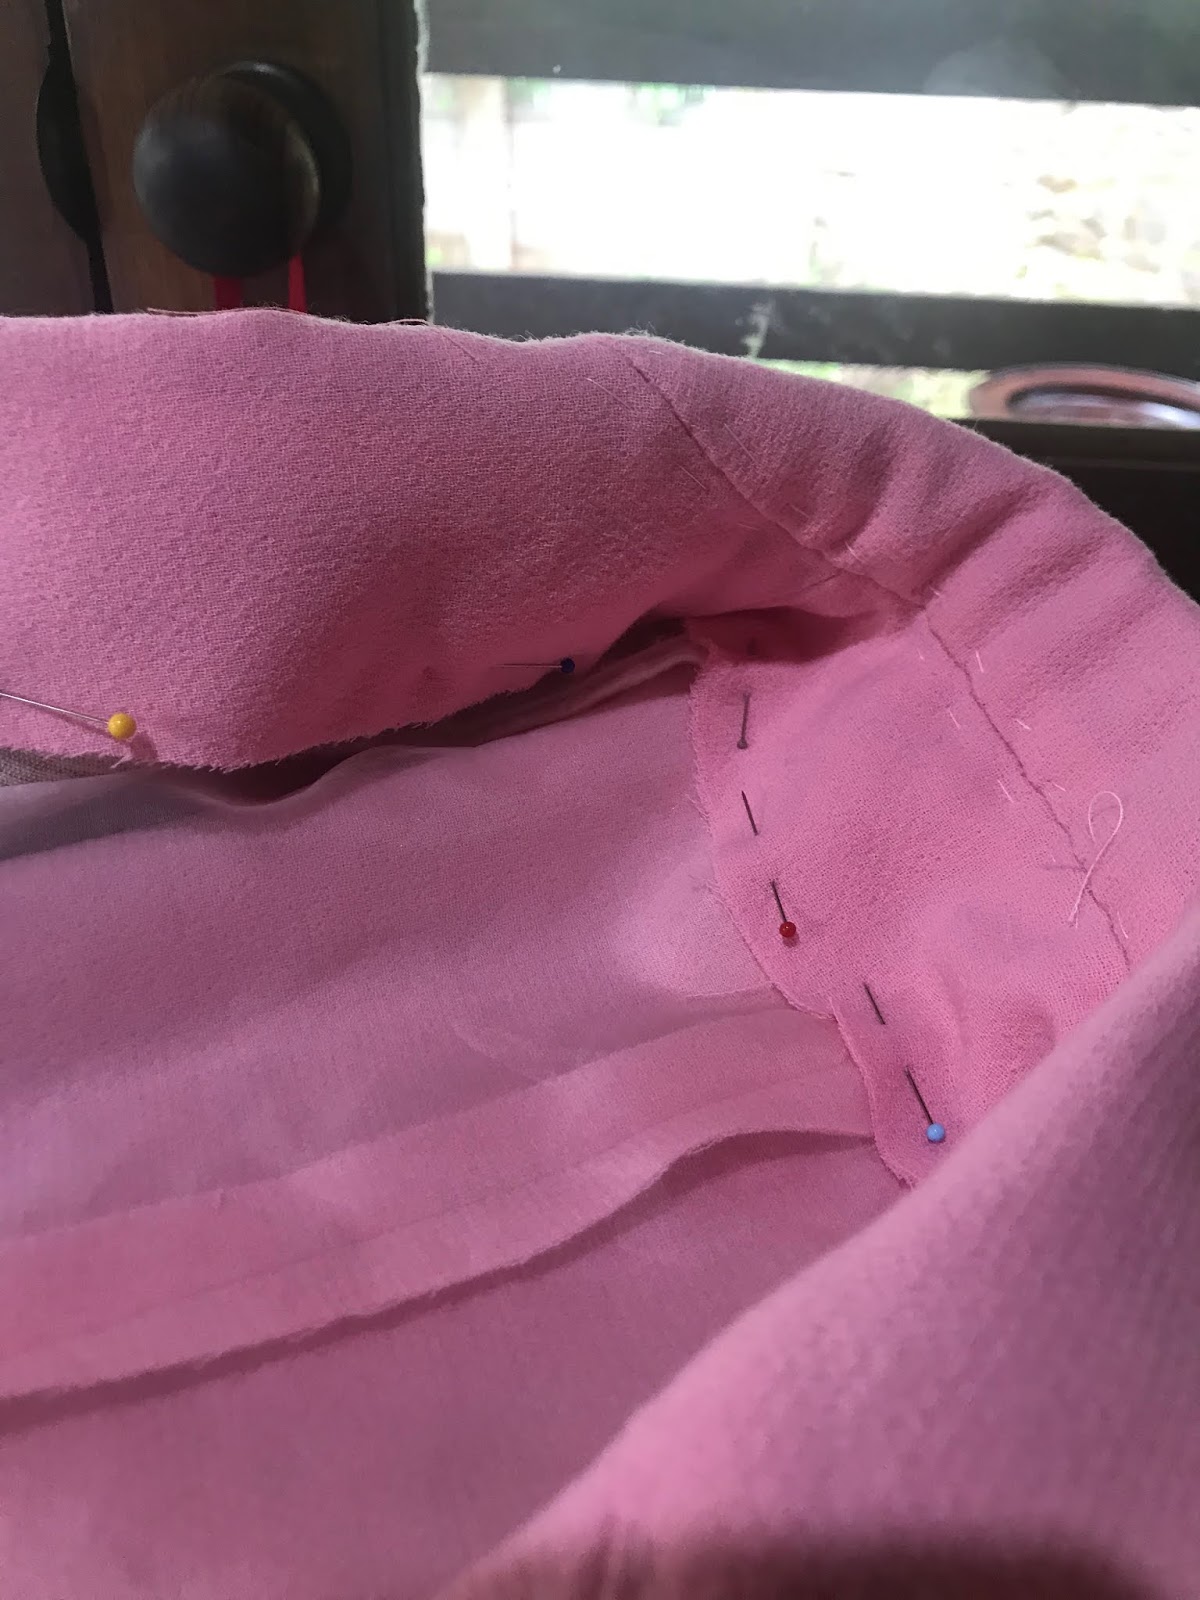
I drafted a back stay to stabilise the shoulders and give extra support in the areas such as the shoulder blades which is another high stress area.
I cut the back stay on the fold in silk organza and pinked the bottom edge. It was then hand basted to the garment back at the shoulders and underarms and catch stitched to the side seams.

Front and backs were then pinned together at the shoulders.
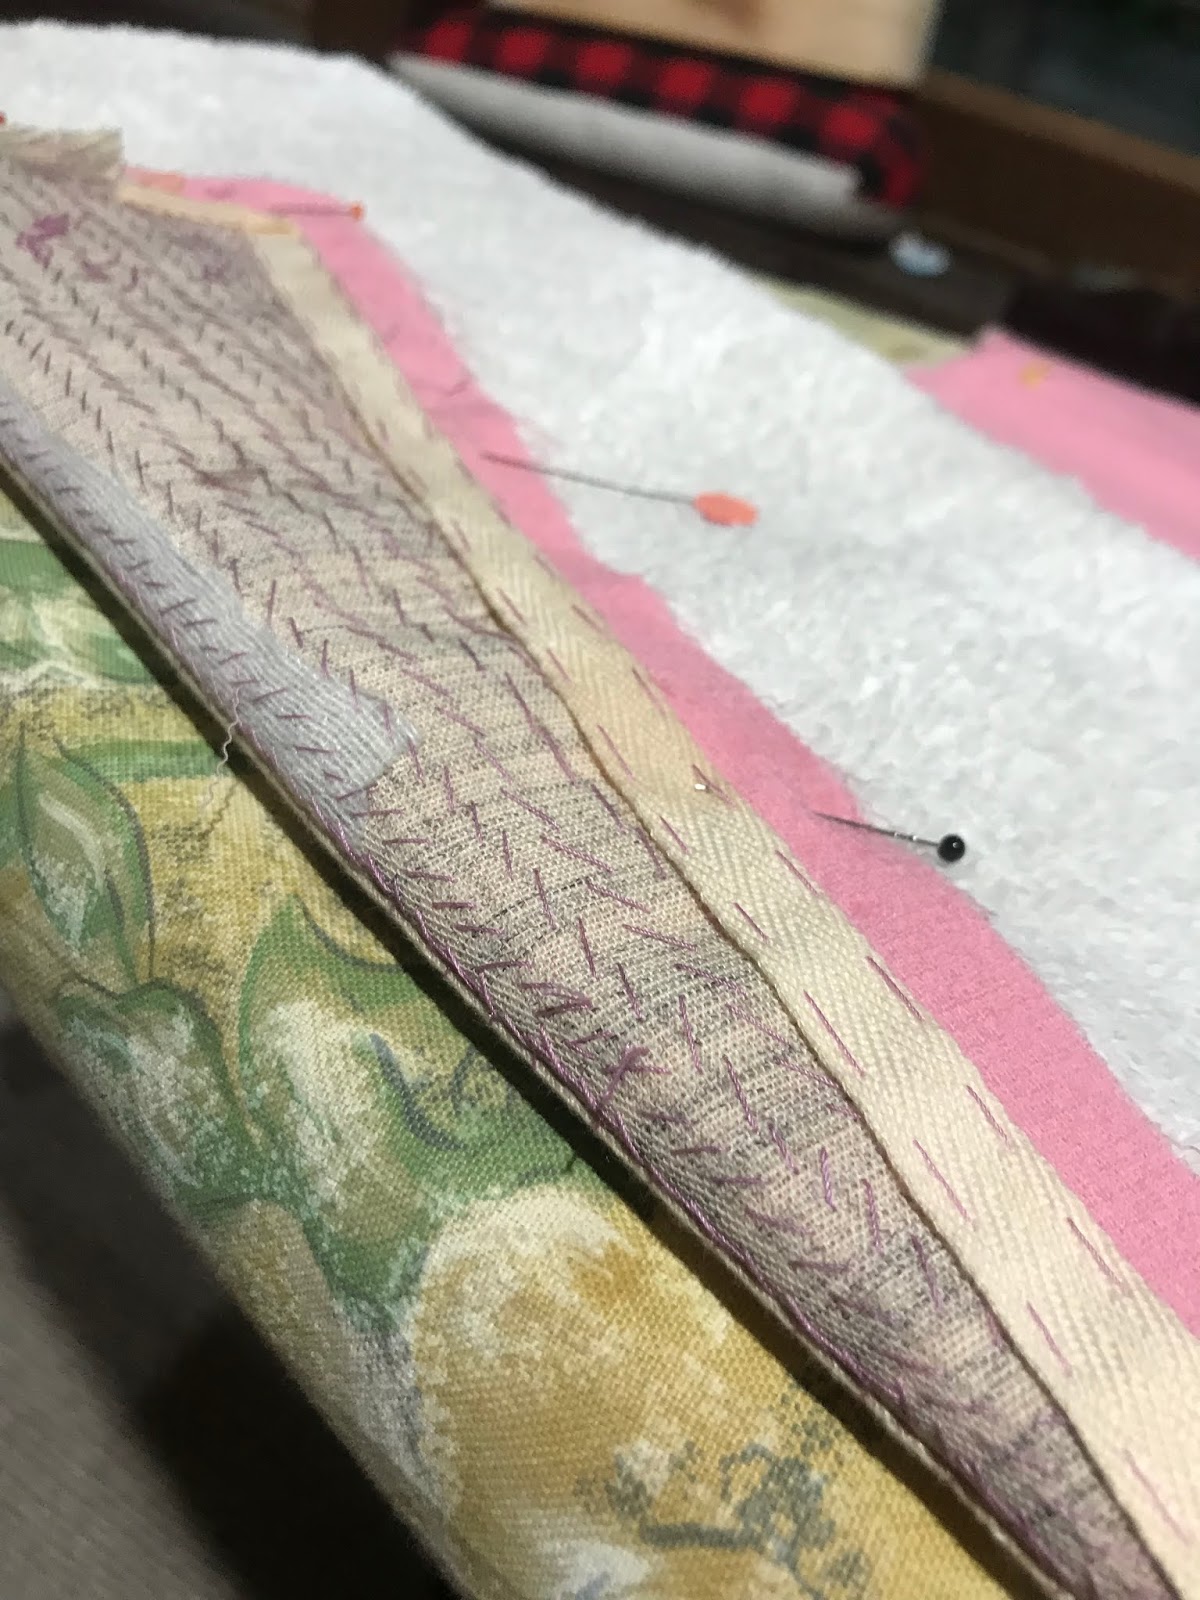
A 1cm wide cotton twill tape was pinned along the front bodice shoulder, centred over the seam line. I cut the tape half a cm shorter than the seam line and eased it over the entire seam.
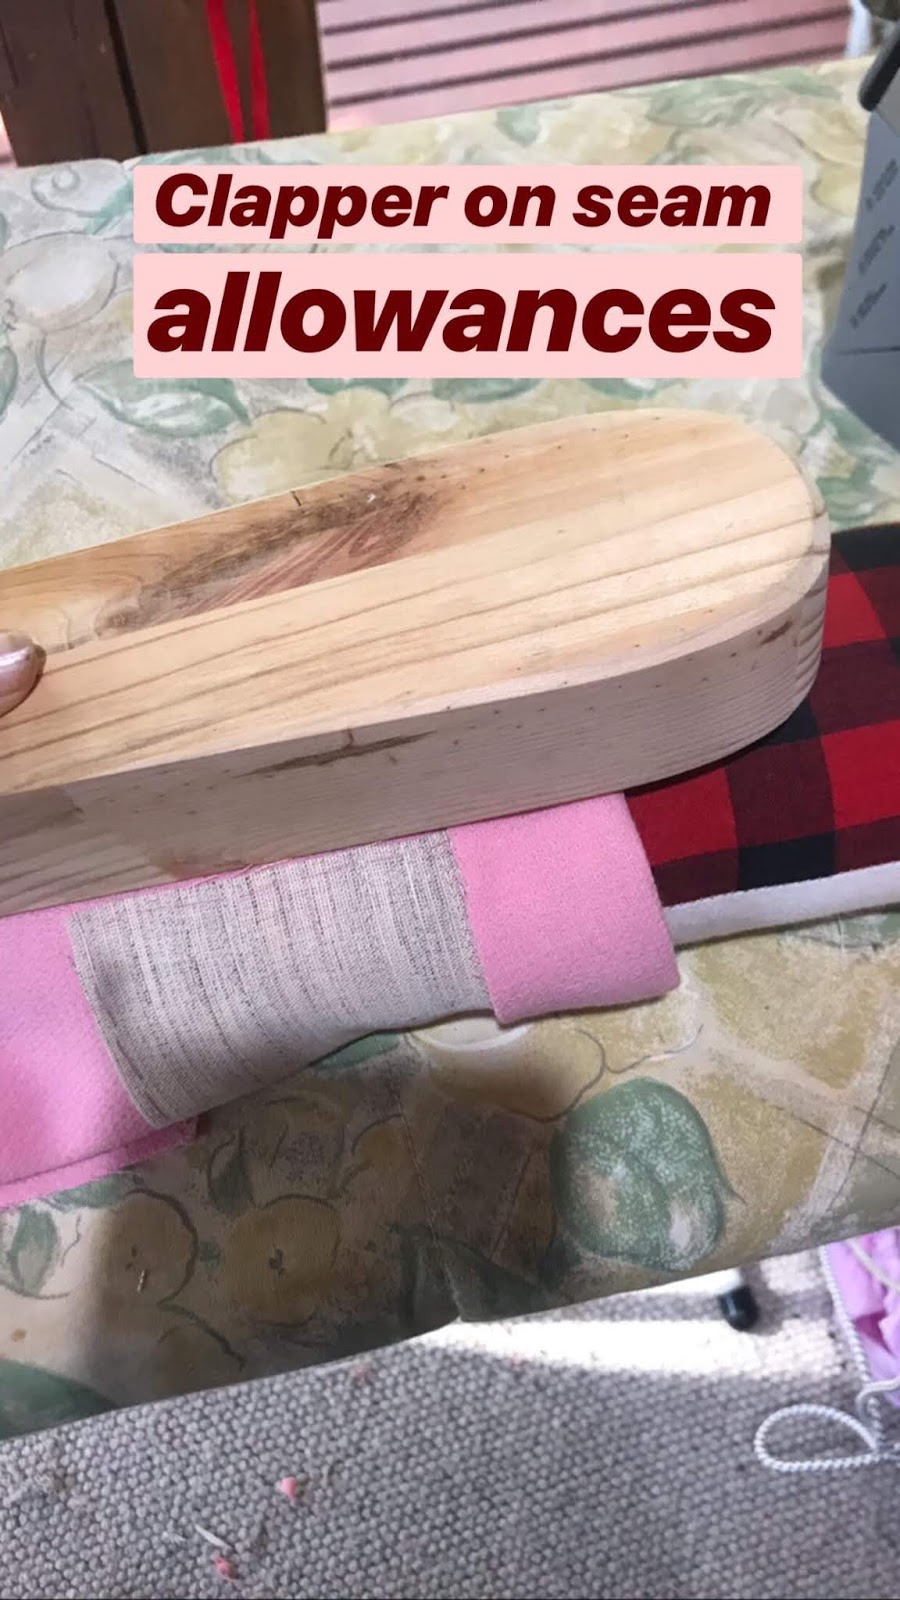
Once attached I then used the clapper to flatten and set the seams.
The cotton tape along the shoulders reinforces a seamline that gets a lot of wear and pull, and stops it from losing its shape.

THE COLLAR
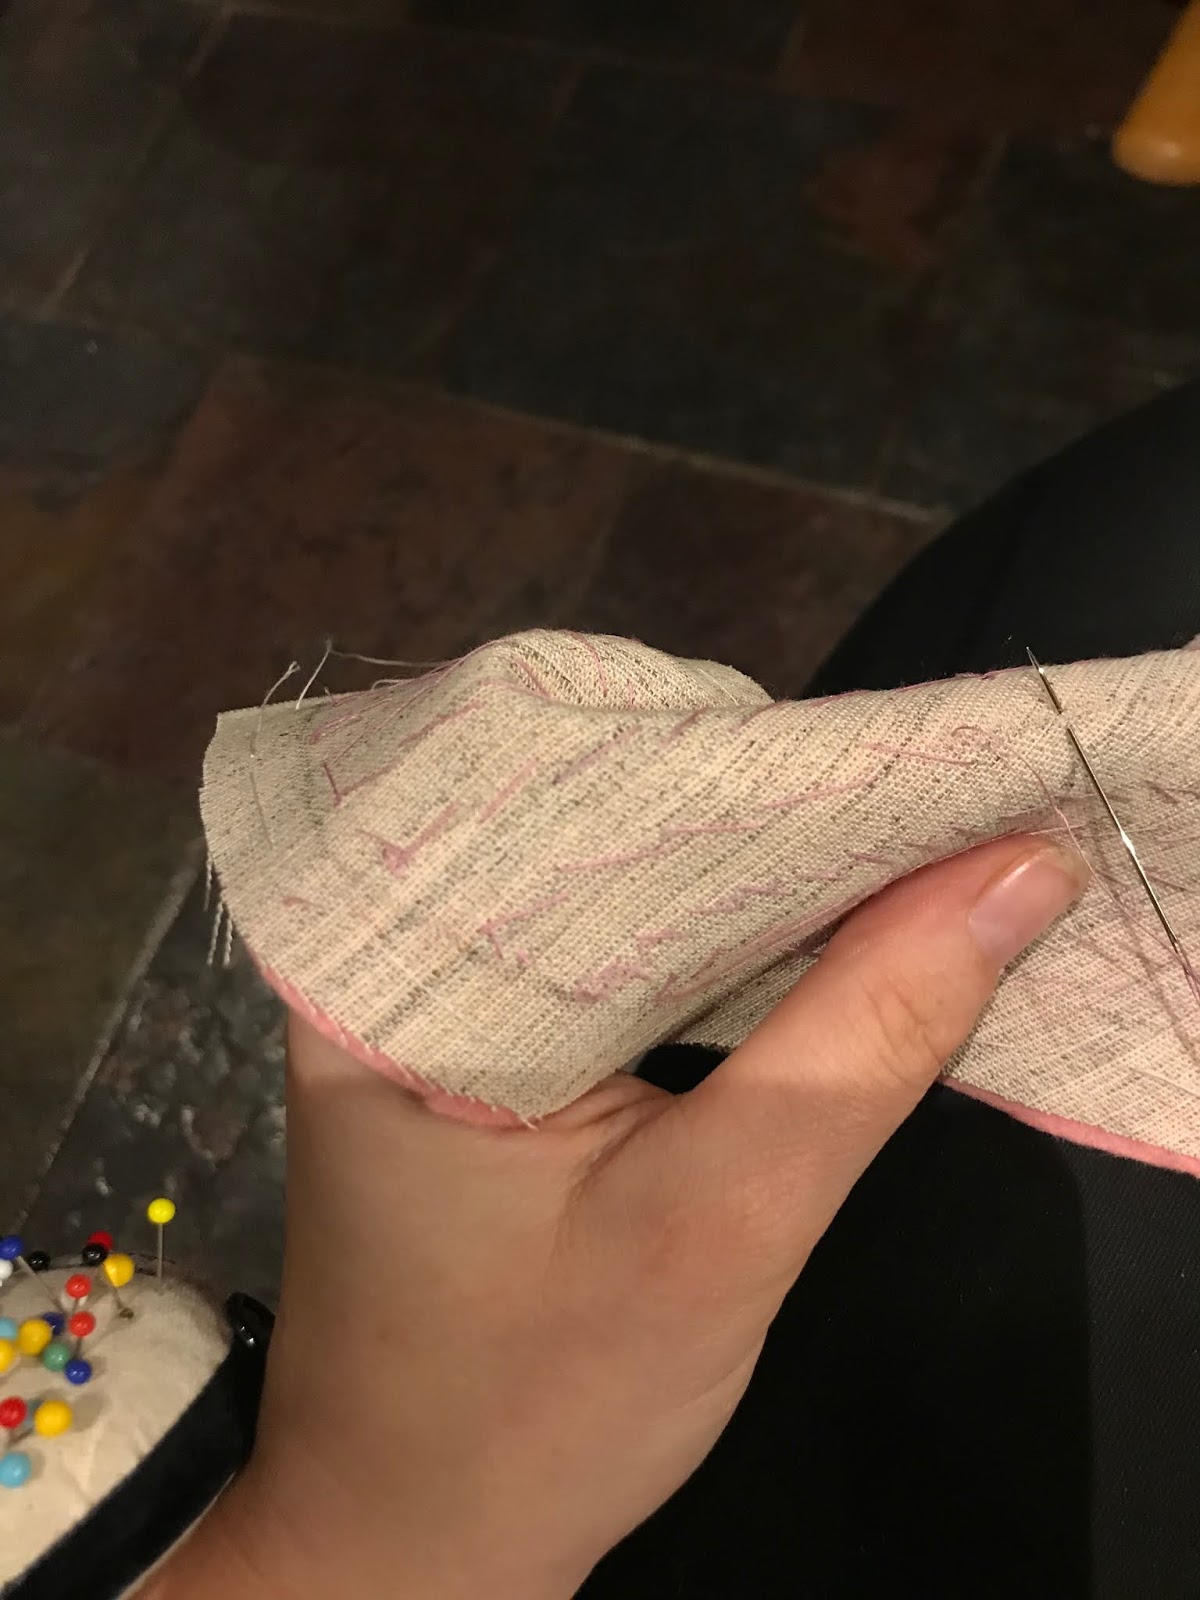
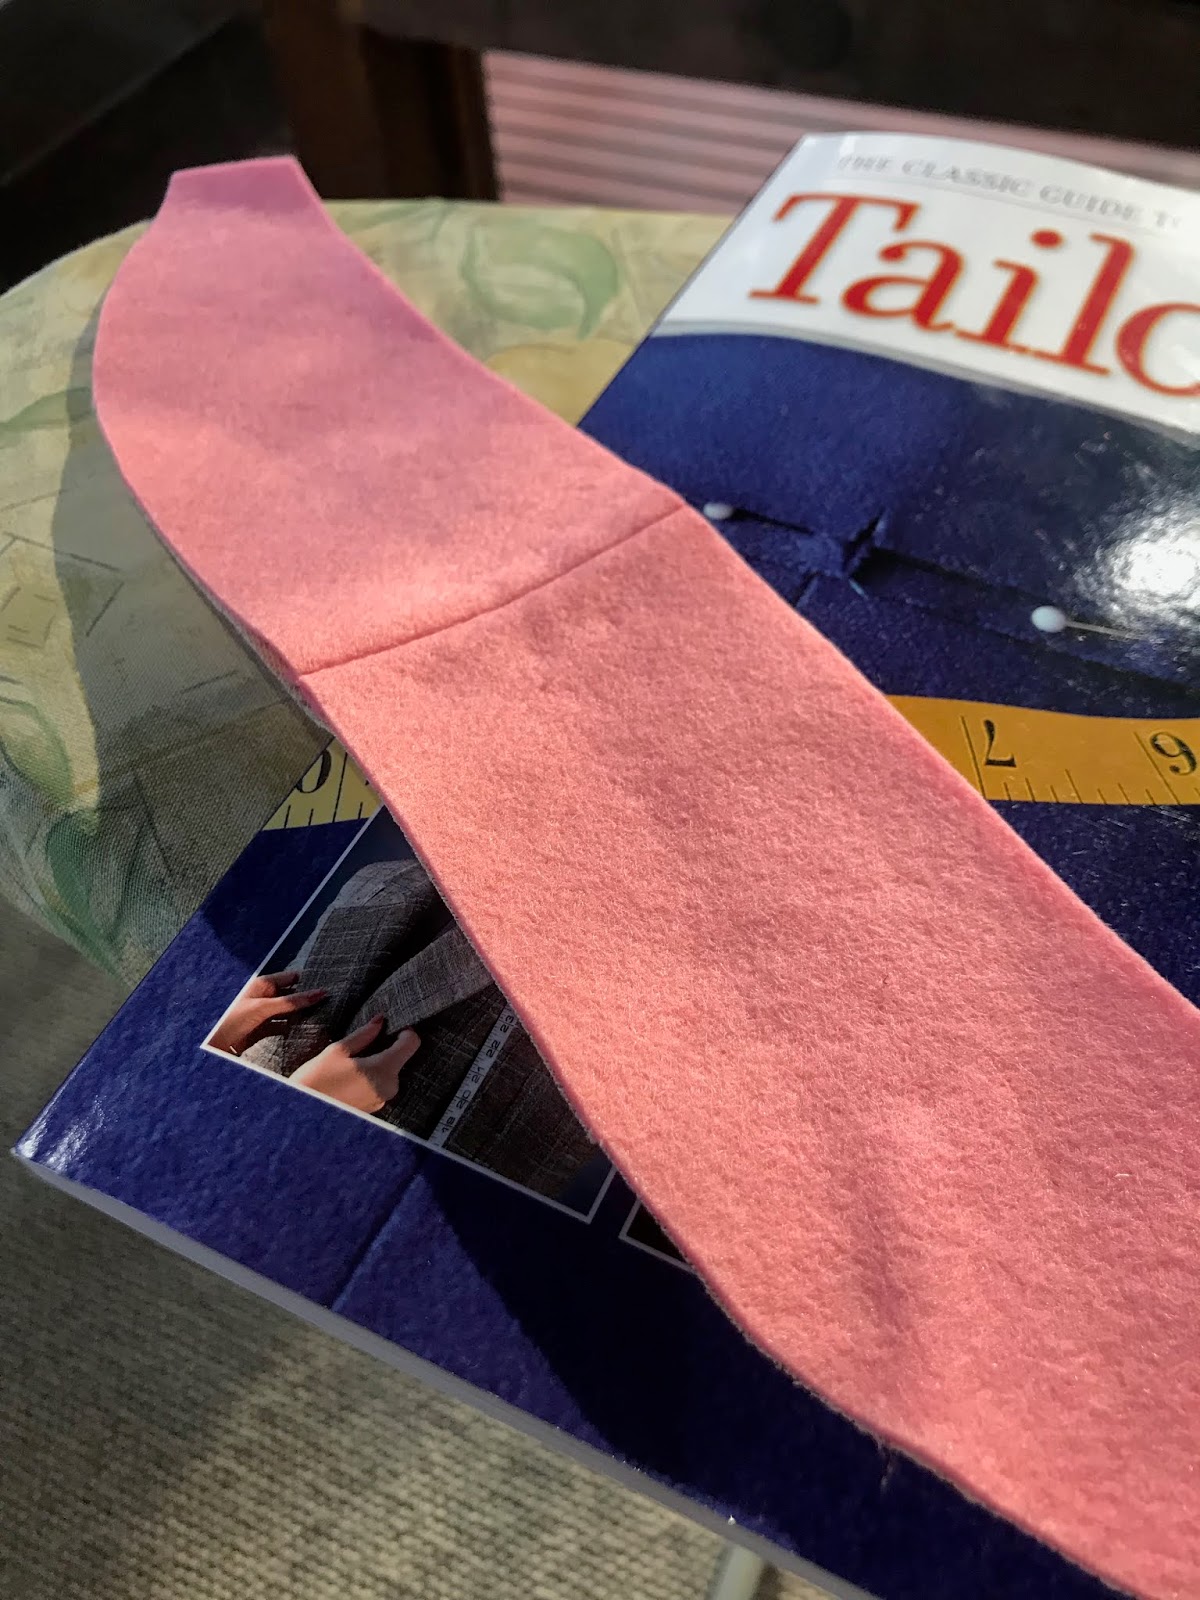
The UNDER COLLAR I cut as two seperate pieces instead of one on the fold. I also cut it on the bias to help it shape along the curve of the neck.
I used wool felt for the under collar instead of the garment fabric, which allegedly is one of the marks of a true bespoke jacket.

The seam allowance at the centre back was lapped to make it as flat as possible, and the canvas hand basted to the wool felt within the seam allowance.
I created a roll line as the pattern piece didn't have it marked on it. This I just sort of 'winged'.
I marked where the roll line ended on the lapel and tried to match that up on the under collar. I then curved it up to the middle of the centre back neck seam, where the collar folds over.
First I invisibly basted the canvas and the felt along the roll line.
I then pad stitched the under collar following the curve of the roll line, with narrow stitches and lines on and below the roll line (and in corners of collar) and wider lines and stitches above roll line.

I removed the seam allowances of the under collar, and cut the canvas just slightly shorter so that it wouldn't poke out and be visible.
I then pinned it to a sewing ham and gave it a really good steam, without letting the iron touch the actual fabric or canvas. The steam helps set the roll line, but you don't want a sharp crease.
I then left it overnight to dry.


Once the under collar had dried I pinned it along the seam-line of the neck, lapping the neck seam allowance. I hand basted it into place, lining up the roll line on the collar with the roll line on the lapels and when I was happy that everthing was in the right place, I fell stitched it along theneck by hand.
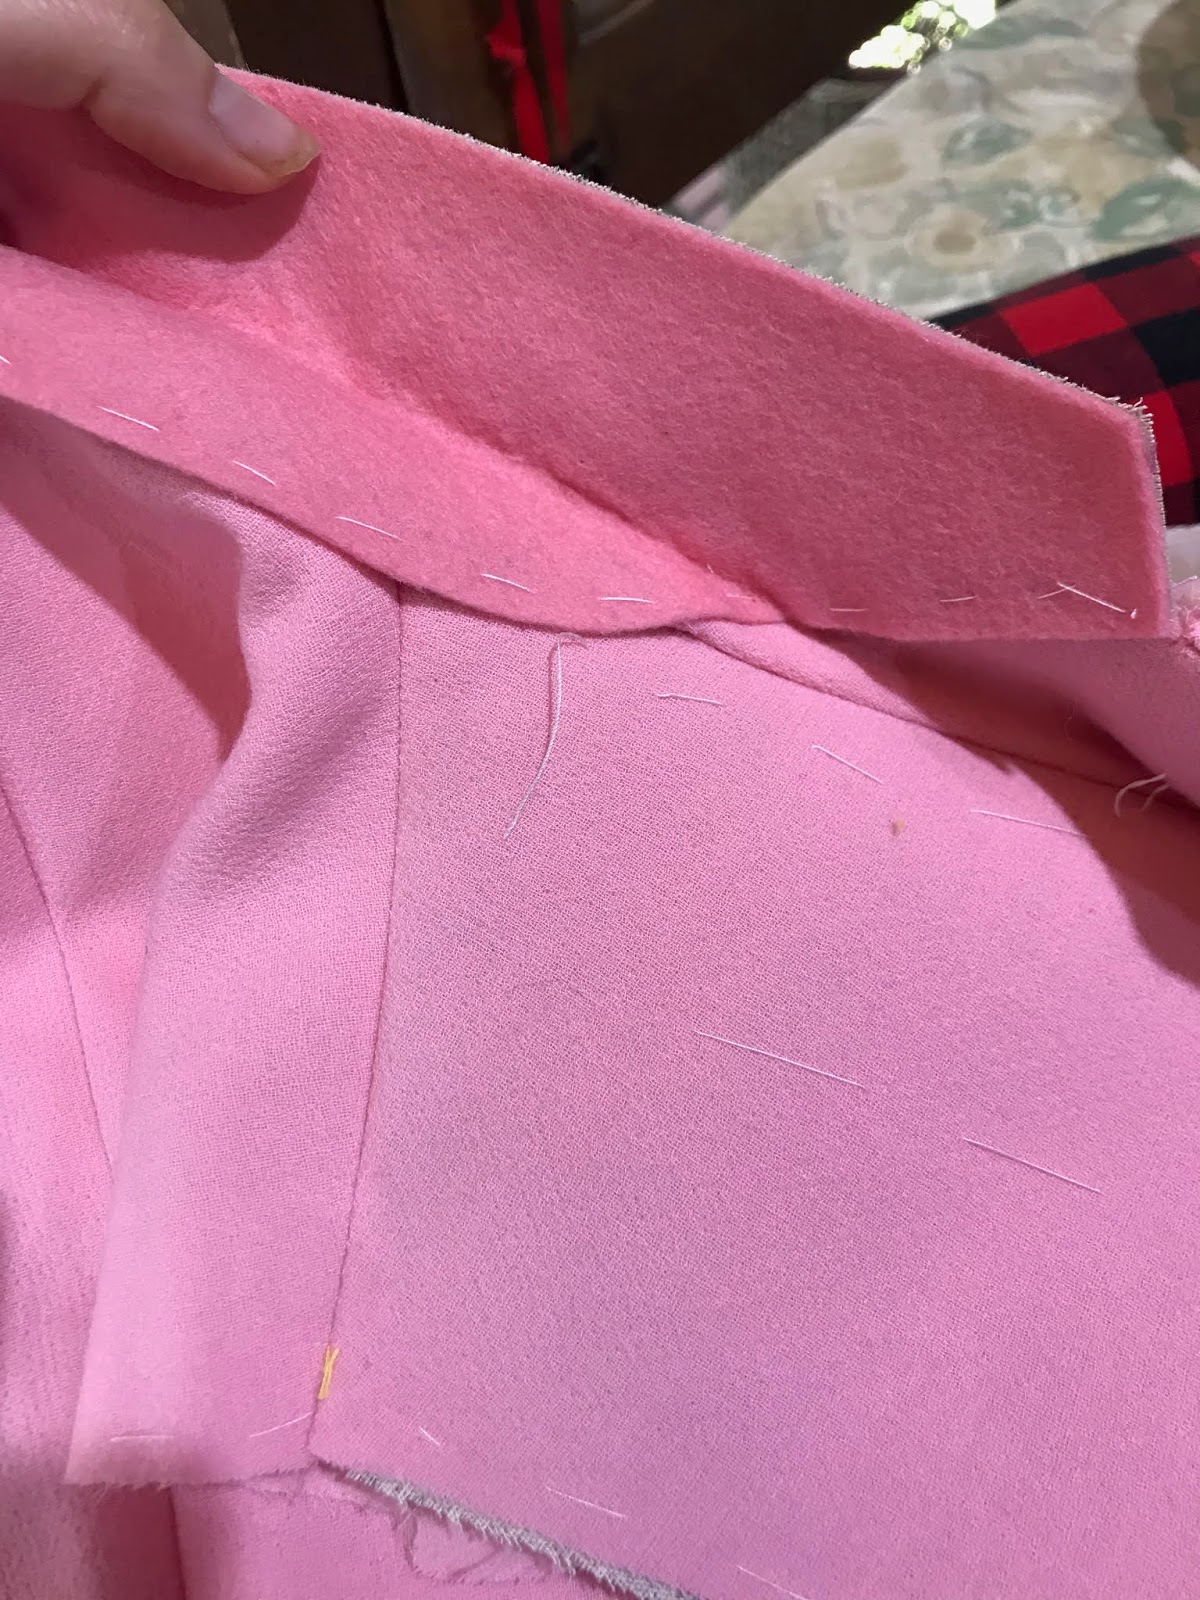

I pressed under the top and bottom seam allowances of the upper collar piece, and then basted it by hand to the under collar. I started along the collar edge (the top edge) beginning in the middle and hanging over the under collar ever so slightly so that the seam line is not visible when the collar is turned down.
Once positioned correctly I attached to the under collar using small fell stitches.


Next I basted the neck edge of the upper collar to the neck and gorge line (where collar meets lapel) and then used a slip stitch to attach.
Finally the seam allowance at the sides of the upper collar are folded over to the under collar and hand stitched down with a fell stitch.
This is allegedly a sign of a true bespoke tailored jacket, where there is no seam at the side collar, but a neat clean fold and the edge visible underneath.

Next I pressed the seam allowance under for the NECK FACING and slip stitched it to the seam line.
Sewing the collar and facings by hand means that the facings and collar are anchored to the neckline right where they need to be, and results in a cleaner attachment to such a bulky area that can easily get twisted or bunched when completing this area on the machine.

This is by FAR the neatest collar I have ever made. The control you have by doing it by hand is LEVELS above what I have been able to previously achieve on the sewing machine.
Yes it adds a bit more time, though not as much as you think.
Machine Vs Handstitching LAPELS
I always find the pattern instructions for lapels/collars/facings super confusing and inevitably mess something up.
Pieces end up fighting each other and fabric gets slightly pulled or puckered and doesn't sit quite right. I know I've often sat in front of my machine with the garment inside out thinking 'well I sure hope this works!'
Doing it by hand is much more intuitive because you can see where things need to go, and you can place them precisely. There is no estimating or hoping it works out when everything is inside out and half attached.
You can also control the slight roll of the upper collar so that seam lines along collar edge aren't visible. Even for future jackets where I don't do the full tailored methods, I think I will still sew the collar on by hand because it's relatively quick and the difference is so noticeable!
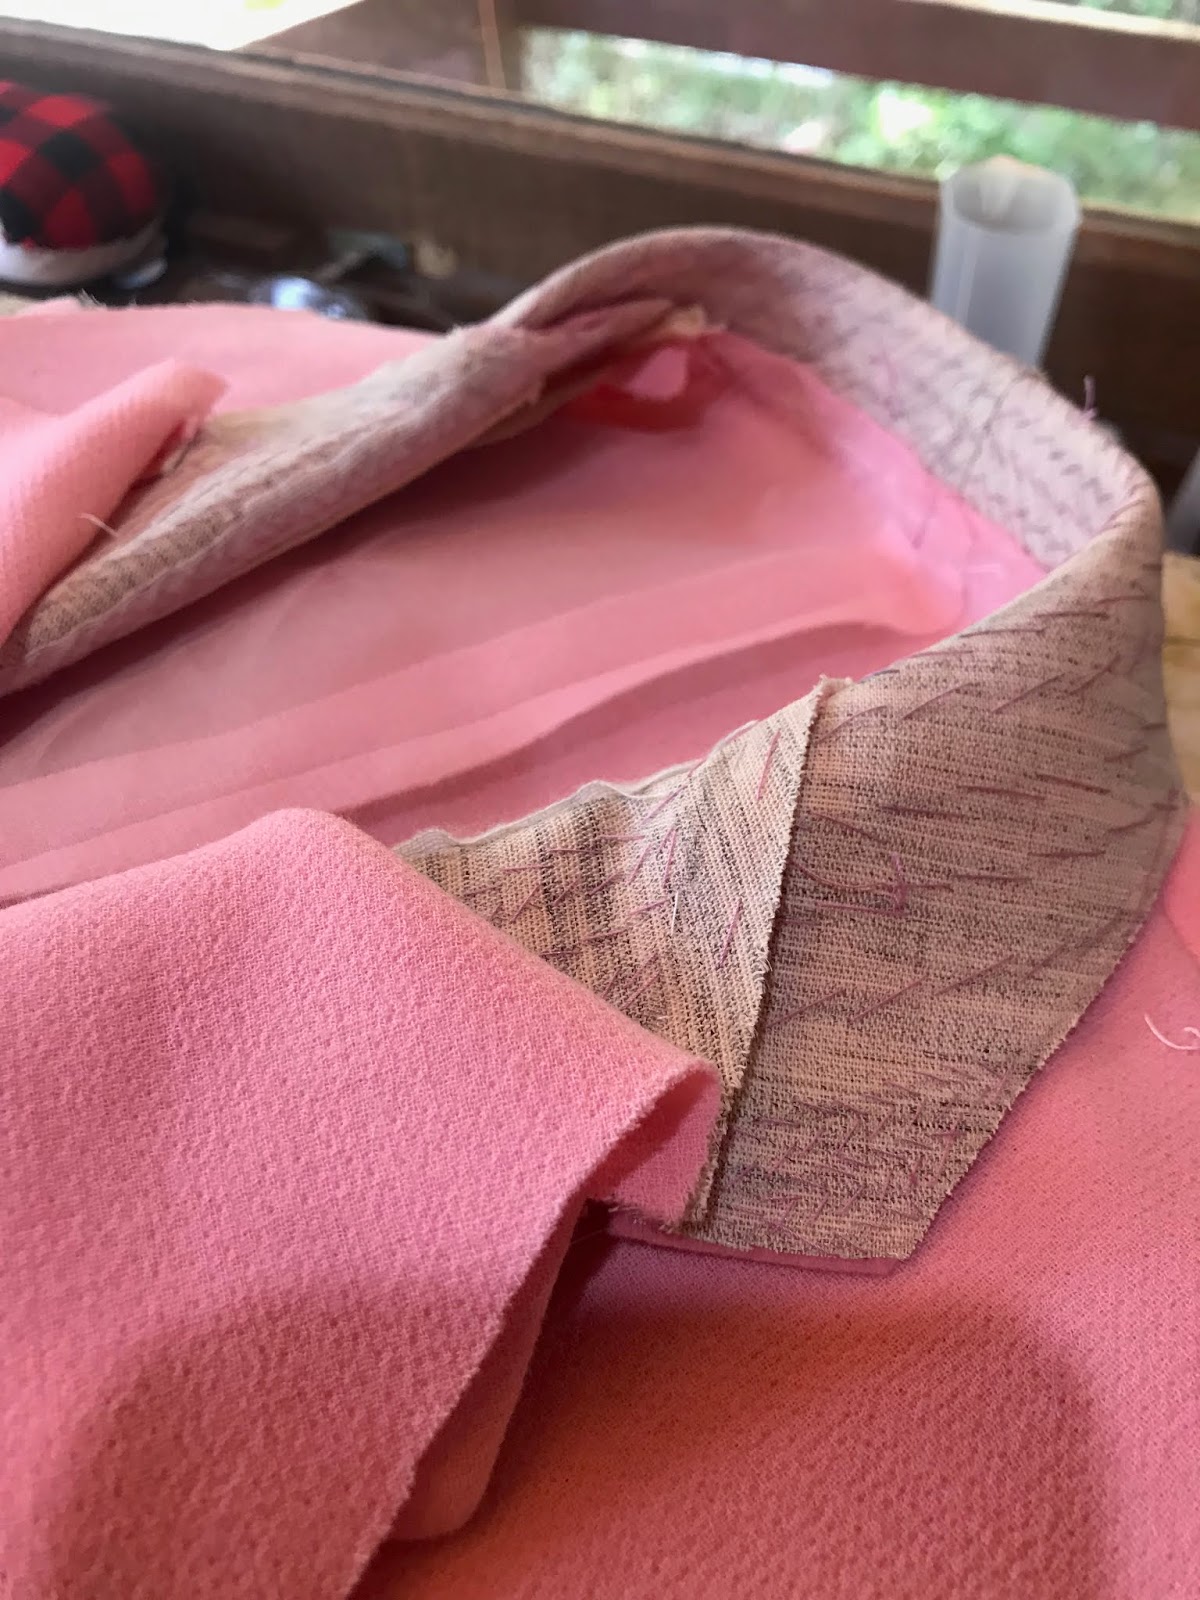
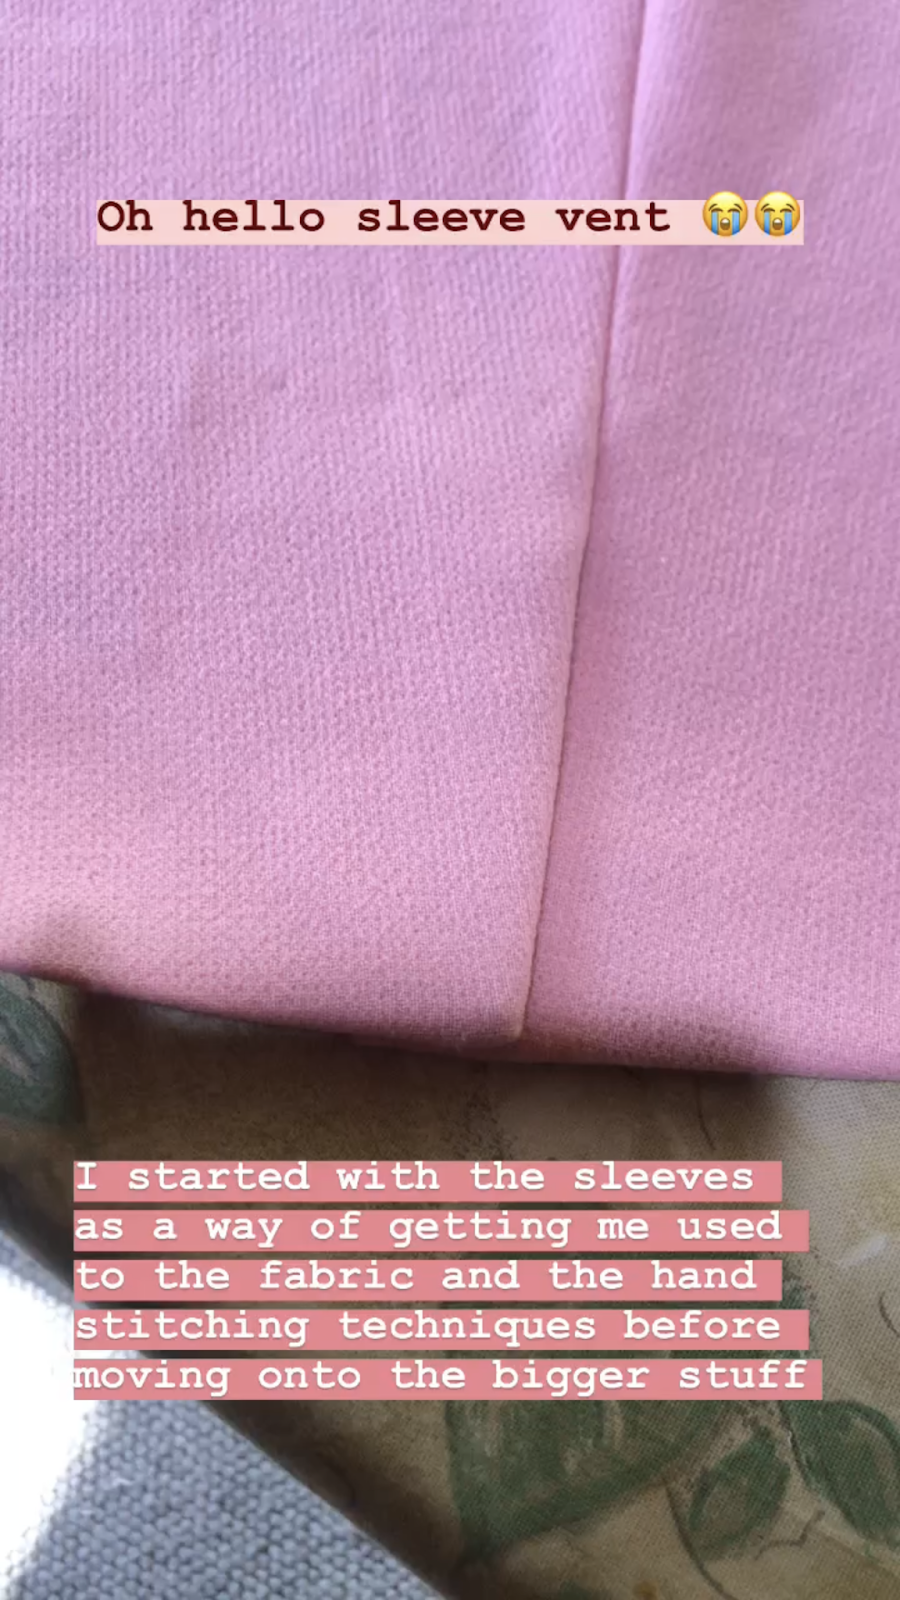
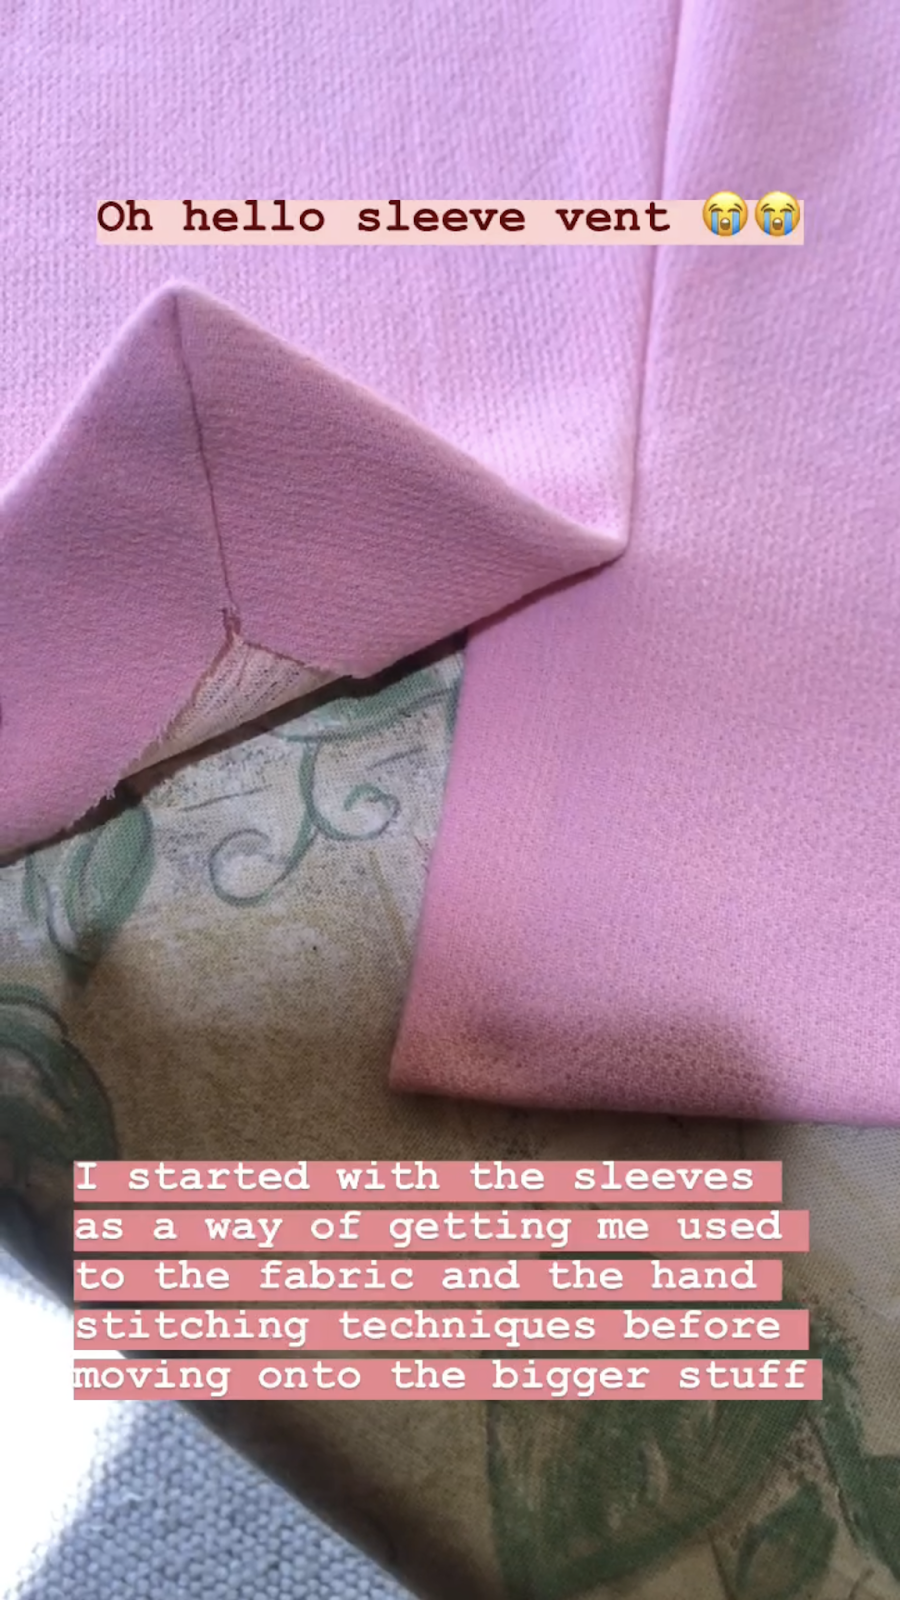
SLEEVES
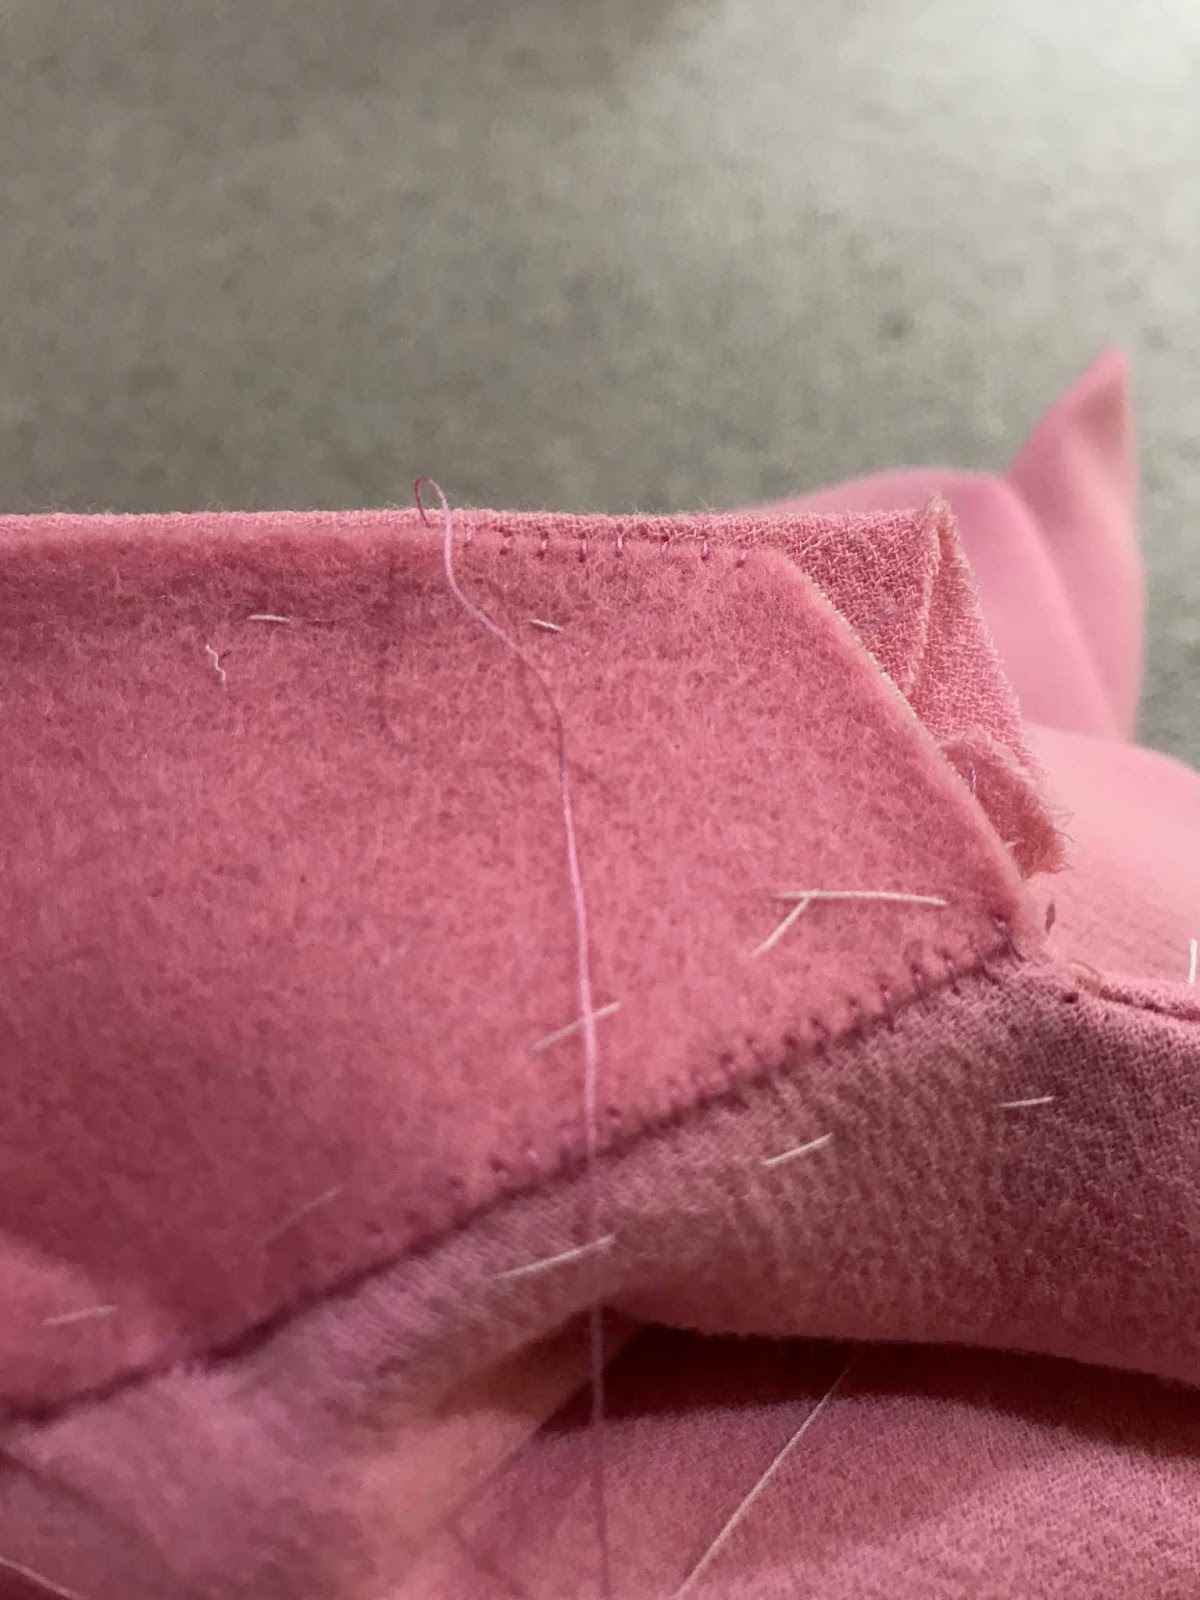
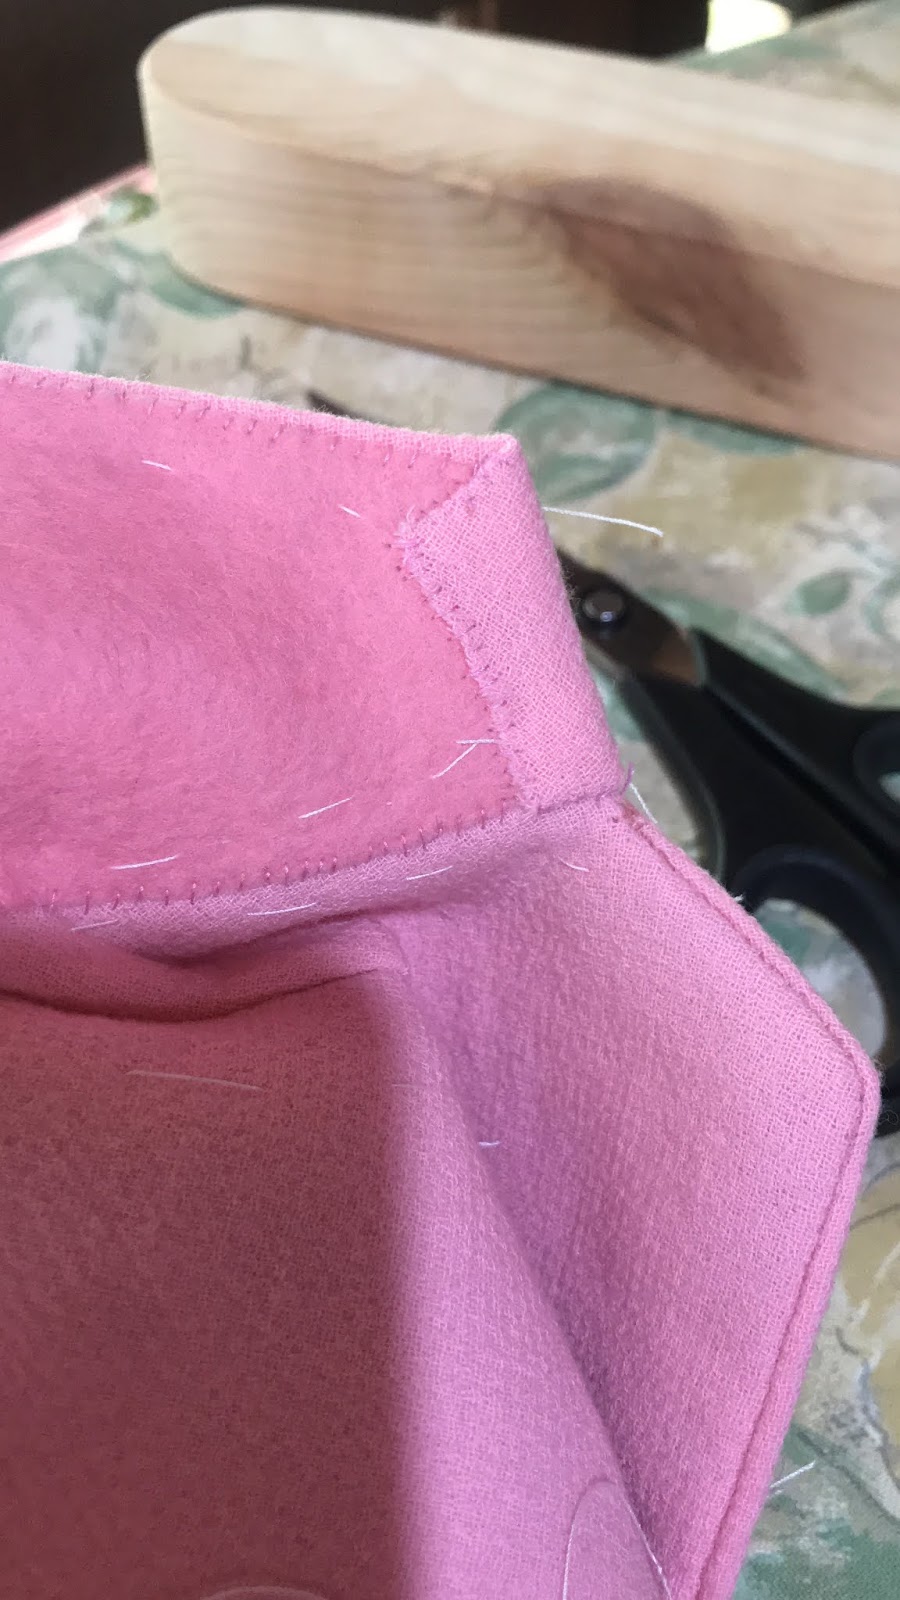
I used hair canvas for the sleeve hems, which I hand stitched on with silk thread.
The sleeve pattern comes with vents, which I extended to make them 11.5cm from the hem to the top of the vent.
I then did a mitred hem for that extra touch and to minimise bulk.


I hand basted two rows of thread along the sleeve head for gathering. I alternated the stitch placement to ensure they would gather as evenly as possible.

I placed the sleeve cap on my sewing ham and steamed it to shrink the fabric and even out the gathers. I then pinned it to the armhole using lots of pins to make sure it was evenly positioned.


I hand basted along the seam-line, and when I was sure there was no puckering i stitched down the seam on the machine.
I stitched a second row of stitches at the underarm ONLY, about 3mm parallel to the original and then trimmed close to the stitches.
I cut 2 pieces of quilters wadding/batting (mine was organic cotton) at 5 x 23cm and then folded one long end down 1.5cm. I lined up the folded edge with the sleeve cap seam-line and slip stitched the fold to the seam line. The sleeve head buffers the gathered fabric from the cap and gives a smooth rounded shape to the sleeve cap.
I then hand stitched in shoulder pads.


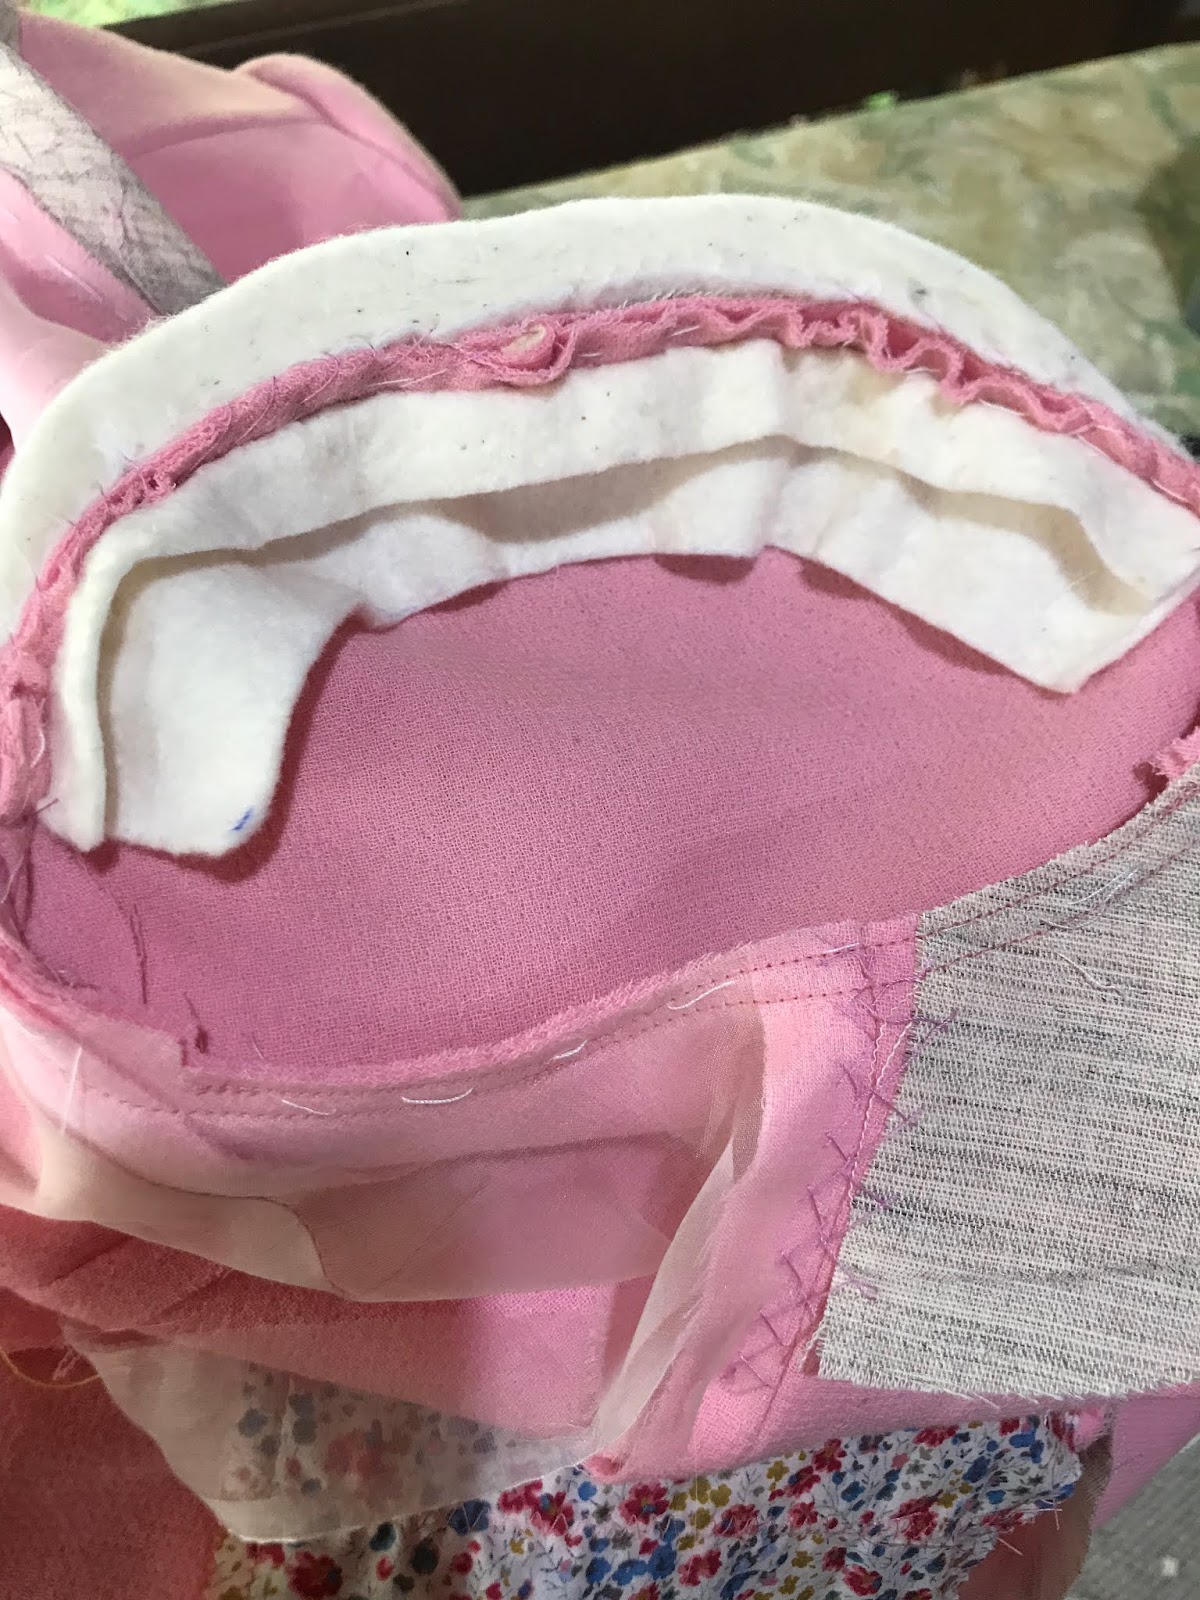

I am so excited by the difference a sleeve head makes! It gives that beautiful, soft and rounded head that makes a sleeve look so much more polished and 'professional'. I'll never do another suit jacket without it!
HEM
I ended up making my hem 3cm, because that's where it naturally seemed to lie with the facings but normally I would do (and recommend) a 4cm hem.
I cut out a strip of canvas 3.5cm wider than the hem (3cm hem + 3 = 6.5cm) and positioned it just below the hem fold line (around 1cm). Having the canvas extend into the hem softens the edge a little and gives support.
I then blind stitched the upper edge of the canvas, and permanently and invisibly basted the bottom of the canvas along the hem line crease.
I then folded up the hem along the pressed edge and permanently basted it to the canvas with uneven stitches so as to not detect a pattern on the right side.

I catch stitched the edge of the canvas to the facing canvas, and then fell stitched the facing hem to the jacket hem.
FINALLY I hand stitched the edge of the facings to the garment in preparation for attaching the lining.
LINING
I added an extra 1.5cm at the side seams of the lining body, grading it down to nothing about 10cm down from the arm hole. I also added 1.5cm at the underarm sections of the sleeve lining pieces, grading it down to nothing at the notch.
This adds a little wearing ease, and provides extra room for the sleeve heads and shoulder pads which take up volume.

I stitched all the vertical sections and darts in the jacket left front and jacket right front linings and hand stitched them individually to the jacket shell.
I used slip stitches around the facing edge and then secured them along the side seam of the garment, the shoulders and the armhole with permanent basting stitches.


I then sewed the vertical sections and darts/pleats in the lining back, basting the pleats and darts down so that they didn't distort when attaching them to the garment.
I then lapped the seams at the shoulders, and slip stitched the side seams of the lining back to the lining fronts.
I added the sleeve lining at the armholes using a double thread fell stitch, which anchors the lining to the sleeve heads. Finally I stitched the lining of the sleeve hem to the hem vents.

The pattern gets you to cut out the sleeve lining without vents and sew both seams down to the hem line, meaning that the sleeve vents are purely decorative and not functional.
I sewed and attached the lining like you would for a back vent so that I had the option of making the vents functional.
In the past, the only hand sewing I've done for linings is attaching the hem to the garment.
I really loved how the lining was in harmony with the garment when sewn in by hand.
There is no pulling or twisting of the garment due to a misshapen lining, and the lining moves as one with the jacket, rather than billowing out loose from the shell of the garment.
The lining is anchored at the arm holes, shoulders, side seams and facings, and you're able to assess the drape of each piece as you attach them, rather than at the end when it's usually too late.
OTHER CHANGES
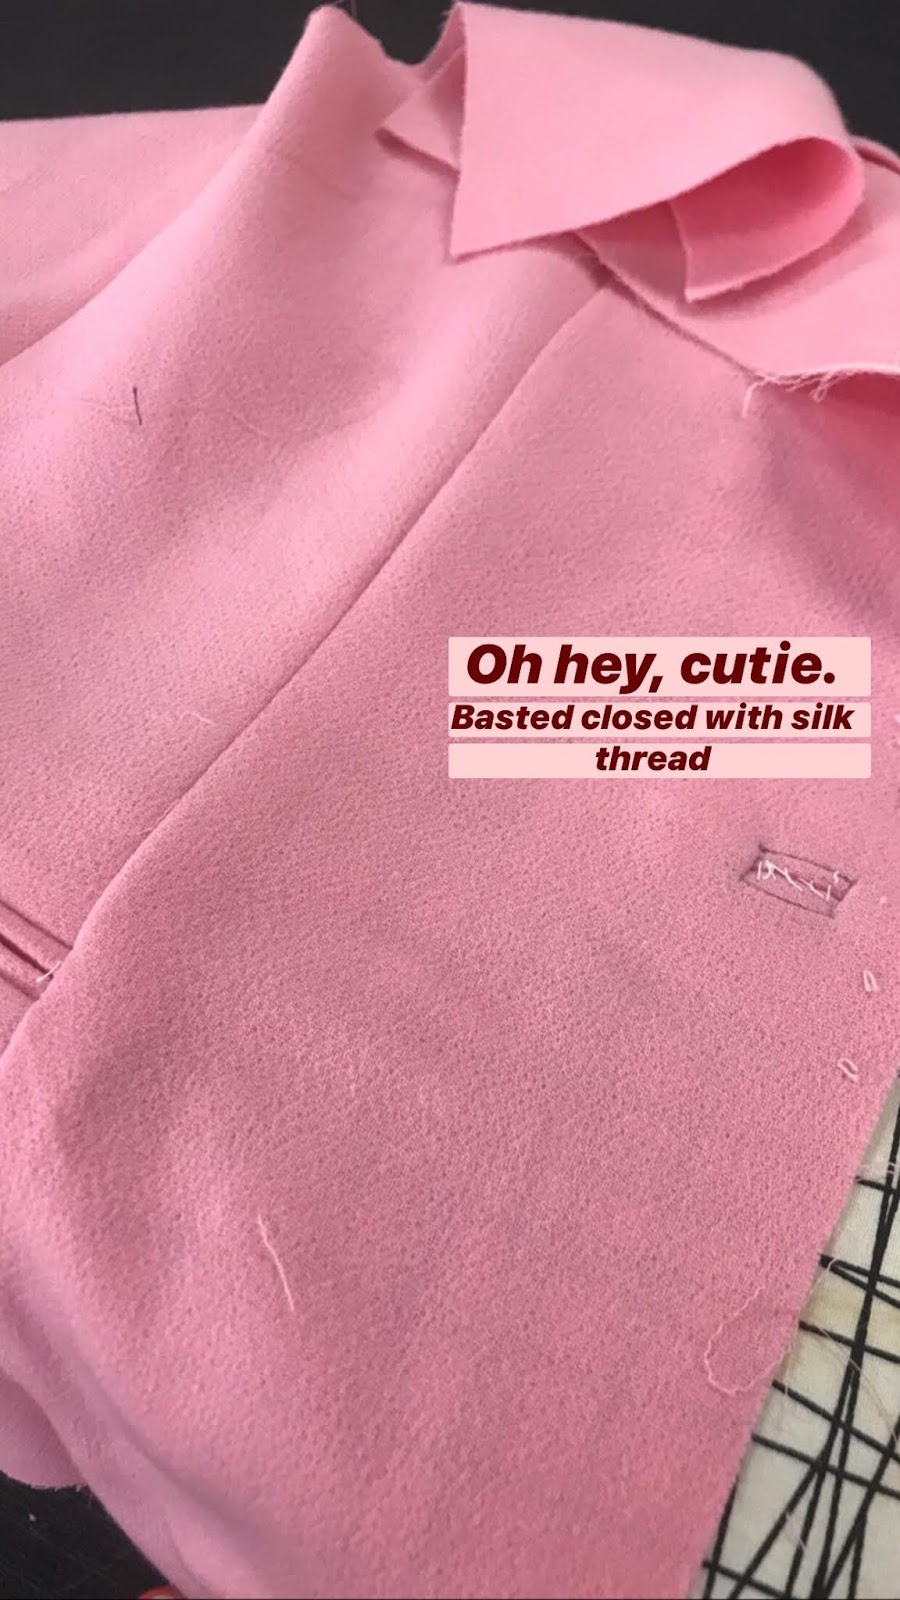
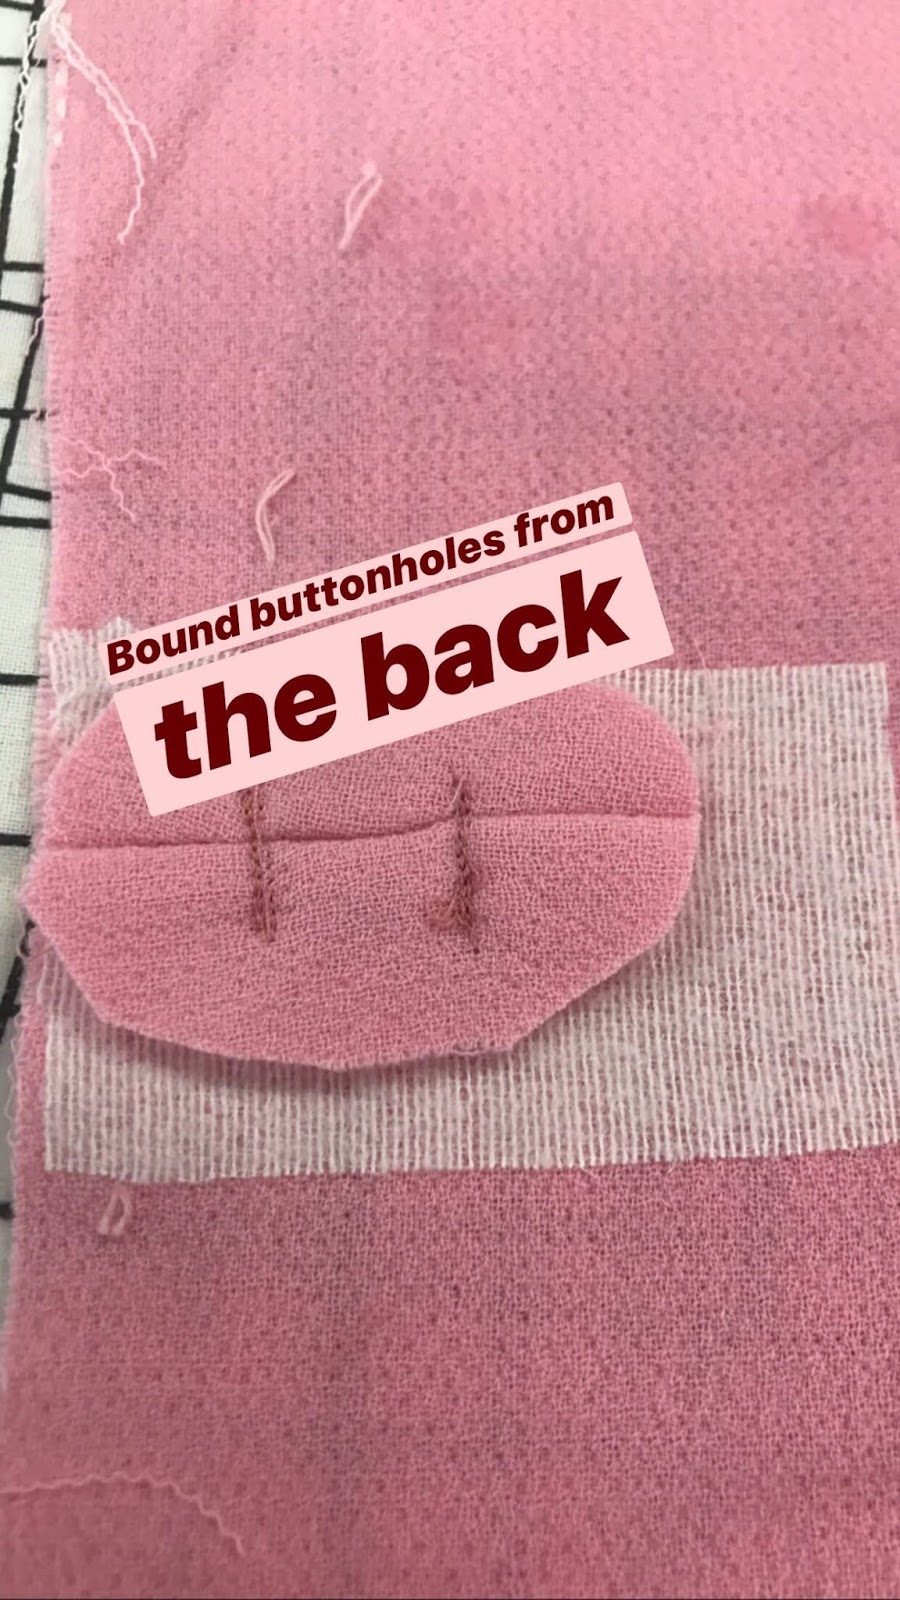
I made a bound buttonhole for the button closure on the centre front.
I changed the jacket to one button instead of two, and slightly lowered the top buttonhole.
FINAL THOUGHTS
My goodness, this was a lot of fun and I'm so glad I finally pushed myself to try tailoring!
This jacket took a lot longer to make then previous jackets that weren't made without these techniques; most of this jacket was sewn by hand!
But I can tell you that I absolutely enjoyed the engineering and the discipline of making a bespoke jacket, and though it's my first and there are some things that need improving, I'm an absolute evangelist for tailoring now!
Yes it took longer, but the joy that it gives me and the difference in the outcome makes it absolutely worth it!
For all the FINISHED PHOTOS of the blazer, you can check out my blog post here!


This was so informative and inspiring to read, and what a beautiful blazer! I always feel like such a big and detailed project is such a commitment and I'd be worried about messing it up but watching you do this so methodically has demystified it a bit. Thank you! x
ReplyDeleteOh that has made my day to read this! Thank you Sathyai!
DeleteIt's definitely achievable for everybody, it just takes time and patience. Thanks so much for your kind comment!
That turned out so well! Thank you for the detailed post! I really feel inspired to try to make a tailored jacket myself (and a little less scared, too).
ReplyDeletexoKaelen | https://darlingmarcelle.com
Thanks so much Kaelen! I hope you do; for me it has been one of the most rewarding things to sew!
DeleteThank you so much for this post - I'm about to embark on a tailoring project - and I would like to go above and beyond what the pattern tells me to do. This post has been great for helping me think about different uses of interfacing, and how I should hand bast it all together :)
ReplyDeleteWished I was so clever. Beautiful.
ReplyDelete