Hello friends!
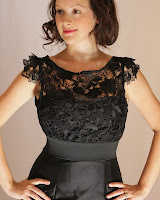
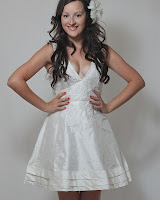
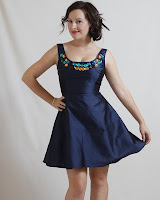
Remember this snazzy new winter coat I made for my sister Angeline? (click on the pictures below to see the blog post). I decided to try bound-button holes for the first time and I was so happy with the result!
These days it's almost impossible to find a purchased garment with bound button-holes.
this photo curtesy of www.janome.com
Don't get me wrong, machine button holes are an amazing invention. They are super fast, sturdy and easy to make. I use machine button-holes all the time.
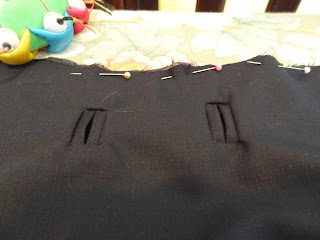
But would you take a look at this button-hole!
Isn't it pretty?!! So if you feel in the mood to go the extra mile for your garment, here's a tutorial to get you started.
So here's what you need
- Sewers chalk/fabric marker
- A ruler
- Pins
- Scraps of your fabric
- Interfacing scraps
- Thread matching your fabric
- Scissors
- Button-hole cutter (if you have one, otherwise small clippers will do).
- Hand sewing needle
- Your sewing machine
- Iron
- Patience
- Chocolates - for snacking, not for sewing. Delicious.
There are plenty of different bound button-hole methods out there and they are all good. This is how I made mine.
Instructions
Each bound button-hole has two identical 'lips' that fill the square of the buttonhole. Each lip is made up of one strip of fabric.
On the right side of your fabric, carefully mark your button-holes.
Interface the back area of the button-hole for extra strength. Most paper patterns will direct you to interface that area whether you are making bound button-holes or regular machine button-holes.
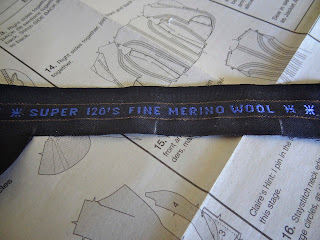
The fabric I am using in my demonstration is a Merino wool suiting. Ooooohhhh fancy.
Making the Button-hole Lips
Width: The long side. Measure the width of your button-holes. The width of mine are 1 inch.
Write your measurement down. Add one inch to that measurement. That is going to the be the width of your button-hole strips that will become button-hole lips.
E.g. My button-holes are 1 inch in width. I add 1 inch on to that width. (1 + 1 = 2) The total width of my button-hole strips is going to be 2 inches.
Height: The short side. What height do you want those cute little lips to be? This is a personal choice. I made mine a tidy 1/4 inch.
Once you've decided, multiply that measurement by 4 to get your total height of your button-hole strips.
E.g. I made my height1/4 inch. Therefore 1/4 x 4 = 1 inch.
Now that we have our width and height, cut out two strips of your garment fabric with those measures (mine is 2 inches long, 1 inch wide). These two strips will become the lips of our button-hole.
Construction
With the wrong sides of your fabric strip together, press your strips in half along the width (long side).
On the right side of your garment, line up one of your pressed strips along the edge of your button-hole marking with the raw edges of your button-hole lip along the button-hole marking.
Pin that bad boy down.
Note: Make sure it's the raw edges that touch the centre line. It will take years off your life if you do it the other way around.
With your fabric marker/chalk, transfer the end of the button-hole markings onto the strips so you can see where you need to start and stop sewing.
Line up the second button-hole strip and pin it down. The raw edges of each lip should now be touching in the centre.
Continue the markings on this strip also.
Tip: Don't be afraid to go nuts with extra pins, or basting the lips down, especially when working with thicker fabric. You want them to be as straight as possible.
With a 1.5 length stitch or smaller, slowly sew down the centre of each strip, reversing at the start and end. You want these lengths to be exactly the same as each other or you'll end up with crooked button-holes.
Below is a view from the back, on the wrong side of the garment. It's easier to see if the lengths are the same by looking at it from the back.
If they look a little uneven, go back and sew the shorter one a few extra stitches to make it the same.
Tip: If it helps, count each stitch as you sew it down so you can mirror that on the other side.
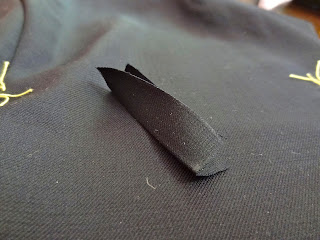
With your button-hole cutter (or clippers if you don't have one) cut a small hole through the centre of your button-hole. Make sure you put something underneath your garment so that you don't stab your table!
Here's a view from the back.
From that initial cut, with your clippers, cut into the corners of your button-holes making a 'Y' shape at both ends. Make sure you keep the lips out of the way or you'll slice a hole through your hard work. This is soul destroying.
On the right side, push the button-hole lips through the cut so that all the raw edges are on the wrong side of the button-hole.
Squeal with delight when you see how your button-hole is starting to look like a button-hole! Good job!
If you flip one side of the fabric over you'll see the two ends of your button-hole lips poking out at the short side of your button-hole. You should also see the little V shape jutting out. That's from when we made the Y shape cut. This little V stands for 'very important'. We are going to sew this V down.
Carefully sew the V strip down onto the end of the two lips with only one line of stitches. You want to sew as close to the base of the V without sewing into the fold of fabric, otherwise you'll end up with puckers in your garment.
Flip the fabric back over to check that it is straight and that there are no puckers. Looks good huh??!!! If not, unpick it and start again. One little row of stitches is easy to unpick.
Once you're happy that it's straight and neat, flip it back over and go over your initial sewing line a few times to really secure it. Trim away the threads. Repeat these steps on the other side of your button-hole.
Here's what it looks like from the back once you've sewn both sides down. This will be covered up when you add the facing.
Turn your fabric back over to the right side ... Tad-Dah! A neat little button-hole! You will be amazed how good it makes you feel when you make your first neat bound button-hole.
Now for the button-hole facings
Carefully line up your garment and facings
wrong sides together. Pin them together so they don't move. We put them wrong sides together so that you can actually see your button-hole. Don't worry, you're not going to be sewing them wrong sides together.
Put a pin through the corner of each button-hole so that it goes through to the facing.
Flip the garment over to the facing and mark the button-hole onto the right side of the facing using the pins as a guide.
Remove the pins and seperate the garment from the facings. Set the garment aside.
Cut out a good size square of fusible interfacing. Don't worry too much about how big it is as it will be hidden inside the garment.
Transfer the facing button-hole markings onto the wrong side of your fusible interfacing (the sticky side).
Pin the interfacing to the facing,
right sides together.
Using your short stitch, slowly sew down that button-hole rectangle going along the markings. You want to slow slightly inside your original markings so that the button-hole on your facing is ever-so-slightly smaller than the original button hole.
Tip: Start sewing in the middle of of one of your markings not at the corner of the button-hole. This makes it easier to reverse over to finish your stitch, without making the stitch too bulky at the corners.
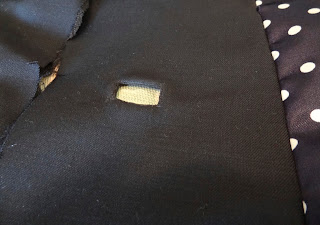
Cut a hole through the centre of your button-hole using your button-hole cutter or clippers. Cut into the corners with a Y shape like on your original button-hole.
Push the interfacing through the hole to the wrong side of the fabric. gently fuse the interfacing to the wrong side of the facing with an iron.
You now have a perfectly shaped and positioned button-hole opening.
When you have finished your garment, slip-stitch your button-hole facing to your bound-buton hole.
And there you have it folks! Thinking of giving bound bound-button holes a try? It is so exciting when you make them for the first time.
If you are ecstatically showing your new completed bound button-holes to family or friends who are not giving you the manically excited reaction you are expecting ... then feel free to email me a picture of your finished bound button-holes at julia@juliabobbin.com I guarantee I'll be excited to see them!
Happy sewing lovelies xxx